Accessing Grades
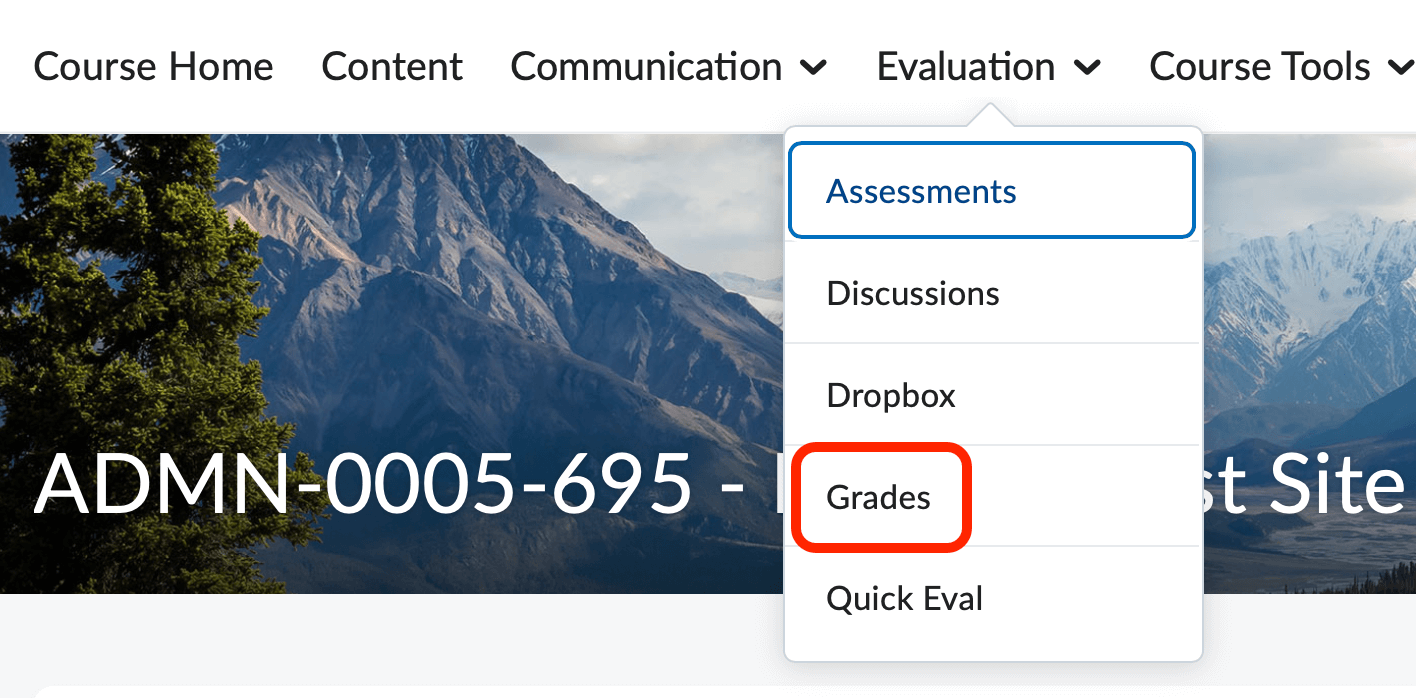
Access the Grades tool by clicking on Evaluation on the default Course Home navbar and selecting Grades.
The Grades tool is the D2L Gradebook for your course. Create grade items to track student performance. Create grade categories to organize your gradebook items or create weighted categories.
Enter Grades
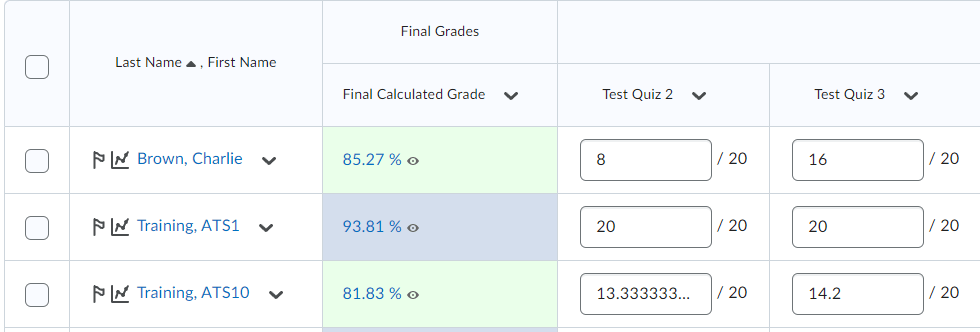
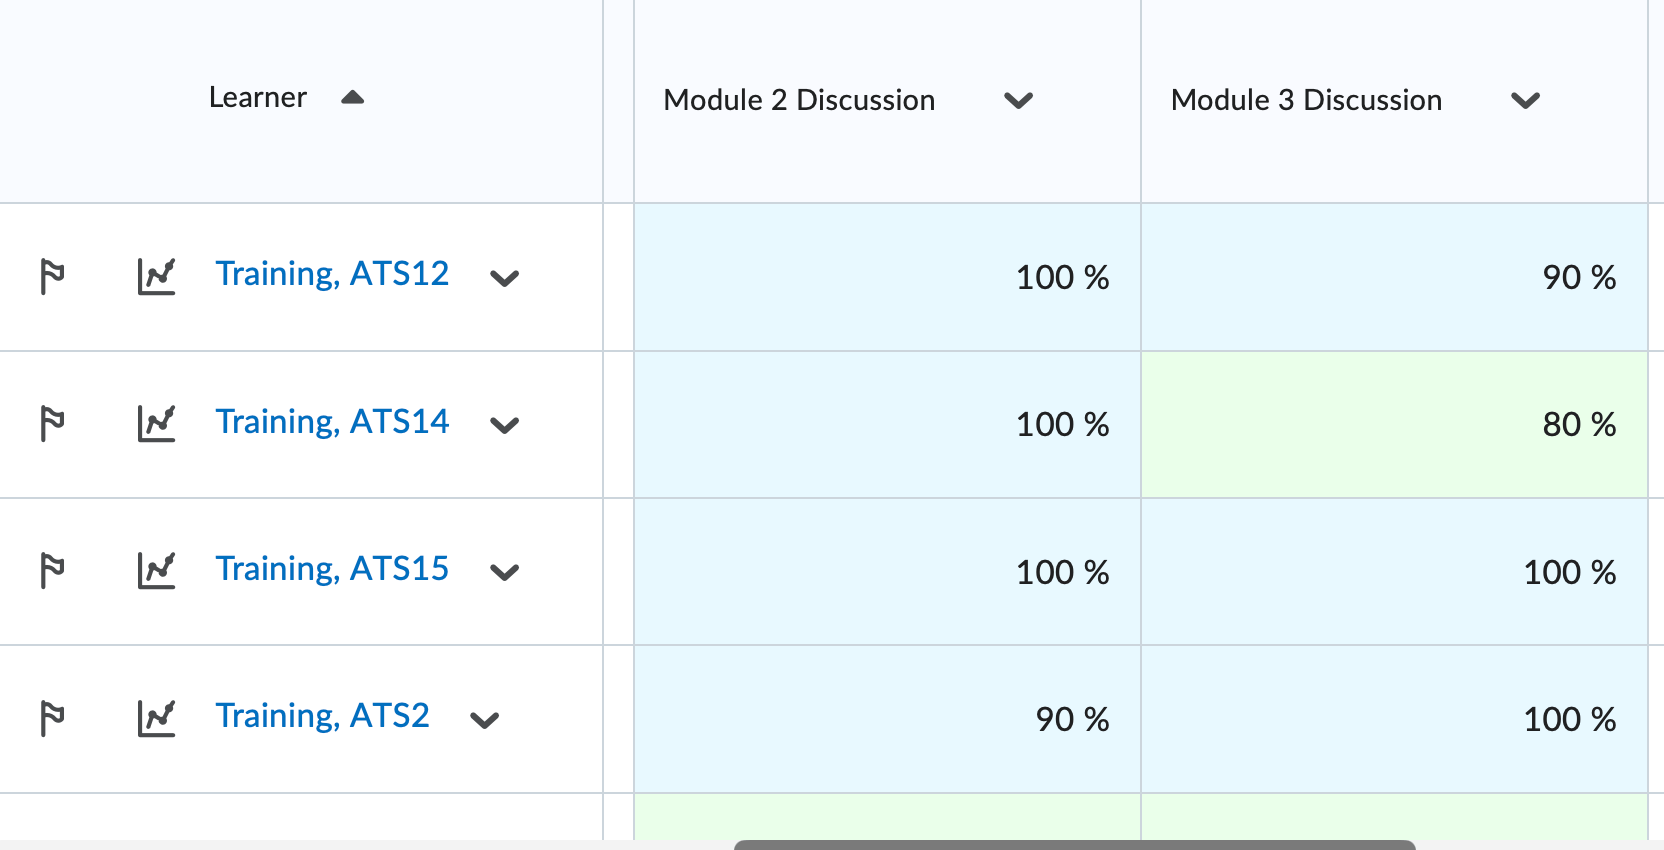
The Enter Grades screen presents your course gradebook in a spreadsheet layout. This page supports two different views: The Standard View, which requires you to open a grade item before you are able to enter grades, and the Spreadsheet View, which presents all grade columns as open textboxes so that you can enter student grades directly on the spreadsheet. Toggle between these two views by using the View button located on the action button on your screen.
-
The Enter Grades Screen
The Enter Grades Screen
The Enter Grades Screen is broken into three main sections: action buttons, filtering options, and the actual grading spreadsheet.
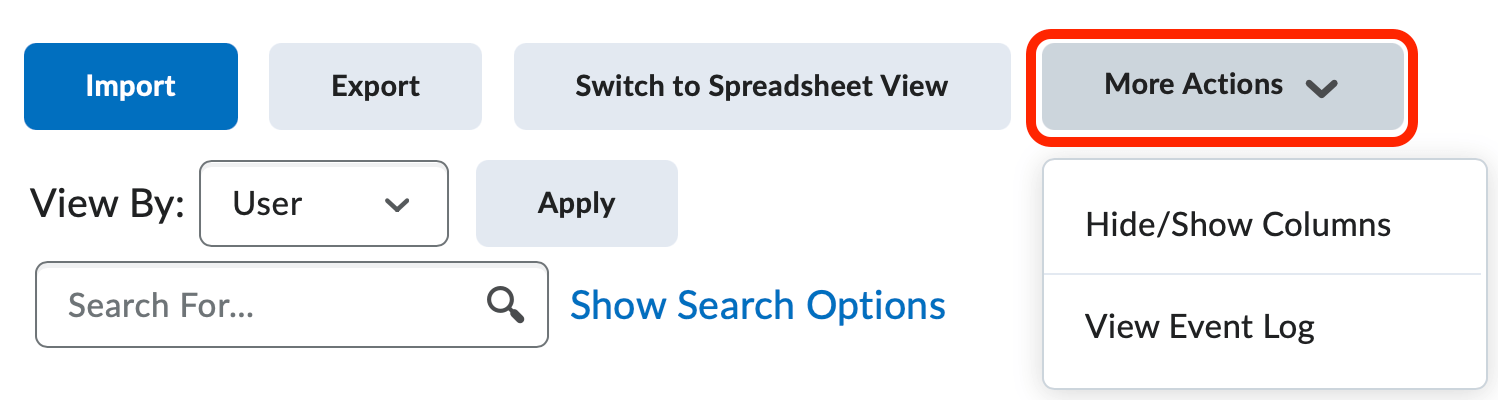
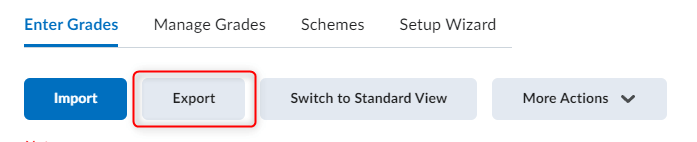
The four action buttons: Import, Export, Switch to Spreadsheet View, and More Actions, are used to manipulate the look and content of your gradebook. Information on Importing and Exporting your gradebook can be found in later sections of this documentation.
More Actions buttons:
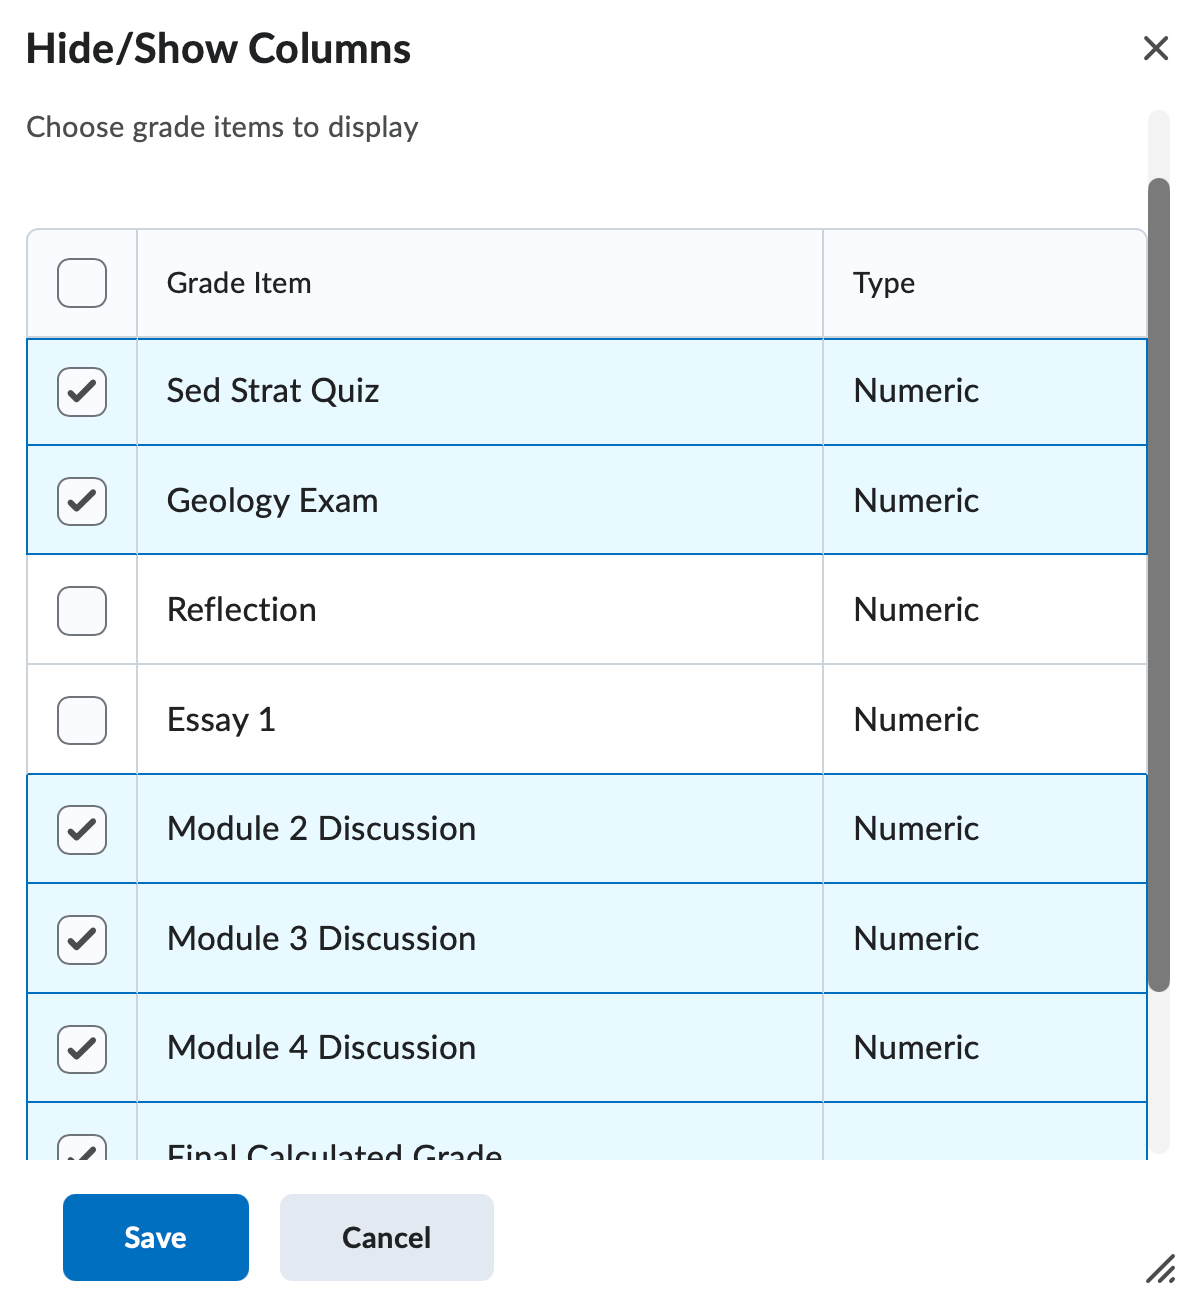
- Hide/Show Columns - The Hide/Show columns function within the More Actions button allows you to show or hide grading columns from your gradebook spreadsheet. Note that this action affects only visibility. Showing and hiding grade columns do not affect the calculation of a student's grade. From the Hide/Show window, simply uncheck the columns you wish to hide from view.
- Event Log - View the Gradebook-level event log to view tracking information about the creation and deletion of grade items and categories. Note that if you want to view item-specific information, you must view the event log found within the particular item.
The Enter Grades screen has two different viewing modes: Standard View and Spreadsheet View.

- Standard View displays a spreadsheet of your gradebook items and categories. To enter grades in
Standard View, you must first open an item by selecting Grade All from that item's context menu.
- Spreadsheet View also displays your a spreadsheet of your gradebook items and categories, but in this
view, all grading items are open to manually enter grades.
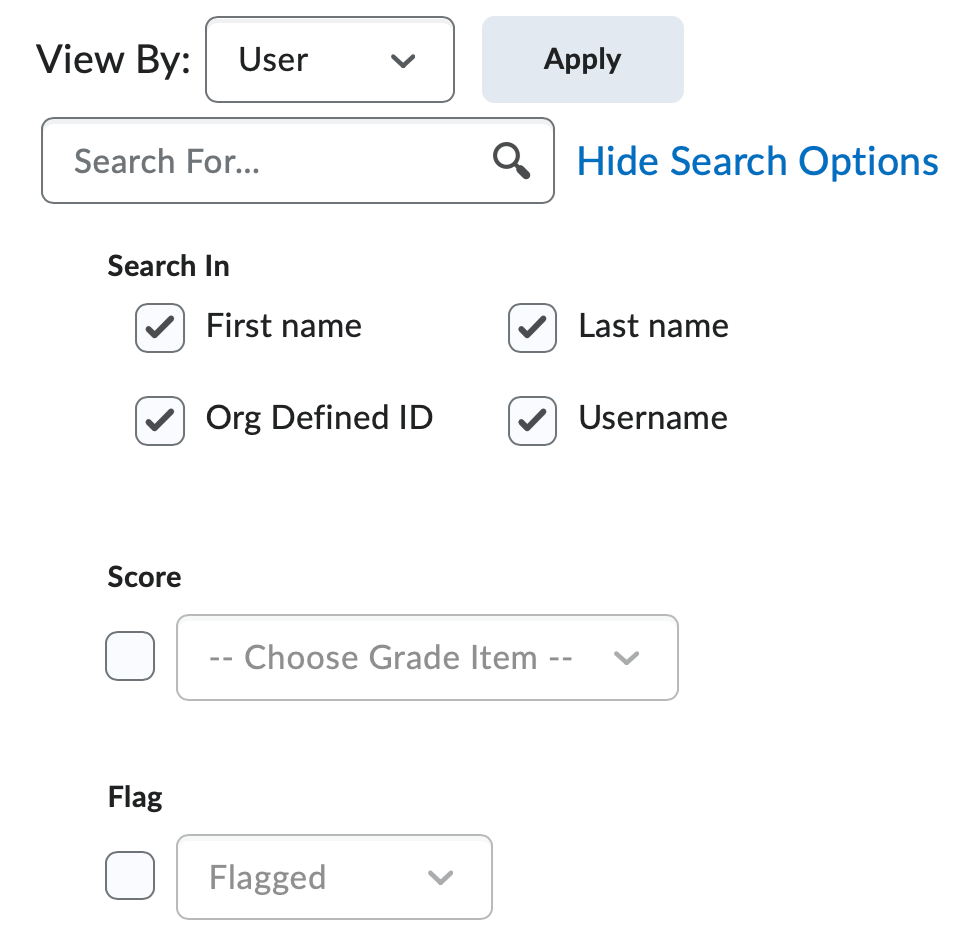
By default, the D2L Gradebook displays the first 10 students in a particular course. Use the filtering options to view a select group or section of student within your course. Additionally, use the Search For textbox to display a single student's grades. View additional search options by clicking the Show Search Options hyperlink to expand detailed search parameters.
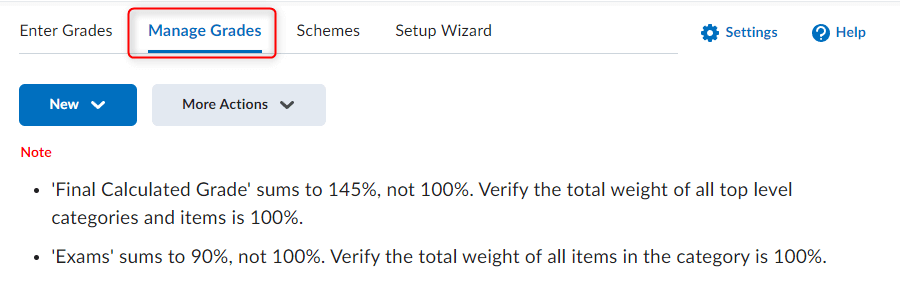
If using a Weighted gradebook, D2L will display any calculation errors in the Note section. To resolve these issues, visit the Manage Grades tab and edit the appropriate item(s) or category.
-
Enter Grades for a Single Grade Item
To Assign Grades for a Single Grade Item
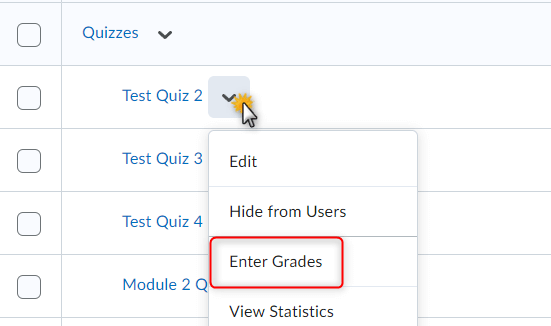
- From the Enter Grades screen, select Enter Grades from the context menu of the item.
- You can enter general comments for the grade item in the Overall Comments text field. Overall comments will be displayed to all students who see this item
in the grade book.
- Enter student grades. Depending on the type of item you are grading, you will see different options:
- If you are grading a Numeric grade item, enter a numeric grade value for each student in the Grade column.
- If you are grading a Selectbox grade item, select the appropriate grade range from the Grade drop-down list for
each student. Each grade range is associated with an Assigned Value (set up in the
Grade Scheme), and where no Assigned Value has been added the value is the starting
percentage for the range.

- If you are grading a Pass/Fail grade item, select the appropriate option from the Grade drop-down list for each
student. The options are Pass or Fail.

- If you are grading a Text gradebook item, enter the text into the Grade field.

- If you are grading a Numeric grade item, enter a numeric grade value for each student in the Grade column.
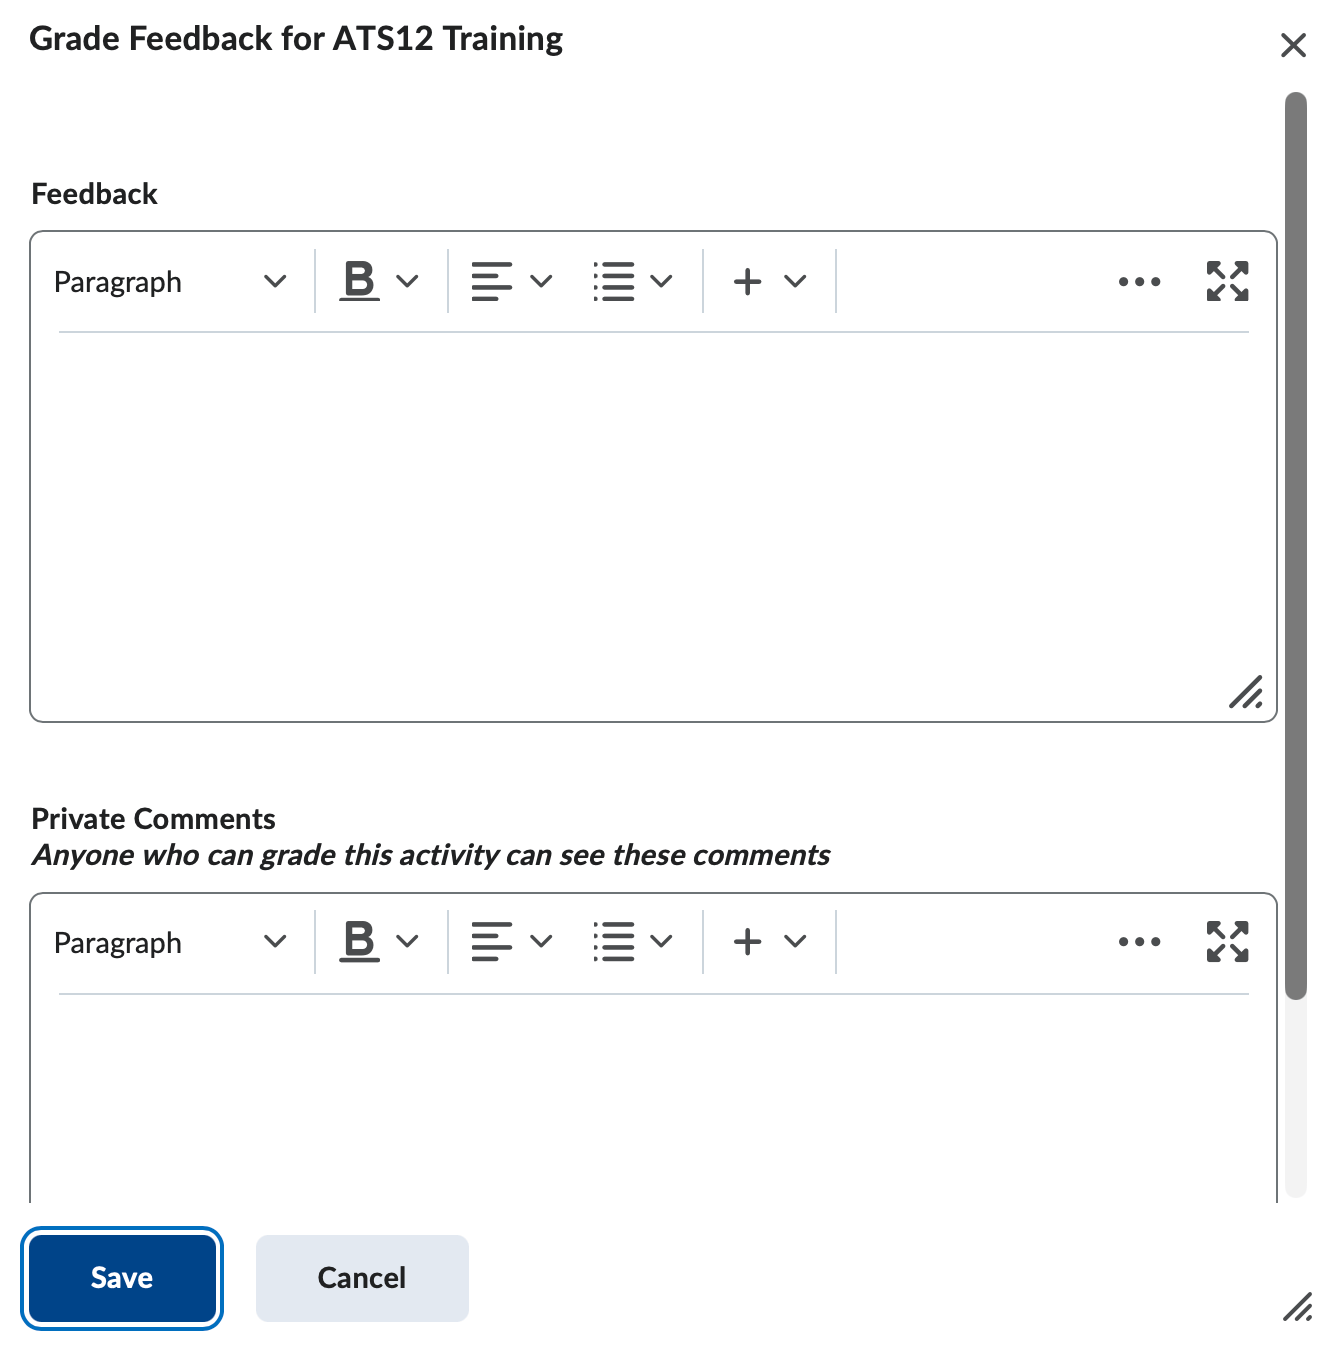
- Click the Feedback icon to enter individualized feedback. The Grade Feedback page displays, where you can type Feedback for the student to view along with their grades. You can also type Private Comments that will not be visible to the student
- Click on the Event Log icon to see all recorded events concerning the student and grade item.
- There are also icons on the top of the page that allow you to perform various functions:
- Click Set Grade to enter the same grade value for all selected users.
- Click Clear Grades to remove all previously entered grades for all selected users for this grade item.
- Click Add Feedback to add the same feedback to multiple students.
- Click Exempt to exempt a particular student(s) from this particular grade item.
- Click Unexempt to remove exemptions from a particular grade item.
- Click Email to email all selected users.
- Be Sure to Save and Close when finished.
- From the Enter Grades screen, select Enter Grades from the context menu of the item.
-
Import Grades
Import Grades from a CSV File
Use a CSV file to update your gradebook. If your current workflow includes keeping your students' grade in an excel file, generate a CSV file to update your students' grade in D2L. D2L provides a sample file to use as a template for formatting your CSV file. Download this template and reference it for the specific formatting details.
At the most basic level, your CVS file should include:
- A Student's E#
- The Grade Item Name followed by "Points Grade" (i.e. Quiz 1 Points Grade)
- A Student's Numeric Grade
- An End of Line Indicator (#)
Constructing a CSV File
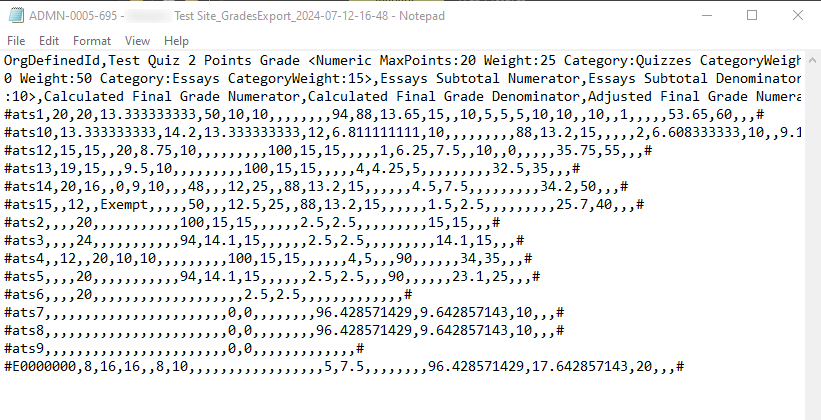
- Line 1 of your CSV file should call out the Column Headings of your gradebook:
- OrgDefinedId, Grade Item Name 1 Points Grade, Grade Item Name 1 Points Grade, End-of-Line Indicator
- Line 2 - X of your CSV file should contain the relevant student information that relates
to the column headings, separated by commas:
- E123456789, Example Quiz 2, 9, #E987654321, Example Quiz 2, 8.5, #
Save your file as a CSV (Comma Separated Values) file. You may perform this action with Excel, notepad, or any other document processing software.
Uploading the CSV File
After you have created your CSV file, you can navigate back to the import screen to upload your data.
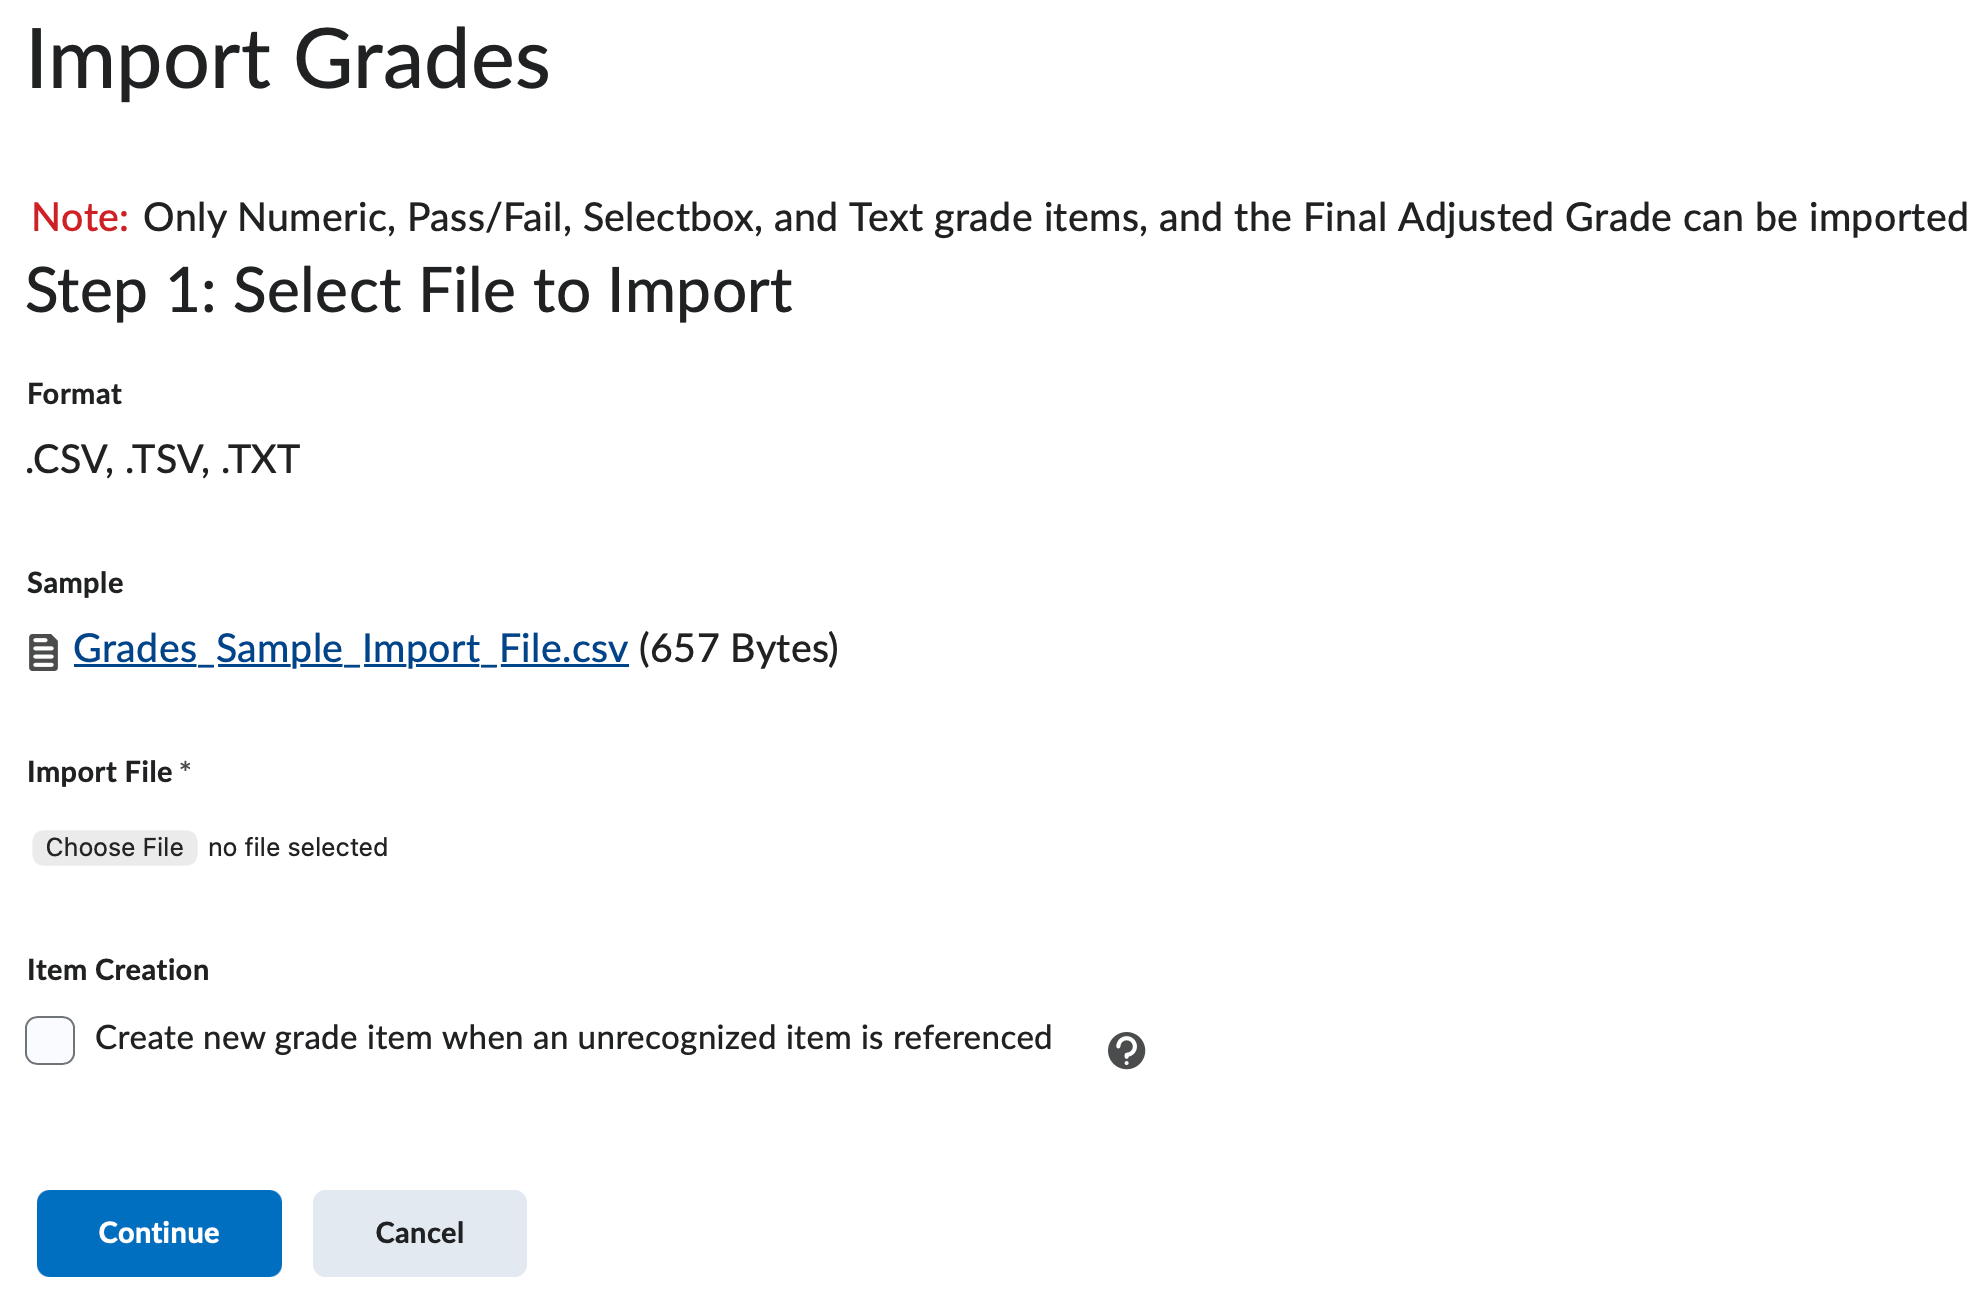
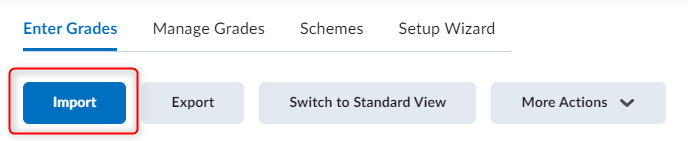
- From the Enter Grades screen, click the Import button.
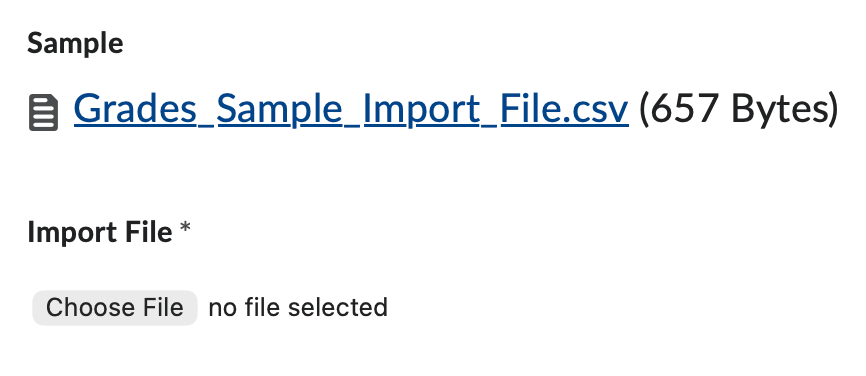
- Click the Choose File button to locate your file on your computer. Note a sample CSV file of the structure is included on this page.
- If the import file contains a grade item that has not yet been created in D2L, checking
the Item Creation checkbox will automatically create the item in your gradebook. Note that after the
import you may need to verify the configuration of the new item.
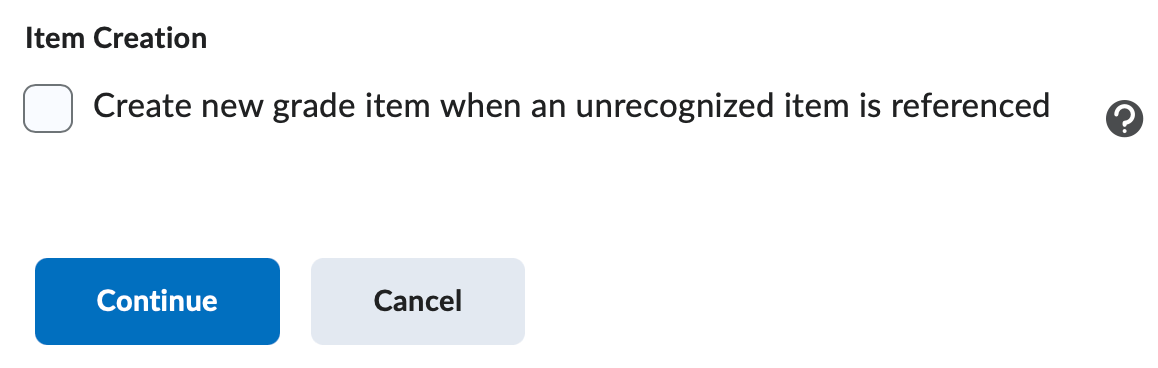
- Click Continue.
- D2L will check your CSV file for errors. If any errors are found, they will display on the Errors and Warnings found page. If your file has no errors, click Continue. Otherwise, click Go Back to reupload a corrected file.
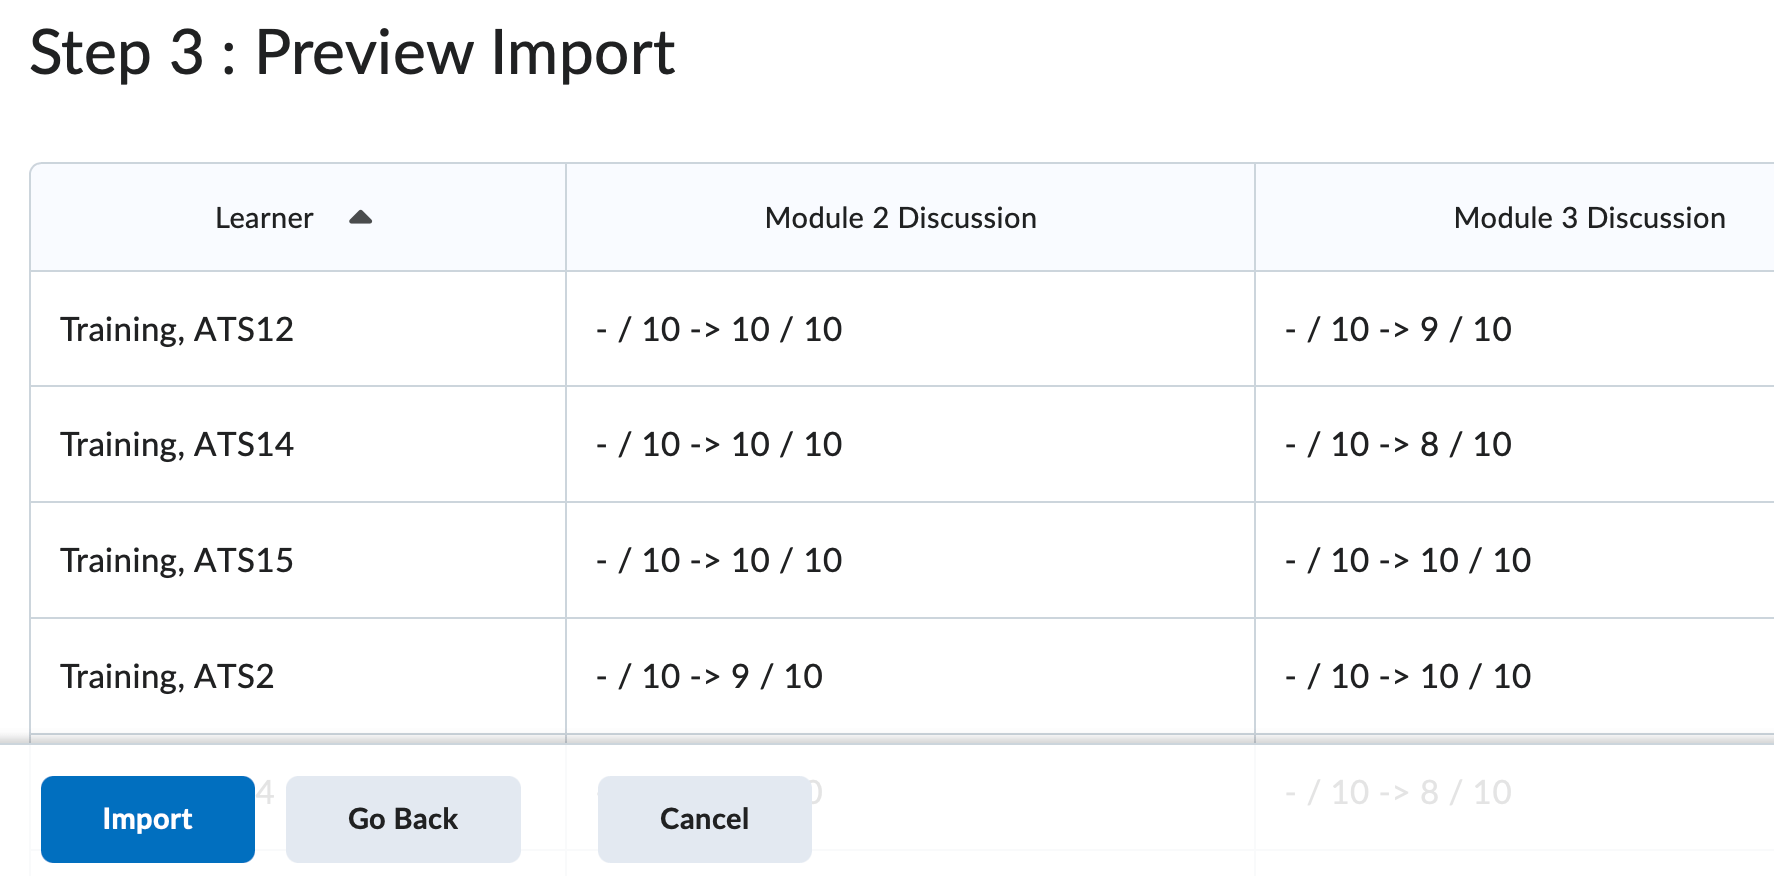
- A preview of your information will display. If the information is accurate, click Import. Otherwise, click Go Back to reupload a corrected file.
- Verify the students' grades in your gradebook.
-
Export Grades / Export Classlist
Export Grades to CSV or Excel
- From the Enter Grades screen, click the Export button.
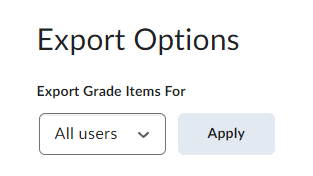
- Use the filtering options to determine which students' grades will be exported. By default, the entire classlist
will be exported. But, using the filtering options, you can export a single group
or section.
- Identify the Key Field. The default is Org Defined ID (E#) and this setting should remain the default.

- Identify the Grade Value to be exported. Most often, you will want to export the Points Grade only, as D2L will export the points a student achieved on an assignment. If using a Weighted gradebook, you will have the option of exporting the Weighted Grade, which will export the weight achieved on a particular assignment.
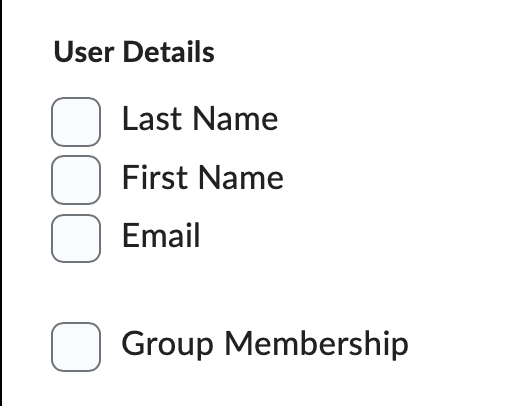
- Identify the User Details to be exported. If you leave all three options (Last Name, First Name, and Email)
unchecked, D2L will export the E# only.
- Select the Grade Items you would like to export.
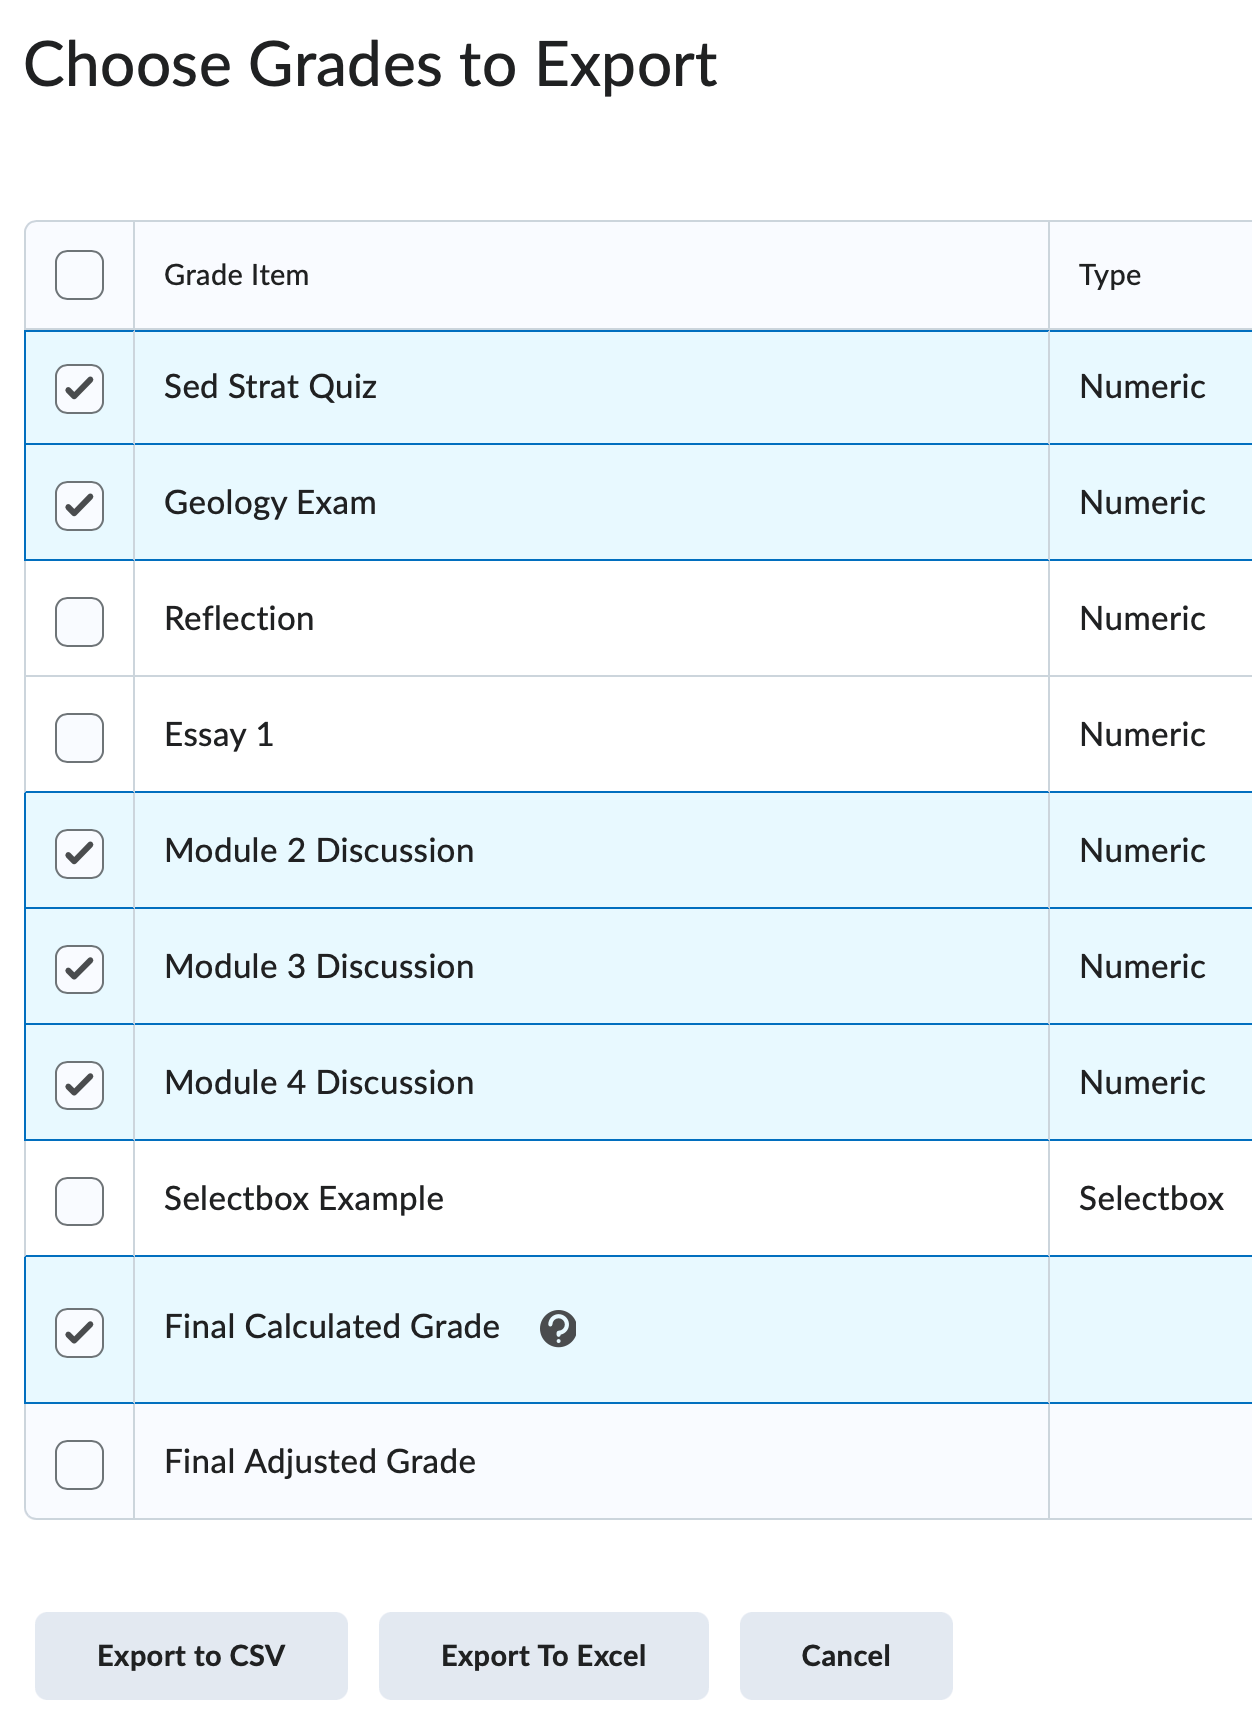
- Select an Exporting Option.
- Export to CSV will generate a CSV file for you to download and open with an appropriate program.
- Export to Excel will generate an native Excel file (xls) for you to download and open with Microsoft
Excel.

- Cancel will discard any changes and not export your gradebook.
- Export to CSV will generate a CSV file for you to download and open with an appropriate program.
- From the Enter Grades screen, click the Export button.
-
Calculating and Releasing Final Grades
Calculating and Releasing your Final Grades
In the student view of the D2L gradebook, a student sees a list of grade items and the points and/or weight achieved for each item. A student’s final grade calculation is not released until you choose to do so. You can calculate and release your final grades from the Enter Grades screen or the Manage Grades screen.
From Enter Grades
- Open the Grades tool from the Course homepage by clicking the Evaluation link in the course nav bar, and then select Grades. Navigate to the Enter Grades screen.
- Locate the Final Grade column. Most often, the final grade column is located on the far right-hand side
of your gradebook. You may need to use the horizontal scroll in order to locate this column.
- Keep in mind that you determine which final grade to release to your students in the Grades Setup Wizard. To confirm which final grade you selected, you can refer to the gradebook Settings link (located on the top right-hand side of the Enter Grades page) and navigate to the Calculation Options tab to confirm or change this setting.
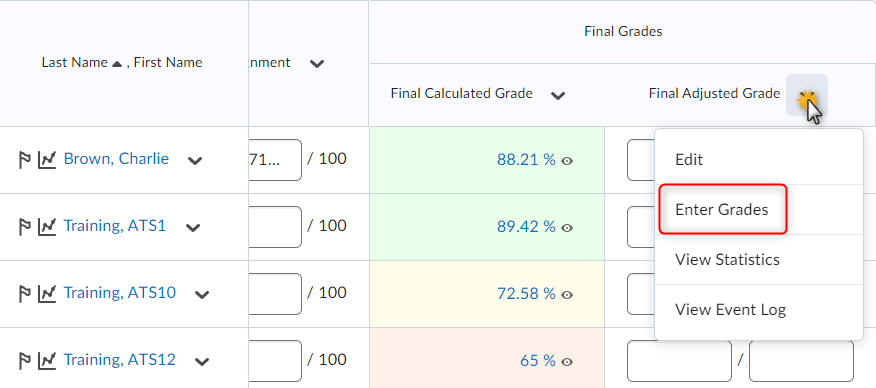
- Selecting the Calculated Final Grade will release the value in the Calculated Grade field to students as their Final Grade. Selecting the Adjusted Final Grade will release the value in the Adjusted Grade field to students as their Final Grade. The Adjusted Final Grade gives you the flexibility to change a student’s final grade after D2L has calculated it; the calculated final grade option does not.
- Select Enter Grades from the final grade’s context menu on the Enter Grades screen.
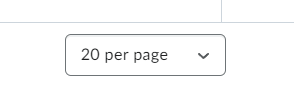
- Ensure that your entire classlist is displayed by selecting the appropriate number
in the per page dropdown menu. Note you may have to scroll to the bottom of the page to see this number.
- From the item’s context menu, select Transfer All to transfer the Final Calculated Grade to the Final Adjusted Grade for all (x) users.
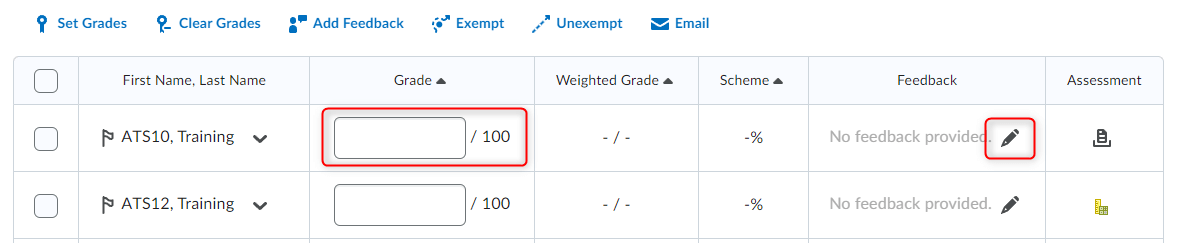
- In the Grade column, you’ll see that D2L has placed students’ grades in the numerator, and the total points possible for the course in the denominator.

- If you selected to release the Final Adjusted Grade, you have the ability to make any changes to the students’ grades. For example, you can round a student’s grade up or apply some bonus points. Make the changes in a student’s numerator field.
- Enter any feedback for a student. To enter feedback, click on the pencil icon. A window will pop open. Enter your feedback and then click Save.
- Once you’re ready to release your final grades, click back on the final grade item’s
context menu and select Release.
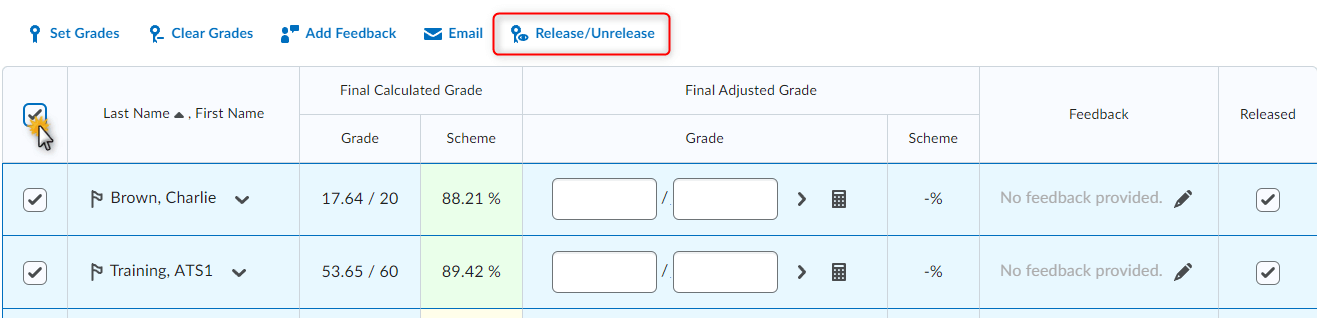
- If you only want to release selected students’ grades, select the appropriate checkbox for each student and then click the Release/Unrelease icon.
- Note that only grades with a checkmark in the Release Final Grade field will be available
to your students.
- When you’ve finished these actions click Save and Close. You'll be prompted with a confirmation window; click Yes. Then, navigate back to the Grades tool by clicking the Evaluation link group, located in the course nav bar, and then selecting Grades.
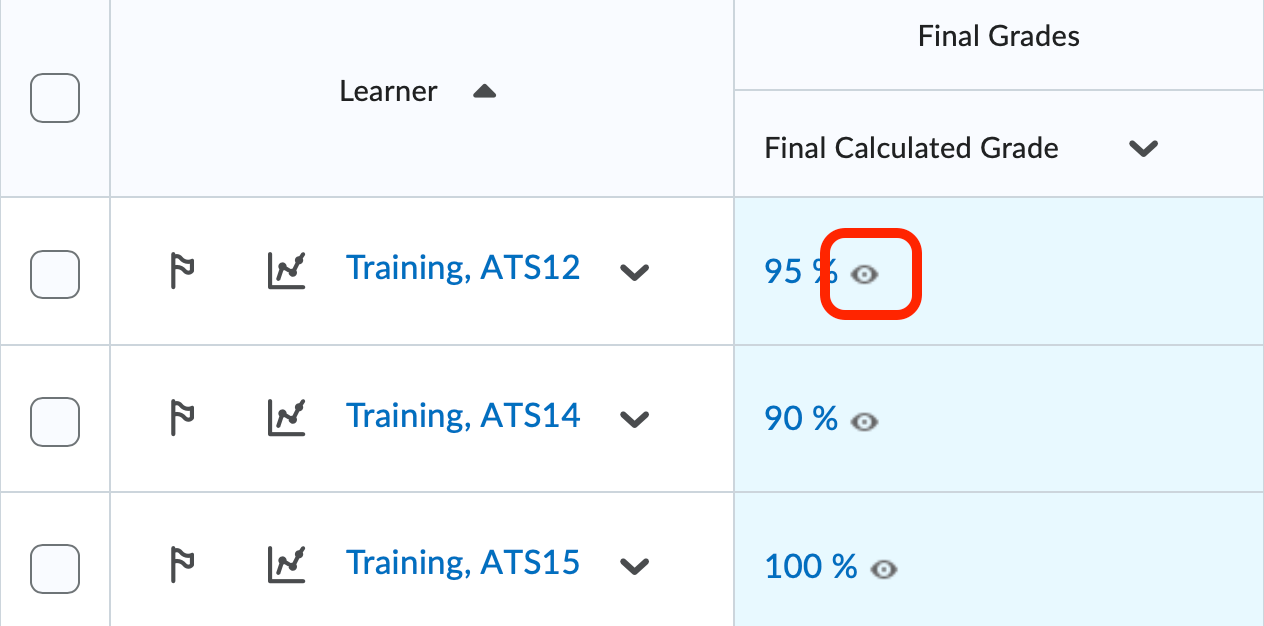
- Scroll to find your final grade column and ensure that the release icon is displayed for every student whose grade you released.
From Manage Grades
- Open the Grades tool from the Course homepage by clicking the Evaluation link group, located in the course nav bar, and then selecting Grades. Navigate to the Manage Grades screen.
- Locate the appropriate Final Grade row. Most often, the final grade column is the bottom row in the grading table.
- Keep in mind that you determine which final grade to release to your students in the Grades Setup Wizard. To confirm which final grade you selected, you can refer to the gradebook Settings link (located on the top right-hand side of the Manage Grades page) and navigate to the Calculation Options tab to confirm or change this setting.
- Selecting the Calculated Final Grade will release the value in the Calculated Grade field to students as their Final Grade. Selecting the Adjusted Final Grade will release the value in the Adjusted Grade field to students as their Final Grade. The Adjusted Final Grade gives you the flexibility to change a student’s final grade after D2L has calculated it; the calculated final grade option does not.
- Select Enter Grades from the final grade’s context menu on the Manage Grades screen.
- Ensure that your entire classlist is displayed by selecting the appropriate number
in the per page dropdown menu. Note you may have to scroll to the bottom of the page to see this number.
- From the item’s context menu, select Transfer All to transfer the Final Calculated Grade to the Final Adjusted Grade for all (x) users.
- In the Grade column, you’ll see that D2L has placed students’ grades in the numerator, and the total points possible for the course in the denominator.
- If you selected to release the Final Adjusted Grade, you have the ability to make any changes to the students’ grades. For example, you can round a student’s grade up or apply some bonus points. Make the changes in a student’s numerator field.
- Enter any feedback for a student. To enter feedback, click on the pencil icon. A window will pop open. Enter your feedback and then click Save.
- Once you’re ready to release your final grades, click back on the final grade item’s
context menu and select Release.
- If you only want to release selected students’ grades, select the appropriate checkbox for each student and then click the Release/Unrelease action link.
- Note that only grades with a checkmark in the Release Final Grade field will be available
to your students.
- When you’ve finished these actions click Save. You'll be prompted with a confirmation window; click Yes. Then, navigate back to the Grades tool by clicking the Evaluation link group, located in the default course nav bar, and then selecting Grades.
- Scroll to find your final grade column and ensure that the release icon is displayed for every student whose grade you released.
- Open the Grades tool from the Course homepage by clicking the Evaluation link in the course nav bar, and then select Grades. Navigate to the Enter Grades screen.
Manage Grades
The Manage Grades Screen allows for you create grading items and categories. This page also hosts the ability to reorder grades, delete grades, and view the gradebook event log. Before you can enter or collect student grades, you must first create grade items. You can optionally create grading categories to better organize your gradebook and to help with grading calculations.
-
Create Grade Categories
Creating Grade Categories
Creating Grade Categories allows you to organize and group related grade items into sections that you can easily manage. For example, you may choose to group all of your assignments under a category labeled "Assignments" and all of your quizzes under a category labeled "Quizzes". Sorting your grade items with Categories helps you keep your Gradebook organized but also helps when creating Weighted Categories.
Use categories to group multiple, related items. Avoid over-categorizing your gradebook by placing single items into categories.
- From the Manage Grades tab of your gradebook, click the New button and select Category.
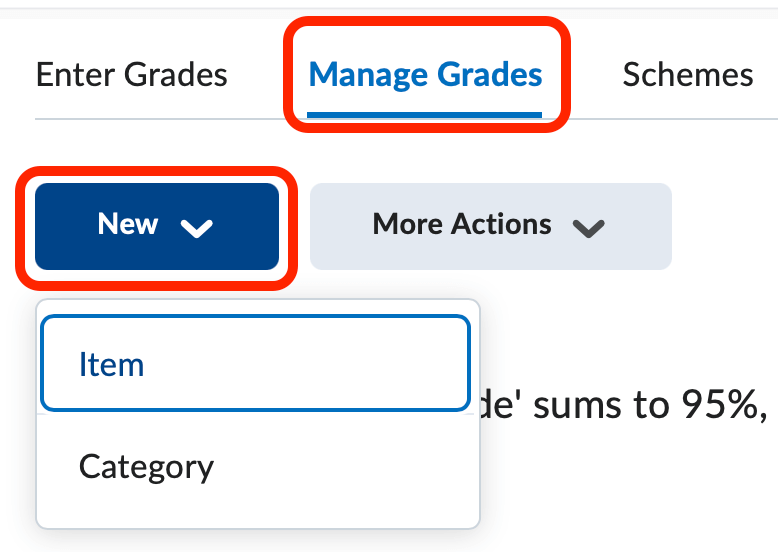
- Type a Name for your Category. For example, enter "Quizzes" or "Written Assignments".
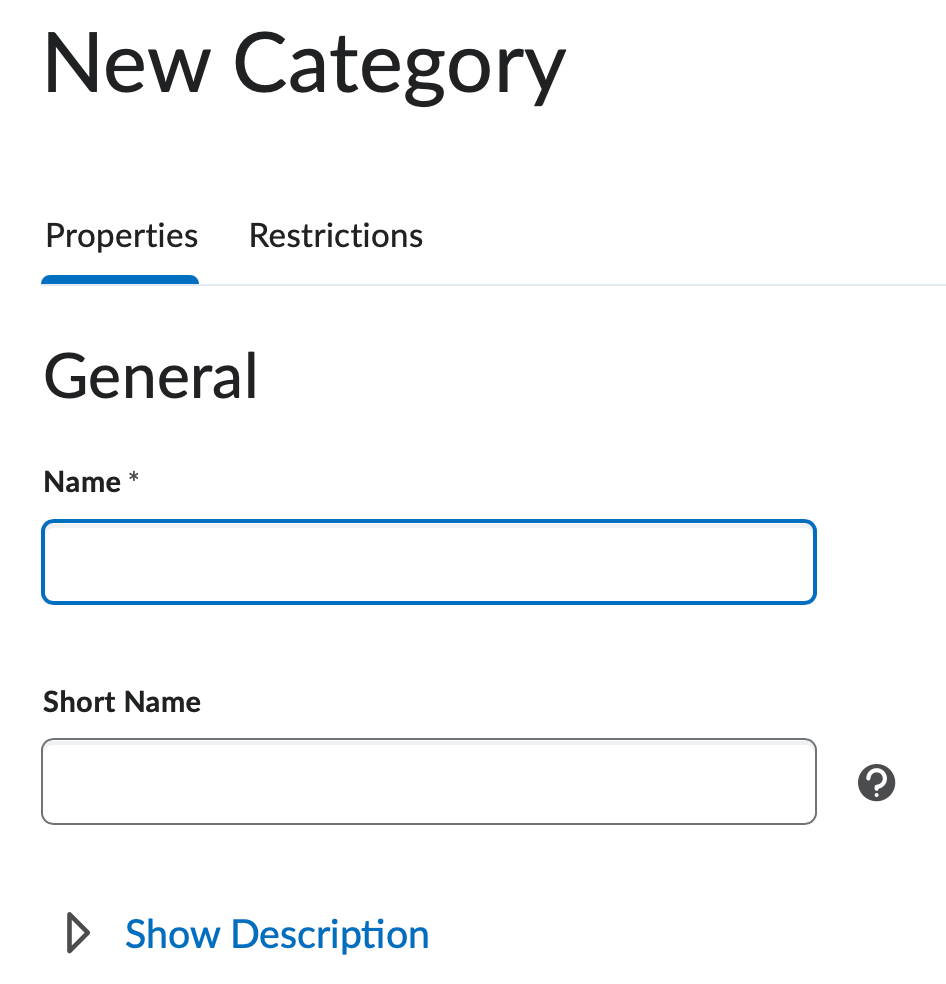
- Optional: Enter a Short Name. Enter a short version of the category name or an abbreviation to display in the grade book to save space.
- Optional: Click the Show Description hyperlink to enter a description for this category. Descriptions will display to student sin the gradebook.
- Grading Preferences
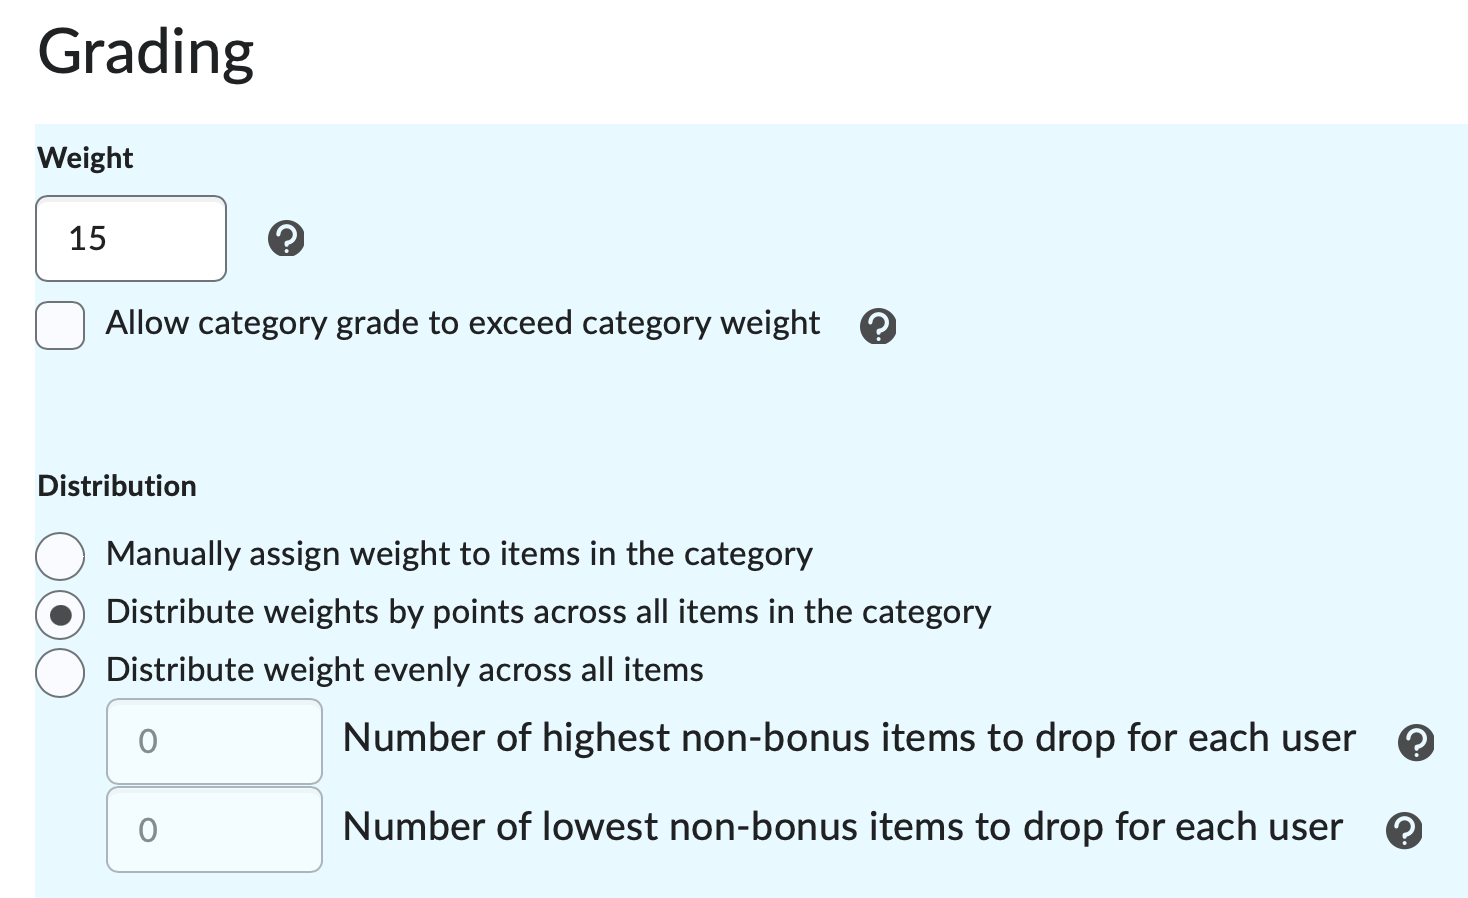
- Specify how much a category contributes to the final grade by typing the value in the Weight field. You will not see the Weight field if using a Points Gradebook.
- Check the box Allow category grade to exceed category weight if you want to allow users' grades for the category to exceed 100%.
- Distribution - Select a distribution option to determine how each item within this category will
contribute to the overall category total.
- Manually assign weight to items in the category - You must manually assign a weight to each item within the category.
- Distribute weights by points across all items in the category - D2L will automatically assign a weight for each grade item that is proportionate to the max point value of the grade item.
- Distribute weight evenly across all items - D2L will automatically assign equal weight to the grade items within the category.
- Number of highest non-bonus items to drop for each user - Use this option to drop users' highest grades in the category from their final grade. You can only use this option if all grade items in the category are worth the same amount.Number of lowest non-bonus items to drop for each user - Use this option to drop users' lowest grades in the category from their final grade. You can only use this option if all grade items in the category are worth the same amount.
- Display options - Configure these options to control what displays to a student in the student view
of the gradebook.
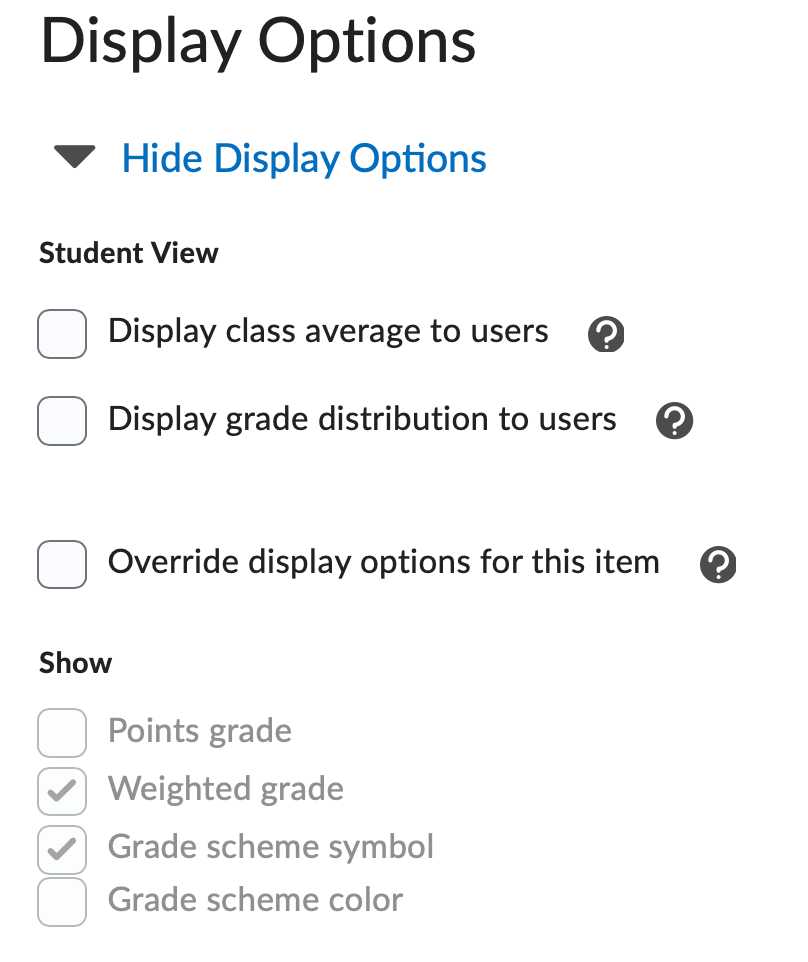
- Display class average to user - Select this option if you want to allow users to see the class average on the item.
- Display grade distribution to users - Select this option if you want to allow users to see a graph showing how grades were distributed between different percentiles.
- Override display options for this item - Select this option if you want graded users to view grade information for this item differently from other items in the grade book.
- Show: - Select the options you want the student to see:
- Weighted Grade
- Grade Scheme Symbol
- Grade Scheme Color
- Select a saving option:
- Save and Close - Saves the current category and redirects the user back to the Manage Grades screen.
- Save and New - Saves the current category and opens a blank New Category page.
- Save - Saves current changes made to page.
- Cancel - Discard changes and redirects back to the Manage Grades page.
- From the Manage Grades tab of your gradebook, click the New button and select Category.
-
Create Grade Items
Creating Numeric Grade Items
Grade Items create the actual columns of your gradebook. You can create items and then associate those items with learning activities such as a quiz, dropbox, or discussion board. You may also create items that do not have an association, which will require you to manually enter student grades. You will not be able to enter or calculate students' grades until you create grade items.
- From the Manage Grades tab of your gradebook, click the New button and select Item.
- The next screen requires you to select a Grade Item Type.These steps will outline the creating of a Numeric Grade Item. Instructions for creating
the other grade item types are also available.
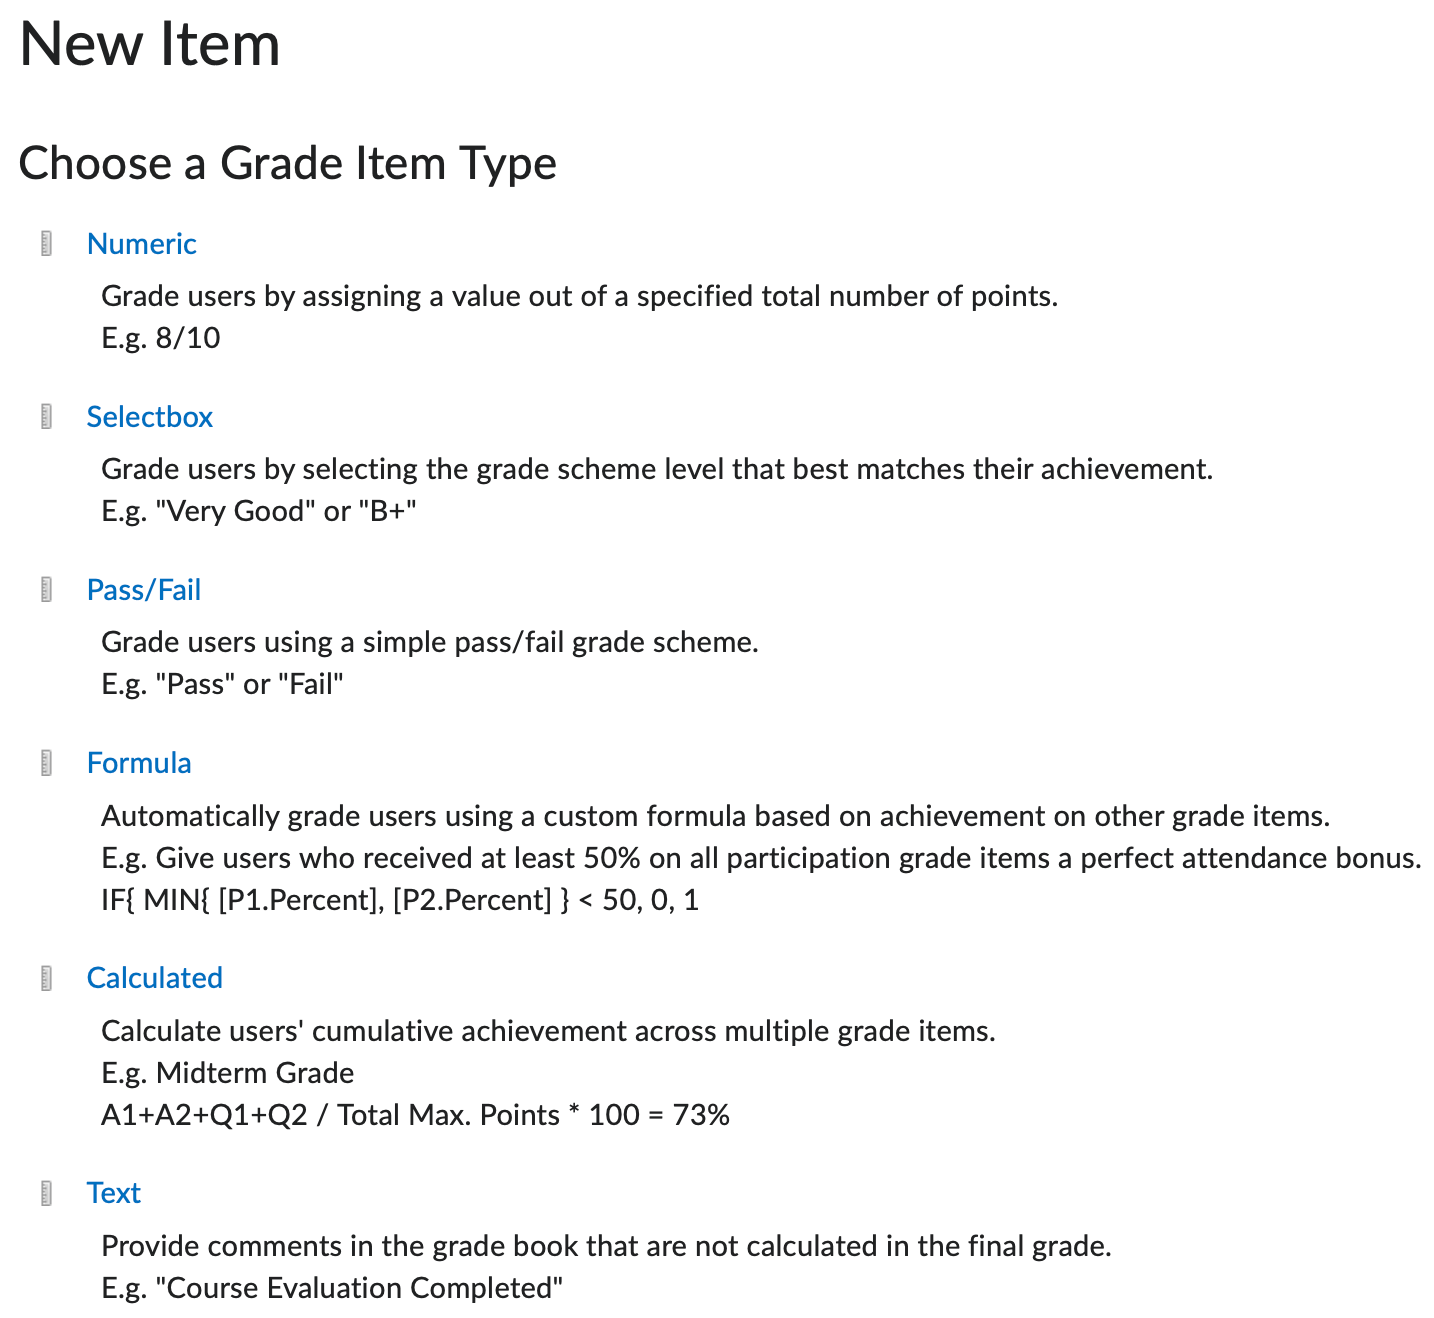
- The Grade Item Type options are:
- Numeric - Graded by assigned a value out of a specified total number of points
- Selectbox - Graded by selecting the grade scheme level that matches their achievement, for example “Very Good” or “B+”
- Pass/Fail - Graded by using a simple pass/fail grade scheme
- Formula - Graded using a custom formula
- Calculated - Graded by calculating users’ cumulative achievement across multiple grade items
- Text - Provide comments in the grade book that are not calculated into Final Grade
- Selecting a Numeric Item Type will then direct you to the New Item page.
- Enter a Grade Item Name.
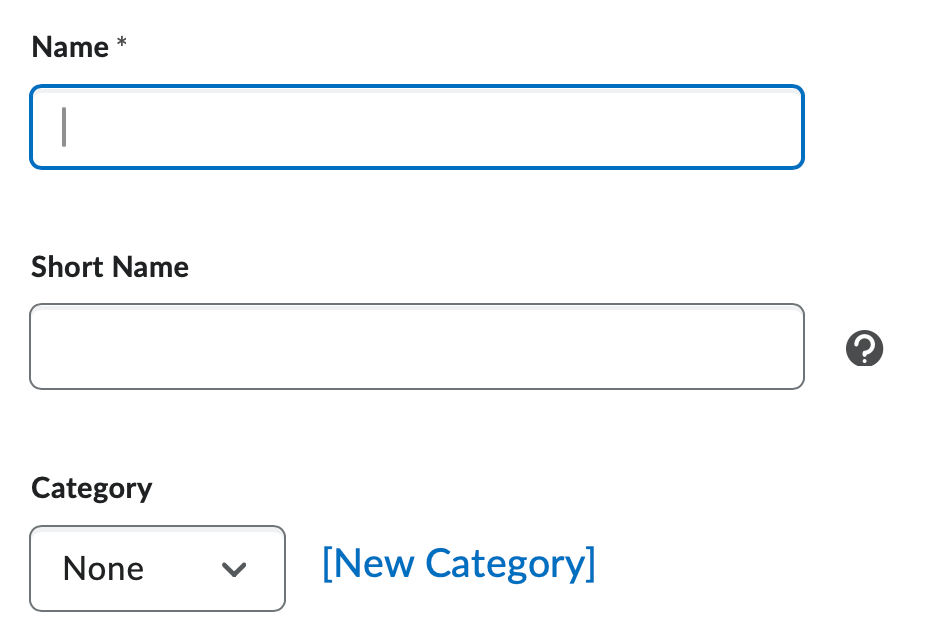
- Optional: Enter a Short Name. This is used on the Grades List page as the Grade Item title, if your Grade Item name is long it will cause the spreadsheet to expand, making it long and difficult to read. By using a concise Short Name you can eliminate this particular issue.
- Optional: Select a Category if the item should belong to a category.
- Optional: Enter a Description for this Grade Item. Students can view the description in the gradebook.
- Enter the maximum number of points the student can achieve on this grade item. The Max points represents the "perfect
score" on this particular assignment.
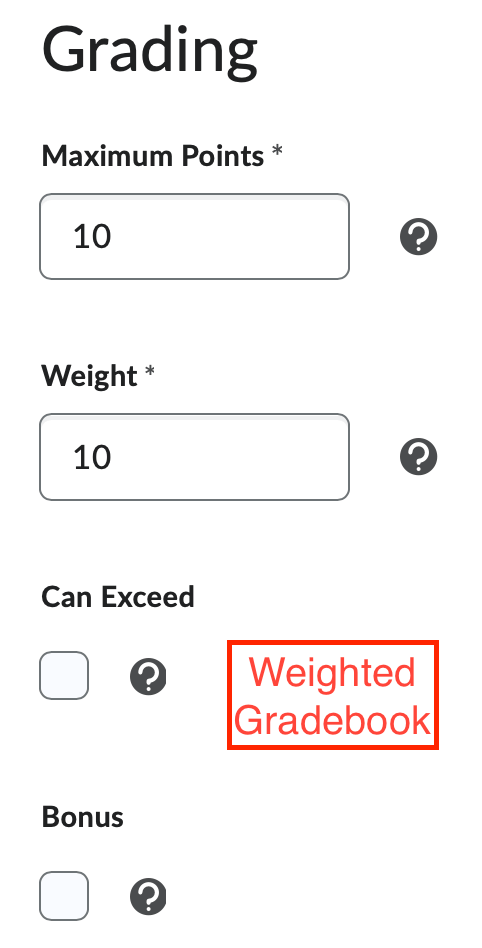
- Optional: If using a weighted gradebook type, select the Weight of the assignment. This value will be either a percentage of the entire Gradebook or a percentage of a grade category. If this item belongs to a category, and you have elected to make each item of equal weight within that category, the Gradebook will calculate the weight for you.
- Optional: Mark the Can Exceed option if you will allow students to achieve a score greater than the Max Point value assigned in Step 8. Otherwise, D2L will disregard any points that exceed the Max Point value.
- Optional: Mark the Bonus option if you want the item to be a Bonus. In D2L, Bonus items are not included in the maximum points for a category or final grade. They are added on top of the calculated grade. Note Bonus items cannot make users' grades exceed the maximum points specified, unless the Can Exceed option is selected.
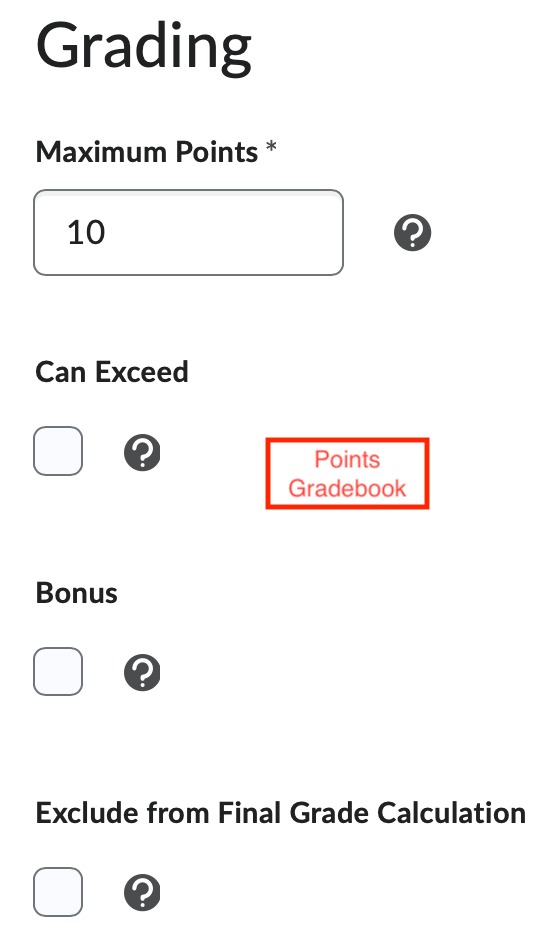
- Optional: Mark the Exclude from Final Grade Calculation if you would like to keep a record of an assignment that is not part of a student's final grade. This option is only available in a Points gradebook. To achieve this same result in a weighted gradebook, you would need to assign a Weight of 0 to the item or category you would like to exclude from the final grading calculation.
- Optional: Select a Grade Scheme. By default, D2L will select the Percentage scheme, which will display student grades
as numbers.
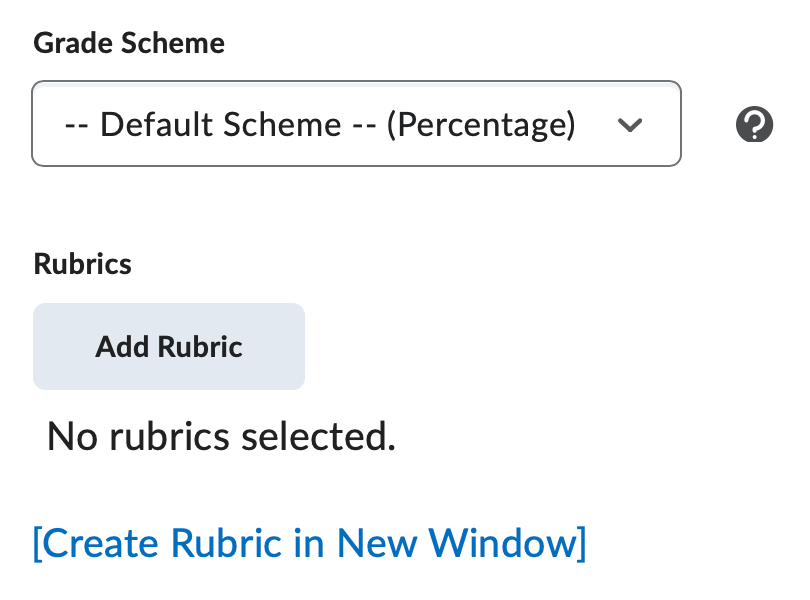
- Optional: Click the Add Rubric button to associate a Rubric with this grade item.
- Display options - Configure these options to control what displays to a student in the student view
of the gradebook.
- Display class average to user - Select this option if you want to allow users to see the class average on the item.
- Display grade distribution to users - Select this option if you want to allow users to see a graph showing how grades were distributed between different percentiles.
- Override display options for this item - Select this option if you want graded users to view grade information for this item differently from other items in the grade book.
- Show - Select the options you want the student to see:
- Weighted Grade
- Grade Scheme Symbol
- Grade Scheme Color
- Select a Save option:
- Save and Close - Saves the current item and redirects the user back to the Manage Grades screen.
- Save and New - Saves the current item and opens back to the Select an Item Type page.
- Save - Saves current changes made to page.
- Cancel - Discards changes and redirects back to the Manage Grades page.
Creating Selectbox Grade Items
Selectbox Grade Items can only be created after you have created a custom grade scheme. If you have not created a custom scheme (i.e. letter grade or letter grade with plus/minus scale), the Selectbox item type will be unavailable.
- From the Manage Grades tab of your gradebook, click the New button and select Item.
- The next screen requires you to select a Grade Item Type.
- From the list of options choose Selectbox - Graded by selecting the grade scheme level that matches their achievement, for example “Very Good” or “B+”. Note for a list of grade item descriptions or any detailed screenshots for the following directions refer back to the previous section: Creating a Numeric Grade Item.
- Selecting a Selectbox Item Type will then direct you to the New Item page.
- Enter a Grade Item Name.
- Optional: Enter a Short Name.
- Optional: Select a Category if the item should belong to a category.
- Optional: Enter a Description for this Grade Item.
- Enter the maximum number of points the student can achieve on this grade item.
- Optional: If using a weighted gradebook type, select the Weight of the assignment.
- Optional: Mark the Bonus option if you want the item to be a Bonus.
- Optional: Mark the Exclude from Final Grade Calculation if you would like to keep a record of an assignment that is not part of a student's final grade. This option is only available in a Points gradebook.
- Required: Select a Grade Scheme. The default Grade Scheme (Percentage) cannot be used here.
- Optional: Click the Add Rubric button to associate a Rubric with this grade item.
- Display options - Configure these options to control what displays to a student in the student view of the gradebook.
- Select a Save option.
Creating Pass/Fail Grade Items
Pass/Fail Grade Items can only be created after you have created a custom scheme. If you have not created a custom scheme (i.e. letter grade or letter grade with plus/minus scale), the Pass/Fail item type will be unavailable.
- From the Manage Grades tab of your gradebook, click the New button and select Item.
- The next screen requires you to select a Grade Item Type.
- From the list of options choose Pass/Fail - Graded by using a simple pass/fail grade scheme. Note for a list of grade item descriptions or any detailed screenshots for the following directions refer back to the previous section: Creating a Numeric Grade Item.
- Selecting a Pass/Fail Item Type will then direct you to the New Item page.
- Enter a Grade Item Name.
- Optional: Enter a Short Name.
- Optional: Select a Category if the item should belong to a category.
- Optional: Enter a Description for this Grade Item.
- Enter the maximum number of points the student can achieve on this grade item.
- Optional: If using a weighted gradebook type, select the Weight of the assignment.
- Optional: Mark the Bonus option if you want the item to be a Bonus.
- Optional: Mark the Exclude from Final Grade Calculation if you would like to keep a record of an assignment that is not part of a student's final grade. This option is only available in a Points gradebook.
- Required: Select a Grade Scheme to display pass/fail. By default, D2L will select the Percentage scheme, which will display student grades as numbers.
- Optional: Click the Add Rubric button to associate a Rubric with this grade item.
- Display options - Configure these options to control what displays to a student in the student view of the gradebook.
- Select a Save option.
Creating Formula Grade Items
Formula Grade Items allow you to create your own custom formula to calculate student's grades.
- From the Manage Grades tab of your gradebook, click the New button and select Item
- The next screen requires you to select a Grade Item Type.
- From the list of options choose Formula - Graded using a custom formula. Note for a list of grade item descriptions or any detailed screenshots for the following directions refer back to the previous section: Creating a Numeric Grade Item.
- Selecting a Formula Item Type will then direct you to the New Item page.
- Enter a Grade Item Name.
- Optional: Enter a Short Name.
- Optional: Select a Category if the item should belong to a category.
- Optional: Enter a Description for this Grade Item.
- Enter the maximum number of points the student can achieve on this grade item.
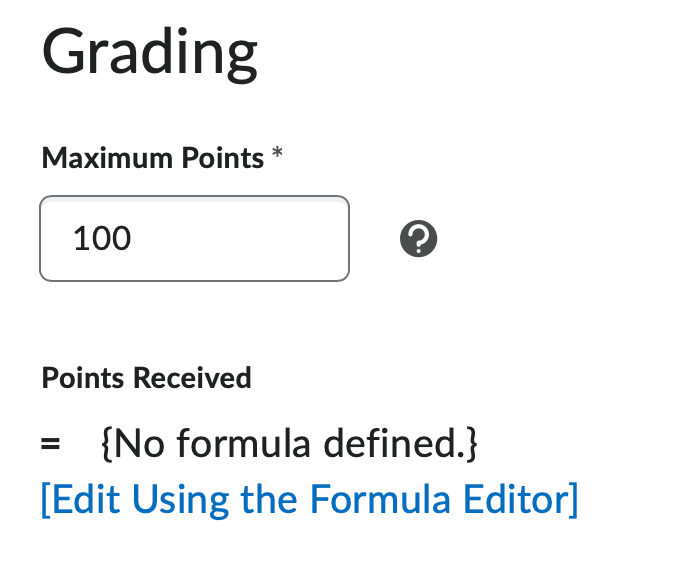
- Create a formula using the Formula Editor. Click Edit Using the Formula Editor hyperlink to access the formula editor. If you need assistance with creating a formula, contact d2lhelp@etsu.edu.
- Optional: Mark the Can Exceed option if you will allow students to achieve a score greater than the Max Point value assigned in Step 8.
- Optional: Select a Grade Scheme.
- Optional: Click the Add Rubric button to associate a Rubric with this grade item.
- Display options - Configure these options to control what displays to a student in the student view of the gradebook.
- Select a Save option.
Creating Calculated Grade Items
Calculated items are a great way to calculate a student's Midterm grade for reporting purposes.
- From the Manage Grades tab of your gradebook, click the New button and select Item.
- The next screen requires you to select a Grade Item Type.
- From the list of options choose Calculated - Graded by calculating users’ cumulative achievement across multiple grade items. Note for a list of grade item descriptions or any detailed screenshots for the following directions refer back to the previous section: Creating a Numeric Grade Item.
- Selecting a Calculated Item Type will then direct you to the New Item page.
- Enter a Grade Item Name.
- Optional: Enter a Short Name.
- Optional: Select a Category if the item should belong to a category.
- Optional: Enter a Description for this Grade Item. Students can view the description in the gradebook.
- Optional: Mark the Can Exceed option if you will allow students to achieve a score greater than the Max Point value assigned in Step 8.
- Optional: Select a Grade Scheme.
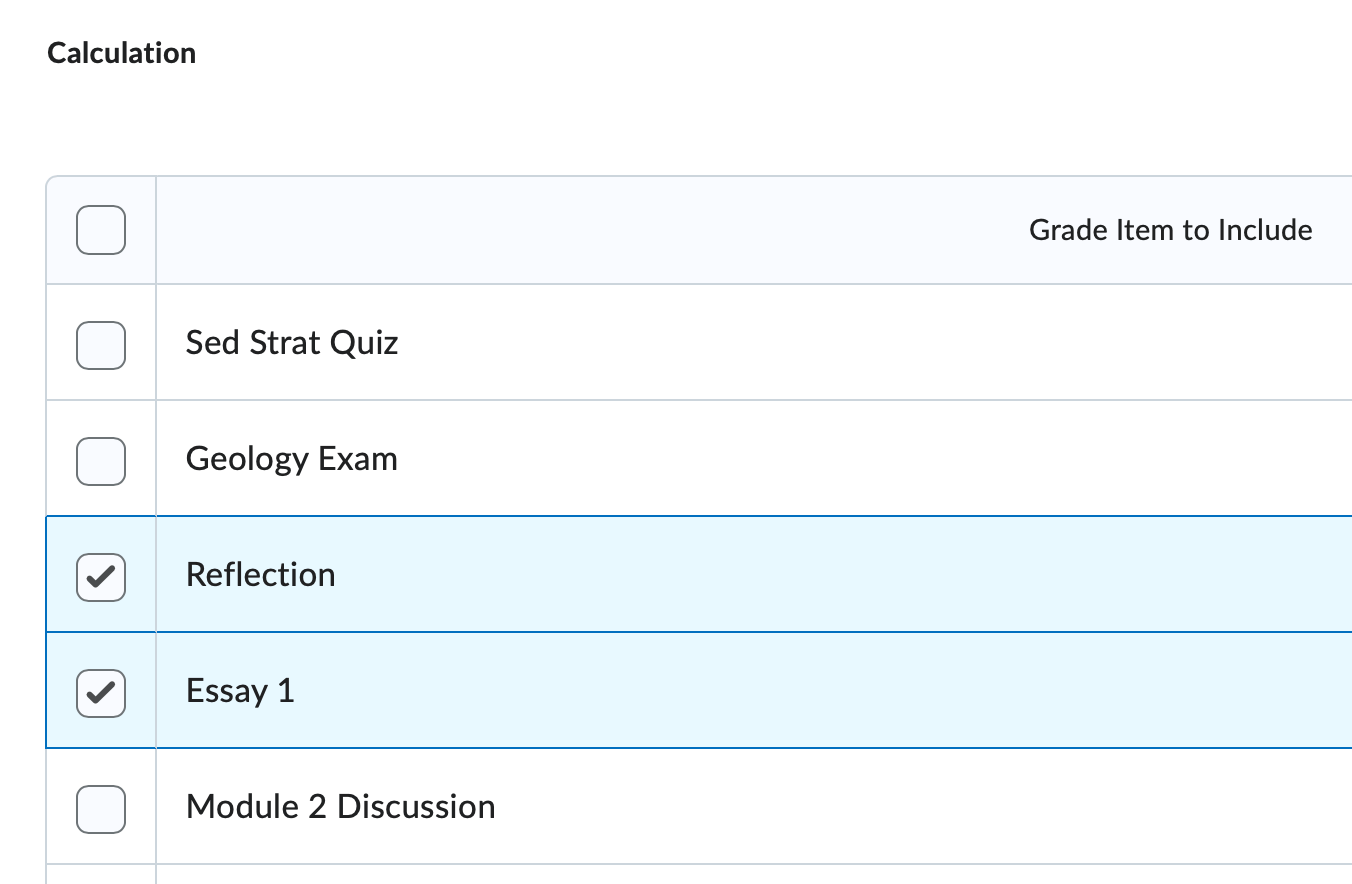
- Calculation:
- Check the items you would like D2L to calculate by placing a checkmark in the box for each item.
- Select a Calculation Method: (Only availalbe in the weighted gradebook)
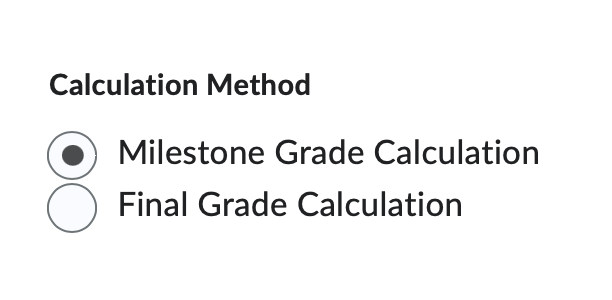
- Milestone Grade Calculation - The Milestone calculation is best used for Midterm reporting because it calculates a grade based on the sum of all graded items.
- Final Grade Calculation - The Final Grade Calculation calculates a grade based on the sum of all graded and ungraded items.
- Check the items you would like D2L to calculate by placing a checkmark in the box for each item.
- Optional: Click the Add Rubric button to associate a Rubric with this grade item.
- Display options - Configure these options to control what displays to a student in the student view of the gradebook.
- Select a Save option.
Creating Text Grade Items
Text Grade Items allow you to leave text responses or feedback for students within the grade item.
- From the Manage Grades tab of your gradebook, click the New button and select Item.
- The next screen requires you to select a Grade Item Type.
- From the list of options choose Text - Provide comments in the grade book that are not calculated into Final Grade. Note for a list of grade item descriptions or any detailed screenshots for the following directions refer back to the previous section: Creating a Numeric Grade Item.
- Selecting a Text Item Type will then direct you to the New Item page.
- Enter a Grade Item Name.
- Optional: Enter a Short Name.
- Optional: Enter a Description for this Grade Item.
- Optional: Click the Add Rubric button to associate a Rubric with this grade item.
- Display options - Configure these options to control what displays to a student in the student view of the gradebook.
- Override display options for this item - Select this option if you want graded users to view grade information for this
item differently from other items in the grade book.
- Show - Number of characters to show for this grade item. This setting will determine how many characters will display in the gradebook for a text gradebook item.
- Select a Save option.
- From the Manage Grades tab of your gradebook, click the New button and select Item.
-
Hiding and Restricting Grade Items
Hiding Grade Items and Categories
Regardless of the type of grade item, you can choose to hide or restrict an item or category from the student view. Hiding a grade item will suppress that item from the student view completely. Hide options are located on the Restrictions tab of the Edit Grade Item or Edit Grade Category page.
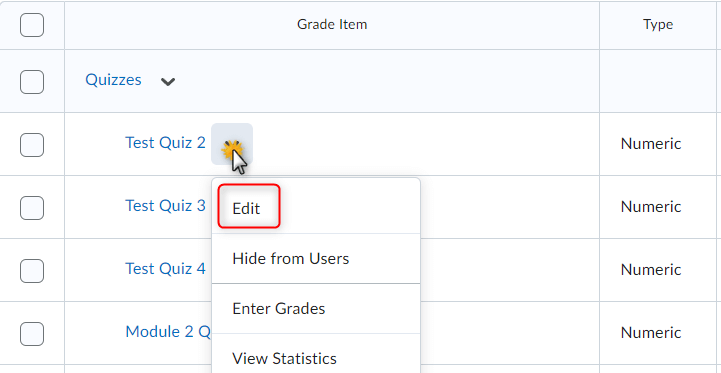
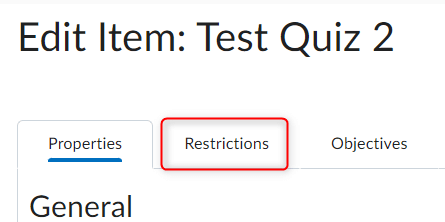
- From the Manage Grades screen, select Edit Grade Item from the context menu of a grade item or category.
- Click the Restrictions tab.
- Check the box next to Hide from Users
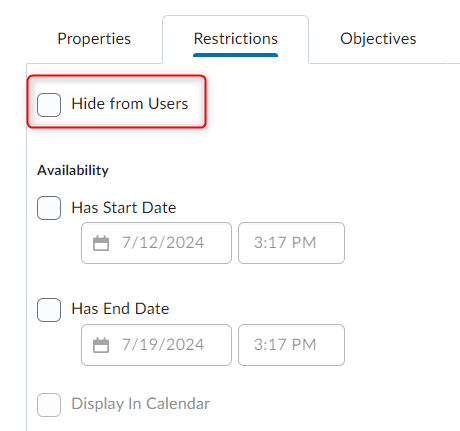
- By default, grade items and categories are always visible.
- Select Hide from Users to hide the item or category from the entire classlist.
- Select Availability to control the window of time the grade item will appear in the student's gradebook. For this option, you must select a Start and/or End date.
- Click Save and Close to return to the Manage Grades screen.
Optional: This can also be done by clicking on the dropdown arrow next to the grade item and select Hide from Users instead of Edit.
Students can also be made exempt from certain grade items through the Enter Grades area.
Restricting Grade Items and Categories
Restricting a grade item or category with a release condition will hide the item or categories from those students who have not satisfied a set of criteria. Restriction options are located on the Restrictions tab of the Edit Grade Item or Edit Grade Category page. Visit the Release Conditions page to learn more about creating and managing release conditions.
- From the Manage Grades screen, select Edit from the context menu of a grade item or category.
- Click the Restrictions tab.
- Create or Attach preexisting release conditions.
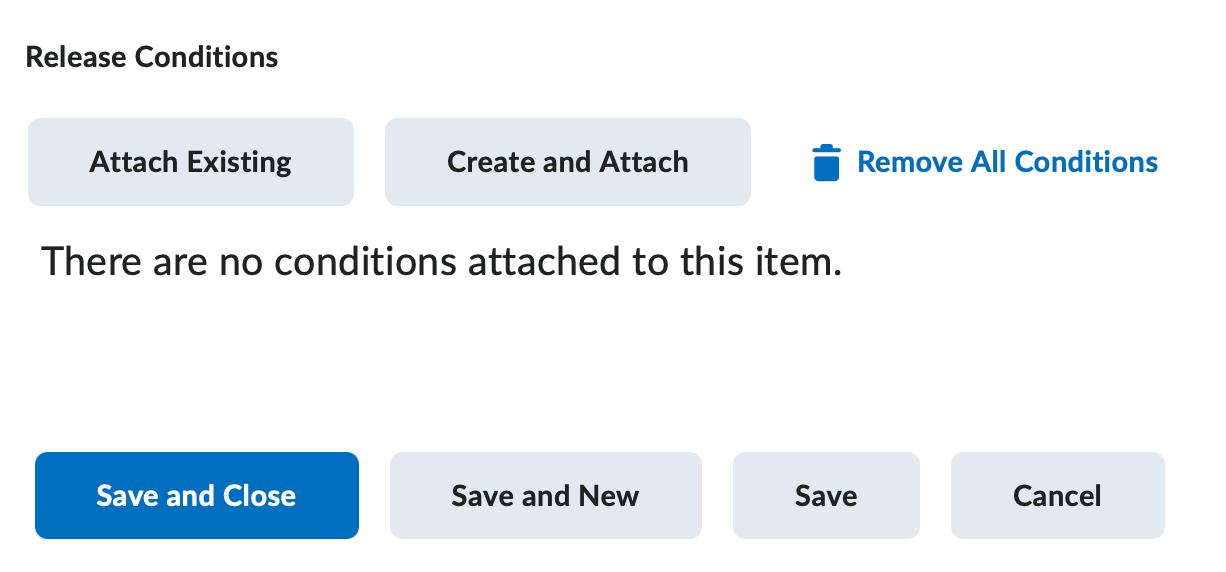
- Click Save and Close to return to the Manage Grades screen.
- From the Manage Grades screen, select Edit Grade Item from the context menu of a grade item or category.
-
Enter Grades from the Manage Grades Screen
Enter Grades from the Manage Grades Screen
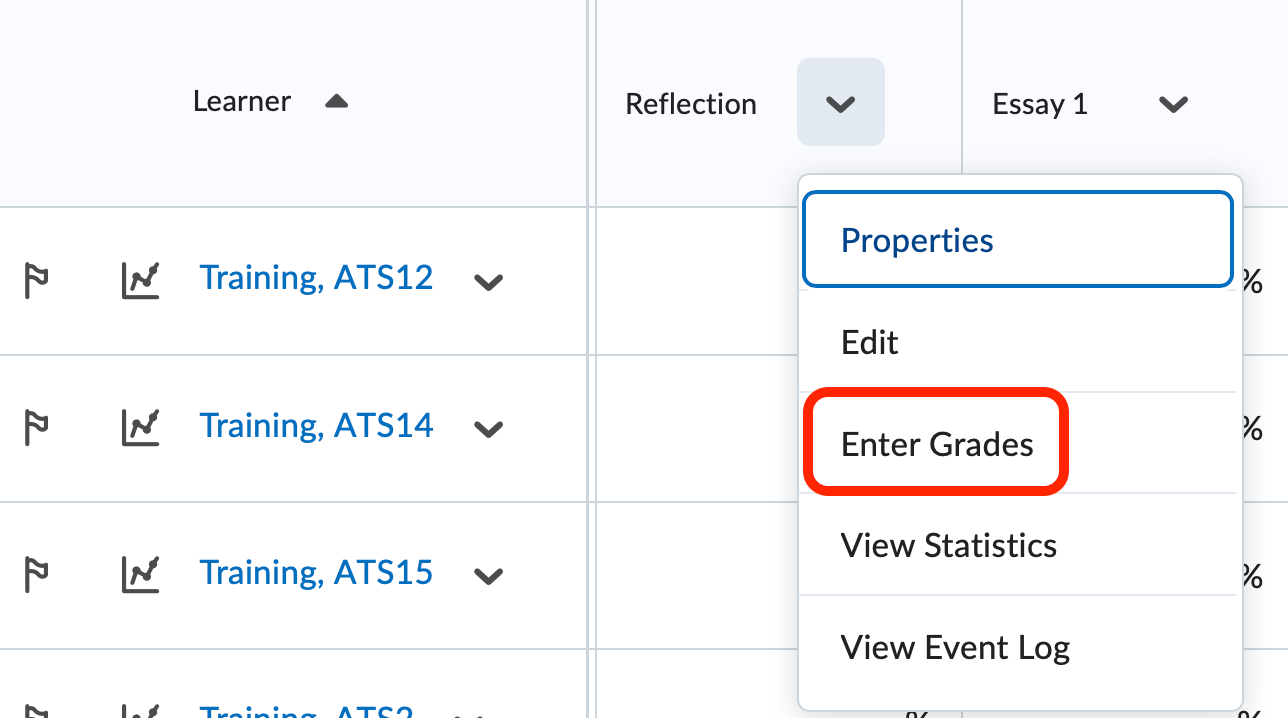
- From the Manage Grades screen, select Enter Grades from the context menu of a grade item.
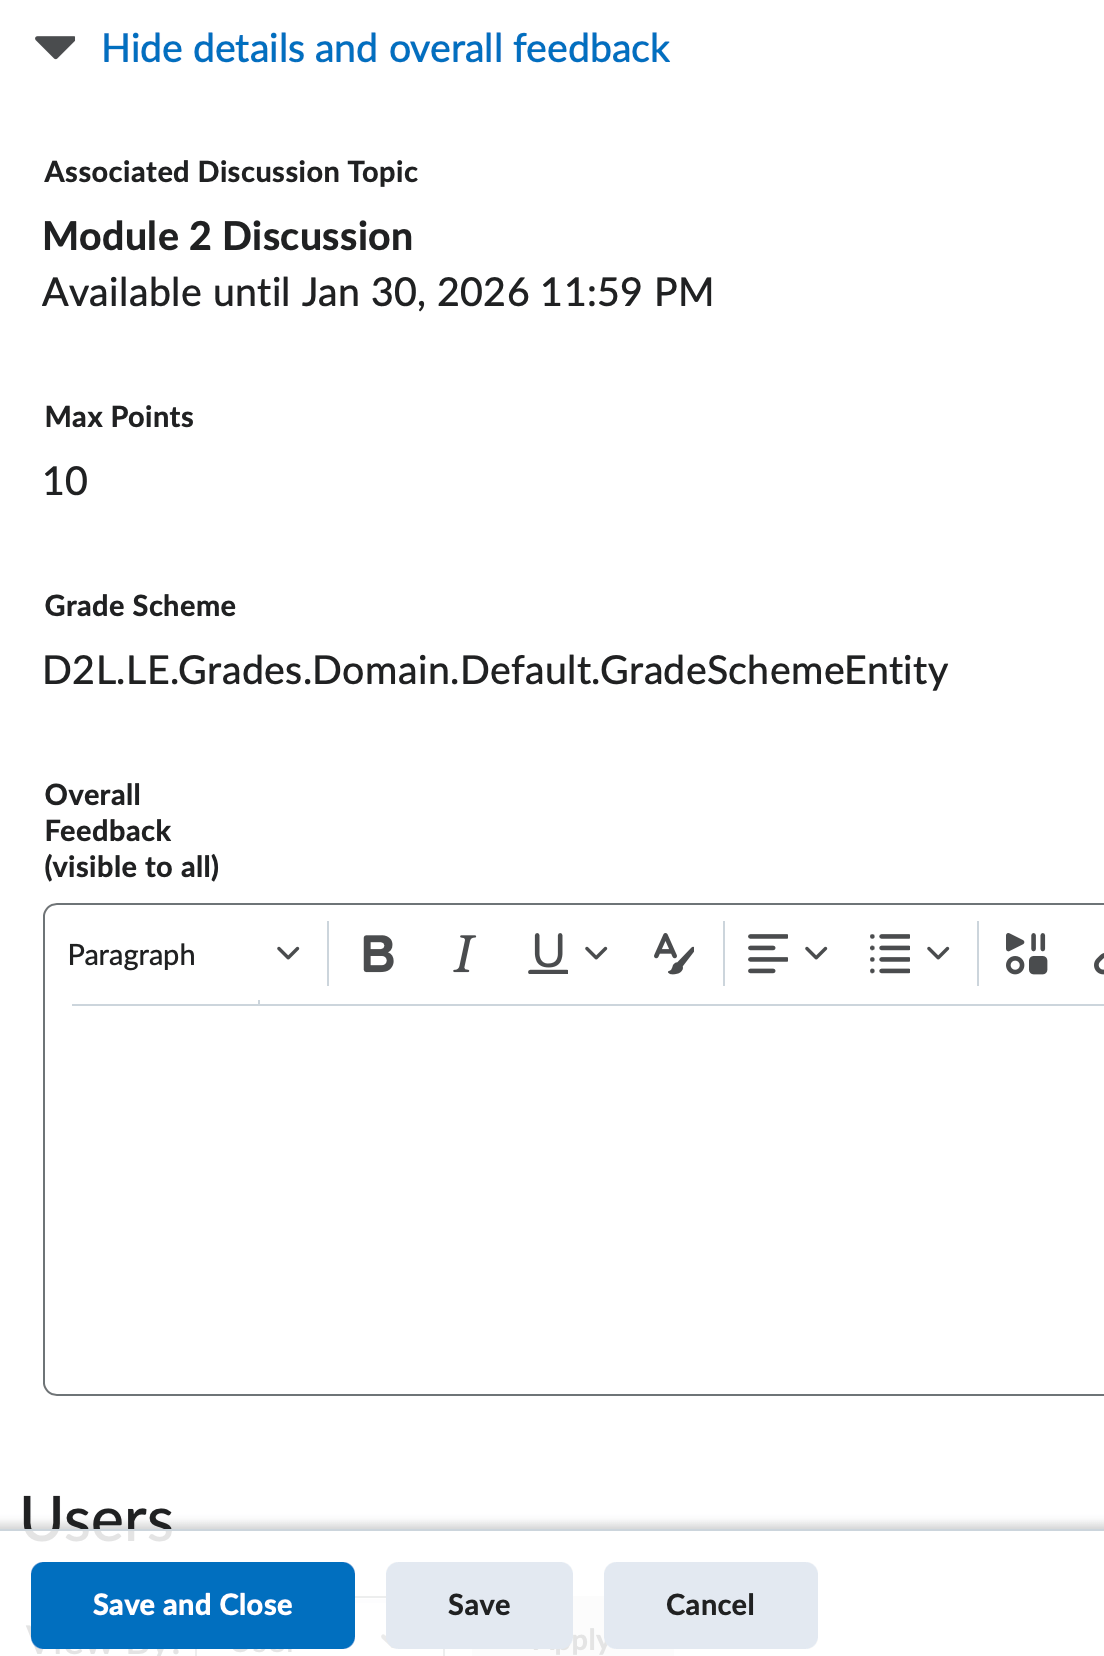
- You can enter general comments for the grade item in the Overall Feedback text field. Overall feedback will be displayed to all users who see this item in
their grade book.
- Enter student grades. Depending on the type of item you are grading, you will see different options:
- If you are grading a Numeric grade item, enter a numeric grade value for each student in the Grade column.
- If you are grading a Selectbox grade item, select the appropriate grade range from the Grade drop-down list for
each student. Each grade range is associated with an Assigned Value (set up in the
Grade Scheme), and where no Assigned Value has been added the value is the starting
percentage for the range.
- If you are grading a Pass/Fail grade item, select the appropriate option from the Grade drop-down list for each
student. The options are Pass or Fail.
- If you are grading a Text gradebook item, enter the text into the Grade field.
- If you are grading a Numeric grade item, enter a numeric grade value for each student in the Grade column.
- Click the Feedback icon to enter individualized feedback. The Grade Feedback page displays, where you can type Feedback for the student to view along with their grades. You can also type Private Comments that will not be visible to the student.
- Optional: Click on the Event Log icon to see all recorded events concerning this user and grade item.
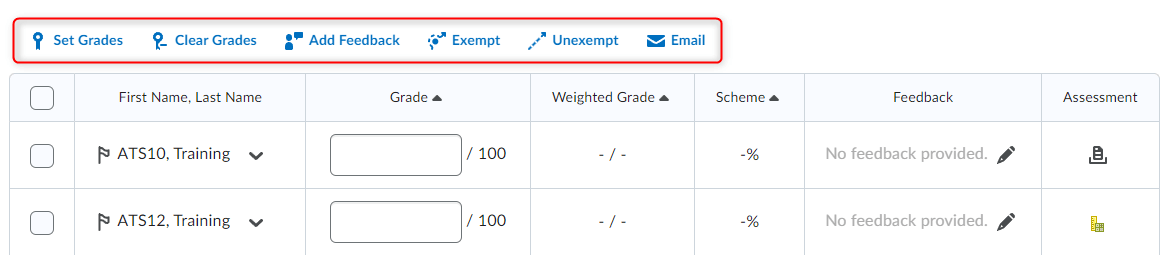
- There are also icons on the top of the page that allow you to perform various functions:
- Click Set Grade to enter the same grade value for all selected users.
- Click Clear Grades to remove all previously entered grades for all selected users for this grade item.
- Click Add Feedback to add the same feedback to multiple students.
- Click Exempt to exempt a particular student(s) from this particular grade item.
- Click Unexempt to remove exemptions from a particular grade item.
- Click Email to email all selected users.
- Be Sure to Save and Close when Finished.
- From the Manage Grades screen, select Enter Grades from the context menu of a grade item.
-
Bulk Edit Grade Categories and Items
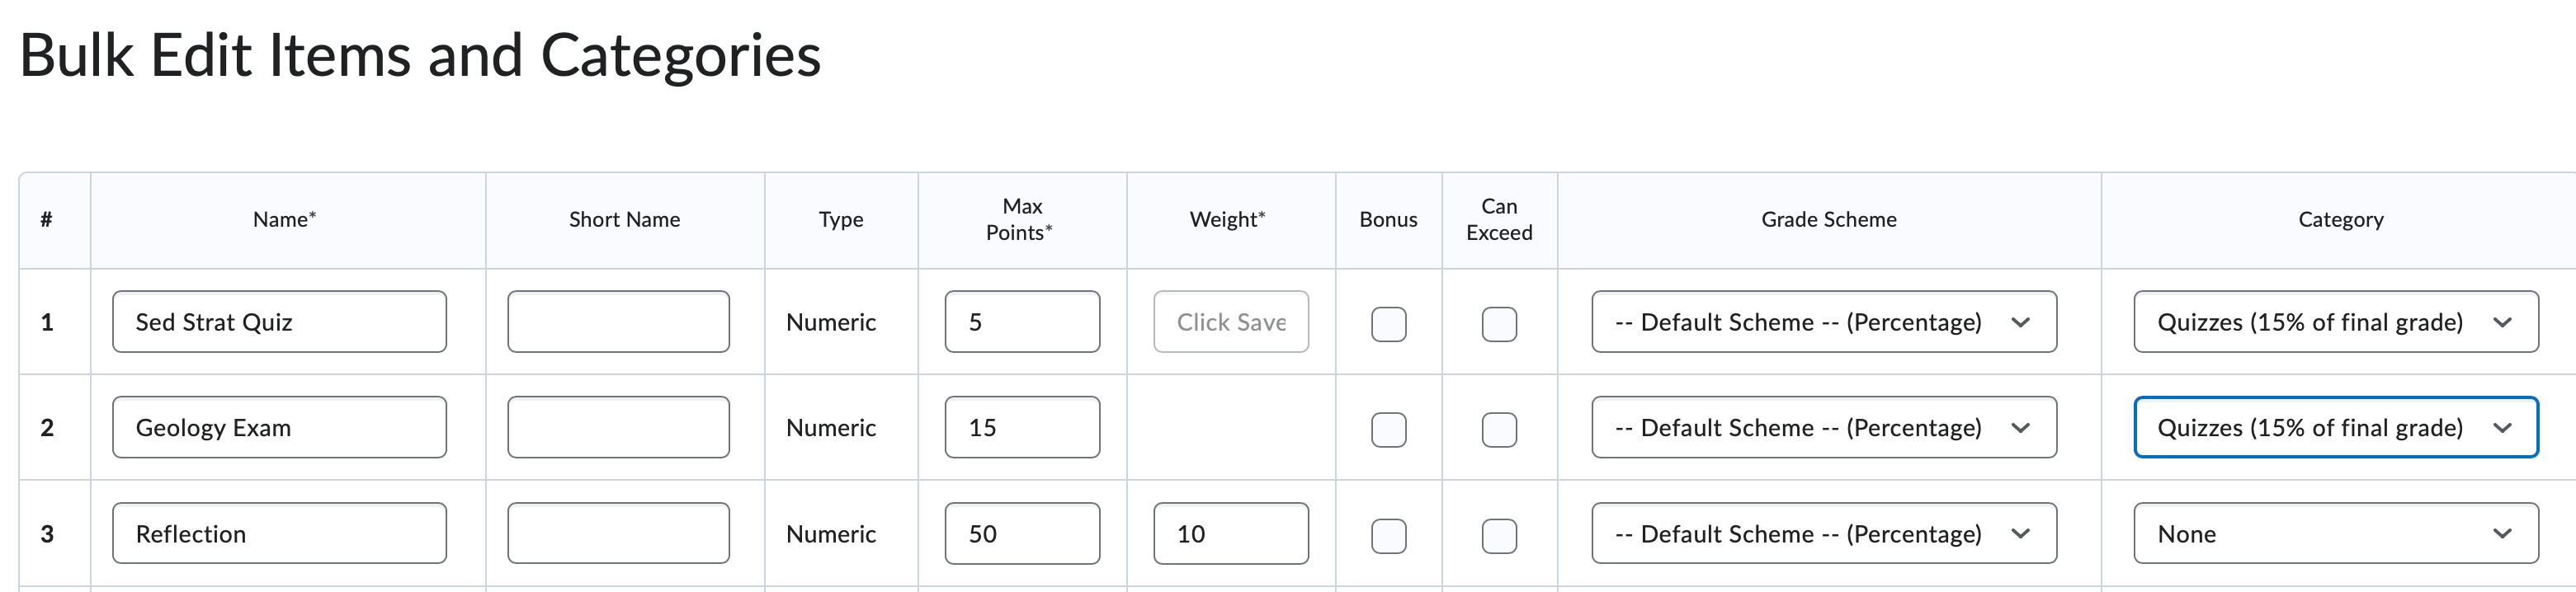
Bulk Editing Grade Items and Categories
Quickly edit the name, short name, max point value, weight (if applicable), bonus, can exceed, and category of grade items and categories using the bulk edit feature. From the Manage Grades screen, simply select the grade item(s) you would like to edit by marking the checkbox to the left of its name and then click the bulk edit action hyperlink.
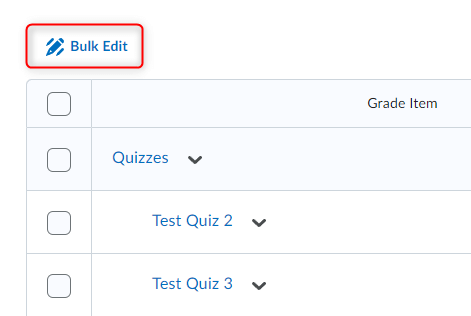
Make the appropriate changes to the item(s) or category and then click Save.
-
Delete Grade Items
Deleting Grade Items and Categories
From the Manage Grades screen, click the More Actions button and select Delete.
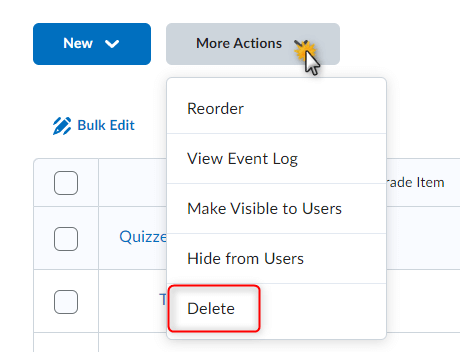
Click the checkbox to the left of each item or category you would like to delete.
Click the Delete button.
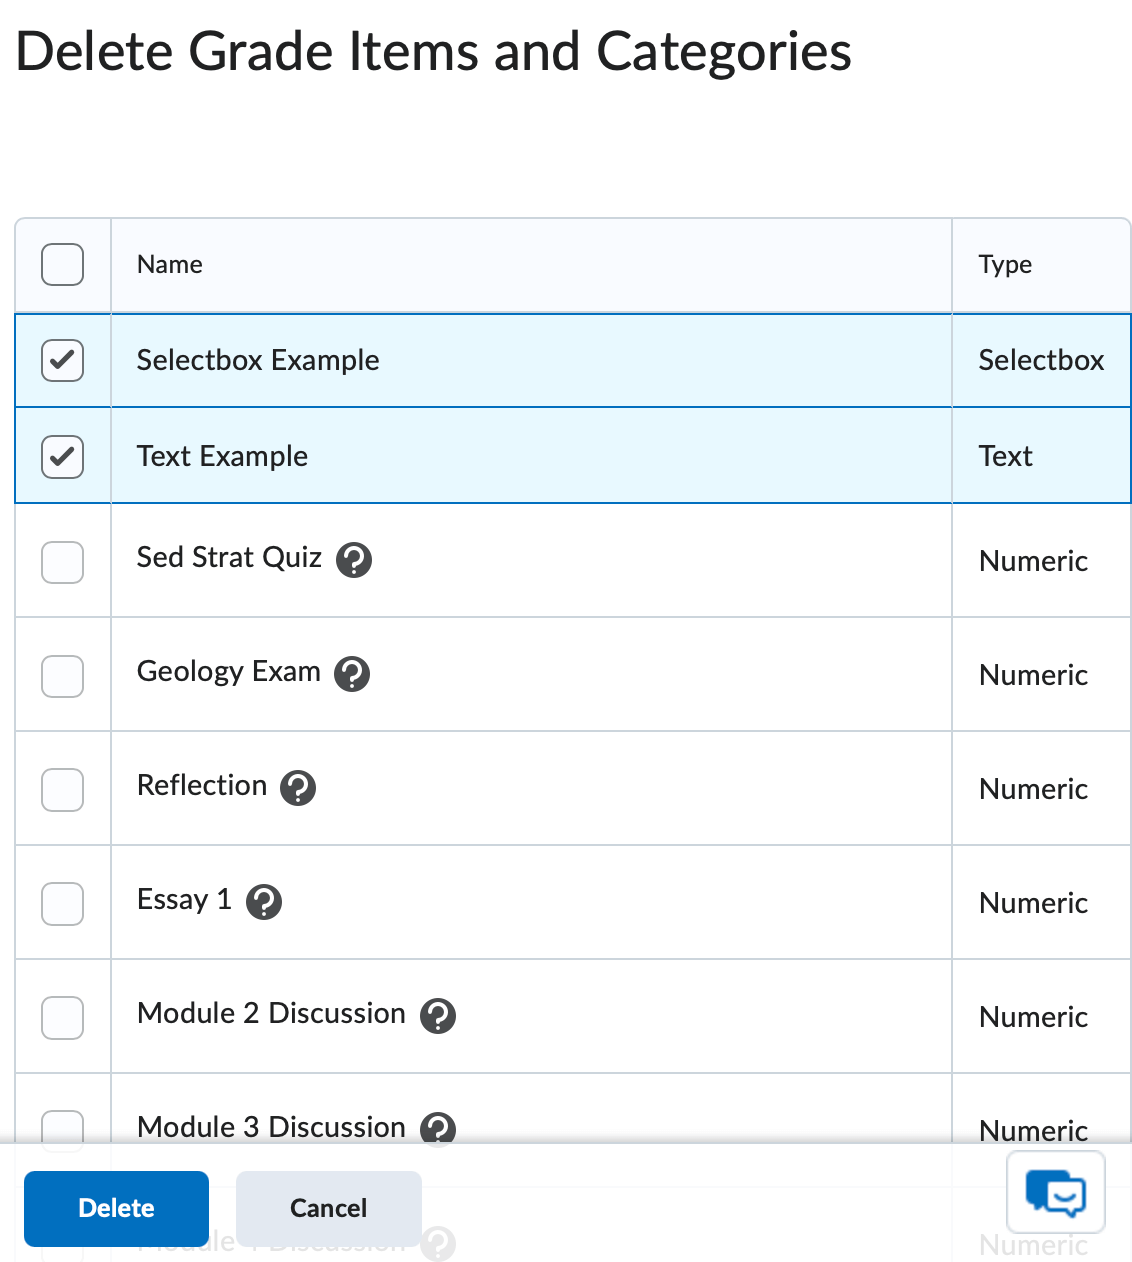
You cannot delete items with associations.
If you see an association info graphic (a question mark) to the right of an item's name you won't be able to delete that item. Click the association info graphic to view information about the exact learning activity that connects to the grade item. You will need to disassociate that grade item from the learning activity before you will be able to complete the delete item workflow.
-
Reorder Grade Items
Reordering Grade Items and Categories
From the Manage Grades screen, click the More Actions button and select Reorder.

Select a number in the in the Sort Order dropdown. Note that the sort order will dynamically update with each sort order number you select or change.

Click Save to return to the Manage Grades page.
-
Grades Event Log
Viewing the Gradebook Event Log
From the Manage Grades screen, click the More Actions button and select View Event Log.
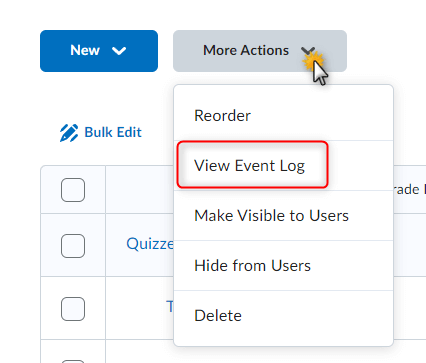
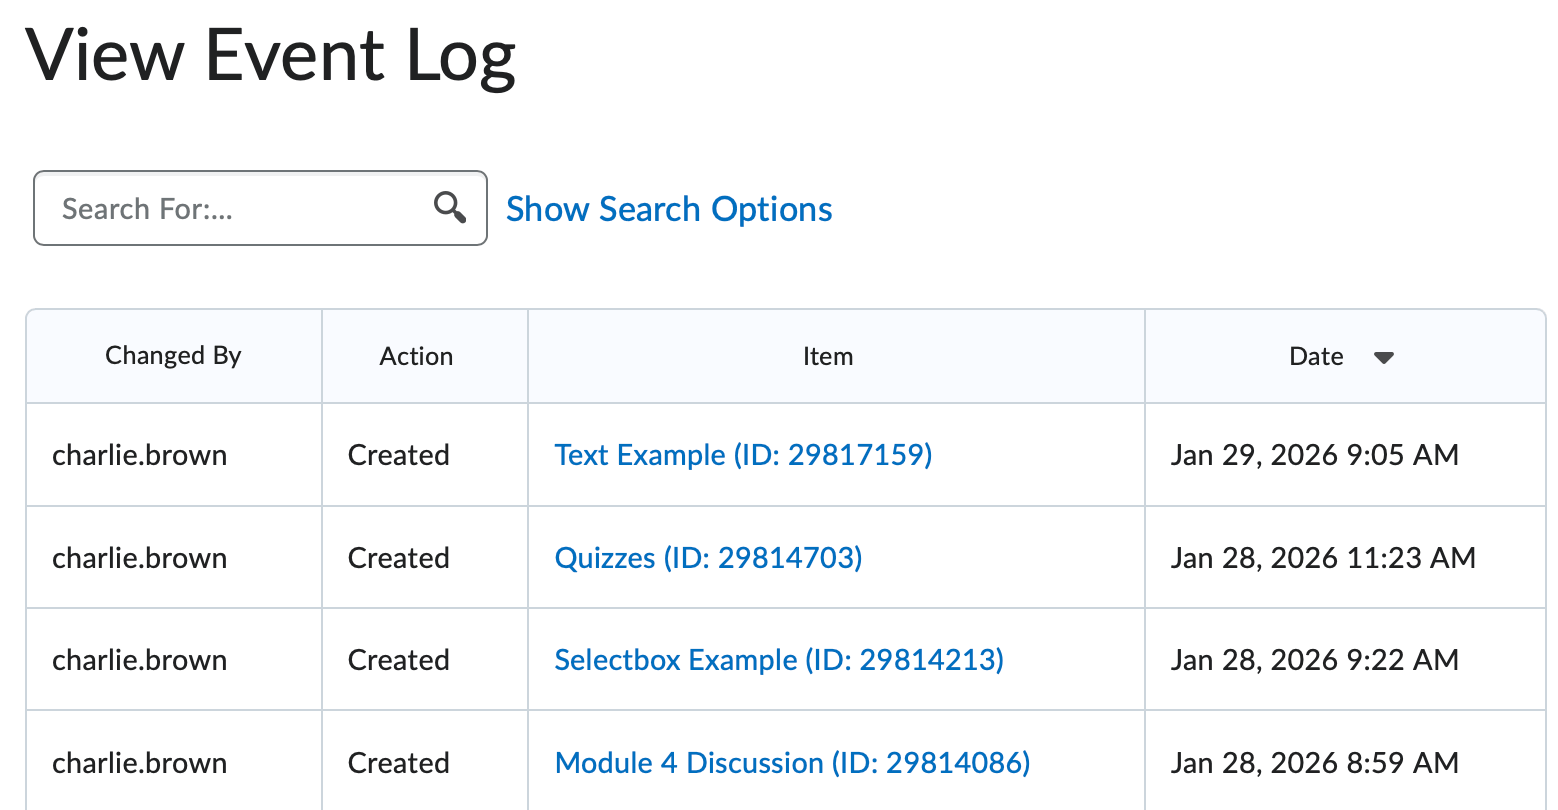
The Gradebook Event Log displays username, action, item, and date modification information for items and categories in your gradebook. To see item-level event log information, you would need to select Event Log from an individual item's context menu.
Navigate back to the Manage Grades Screen by clicking Manage Grades in the breadcrumb trail.
Setup Wizard
Grades Setup Wizard
The Grades Setup Wizard will help establish the framework for your Gradebook's calculation methodology. You can change these settings at any time and you can run the wizard multiple times, if necessary.
Navigate to the Setup Wizard by clicking the Setup Wizard link from the Enter Grades or Manage Grades screen.

The wizard opens to a summary screen of the current gradebook settings. To begin setting up your Gradebook select the Start button from the Grades Setup Wizard.
-
Step 1
Step 1
The First step of the wizard is where you will select your Grading System. You can choose from a Weighted, Points, or Formula grading system.
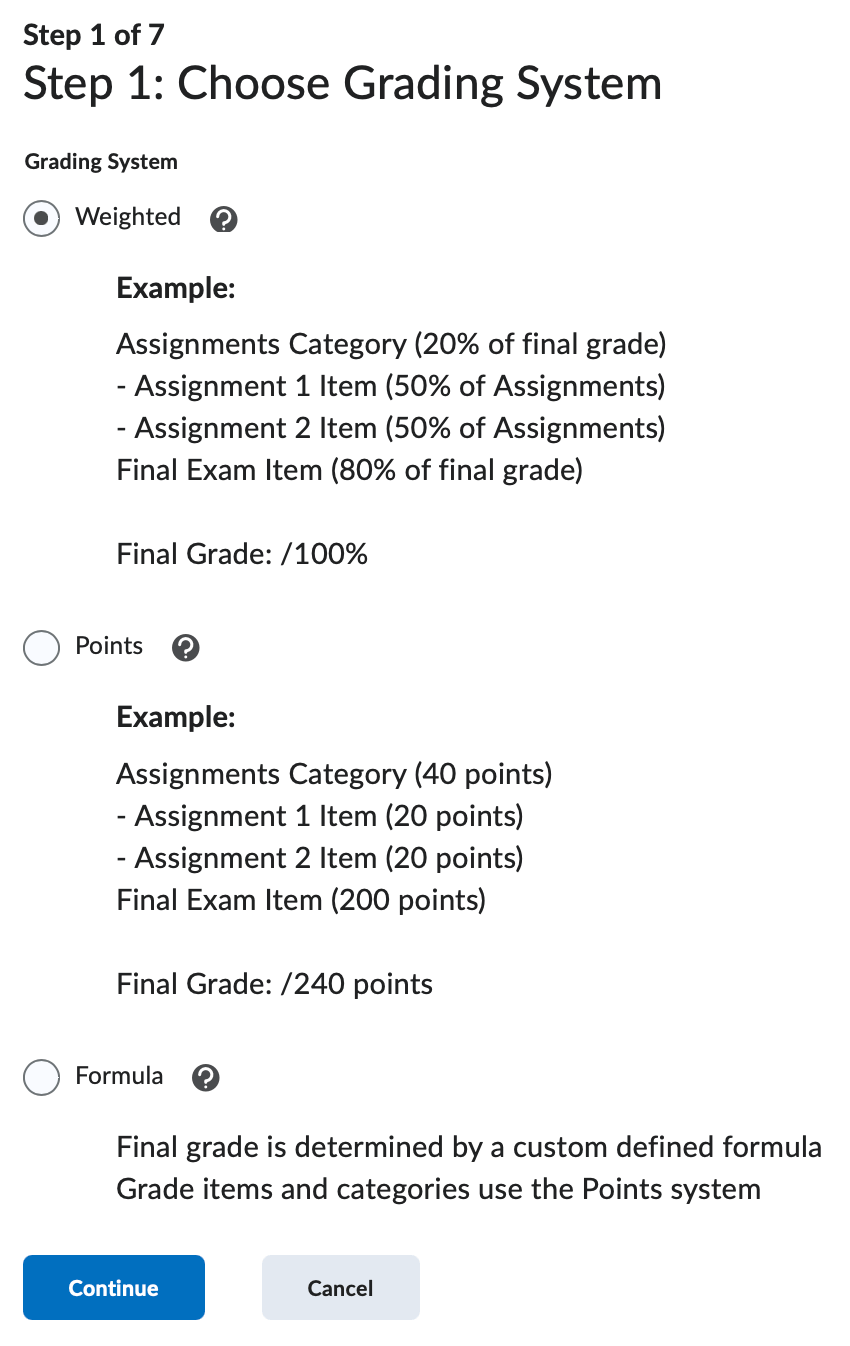
- Weighted - Use the weighted system if you want grade items calculated as a percentage of the final grade worth 100%.
- Points - Calculate the final grade by totaling the points users received on grade items.
- Formula - Calculate final grade using a custom formula that lets you set conditions on grade items.
This first step is one step that it is best not to change after the Gradebook has been created. Once you have selected your grade system click Next to continue.
-
Step 2
Step 2
The second step of the gradebook setup wizard determines if D2L displays the Calculated or Adjusted Final Grade to students.
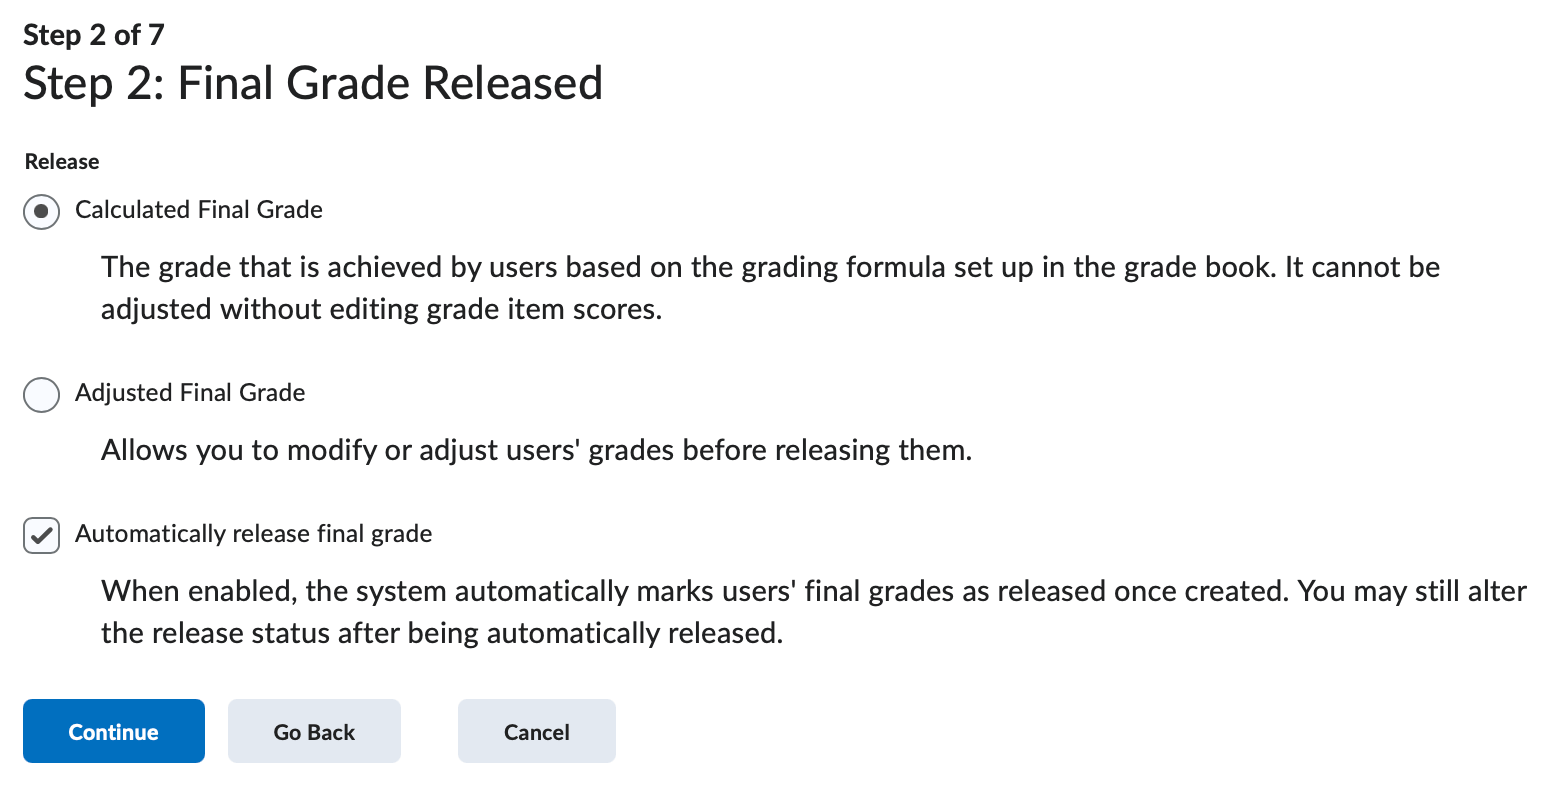
- Calculated Final Grade - Displays the grade that is achieved by users based on the grading formula set up in the grade book. It cannot be adjusted without editing grade item scores.
- Adjusted Final Grade - Allows you to modify or adjust users' grades before releasing them.
- Optional: Automatically release final grade will release the final grade automatically for student's to view.
Make your selection and then click Continue.
-
Step 3
Step 3
The third step of the setup wizard will allow you to select Grade Calculation options. You can select how you want to treat ungraded items.
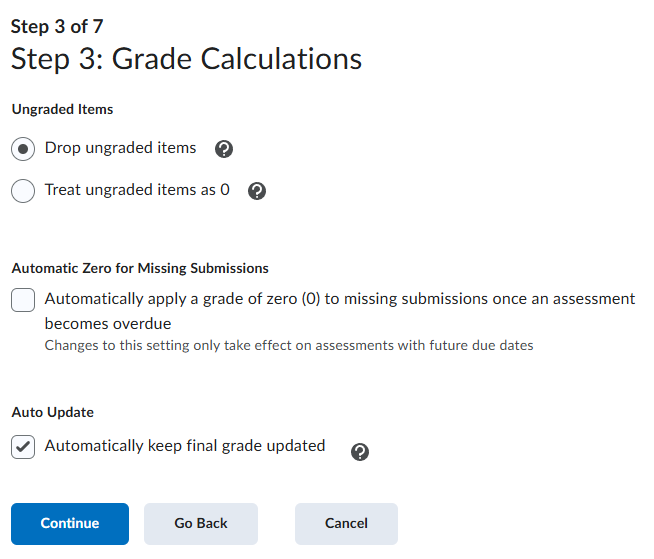
- Drop Ungraded Items - Items that do not have a grade inputted are not counted in the final grade.
- Treat Ungraded Items as 0 - Items that do not have a grade inputted are counted as 0 in the final grade.
- Automatic Zero for Missing Submissions - Items will automatically be assigned a zero (0) for submissions once the assessment Due Date has passed.
- If you choose to Auto Update, the final grade will be updated any time you make changes to any grade items. If this option is not selected you must manually re-calculate final grades after updating any grade item.
Make your selection and then click Continue.
-
Step 4
Step 4
The fourth step of the setup wizard asks you to select a Default Grade Scheme for the Gradebook. You can create other grade schemes that you design, such as letter grades or you can choose to apply grade schemes to particular grade items in the Gradebook. You will have to create other Grade Schemes before you will have the option here to change it to anything other than the default Percentage.
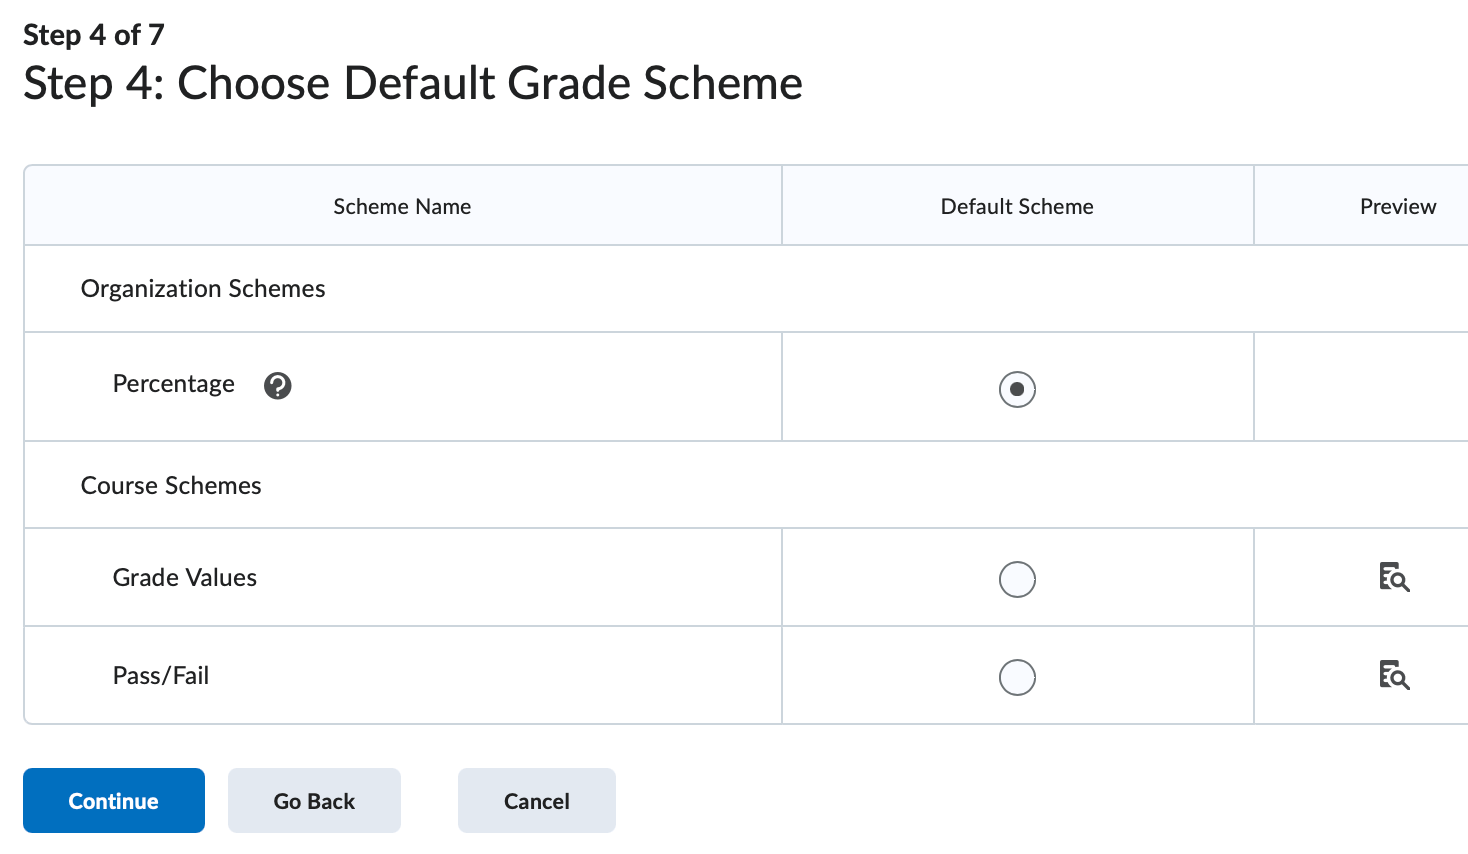
Make your selection and then click Continue.
Contact d2lhelp@etsu.edu to learn how to create your own grade scheme.
-
Step 5
Step 5
In the fifth step of the setup wizard you can change the default number of decimal places displayed to fewer or more. The default is 2. This setting controls how many decimals will be displayed to users grading a course. The value must be an integer between 0 and 5.
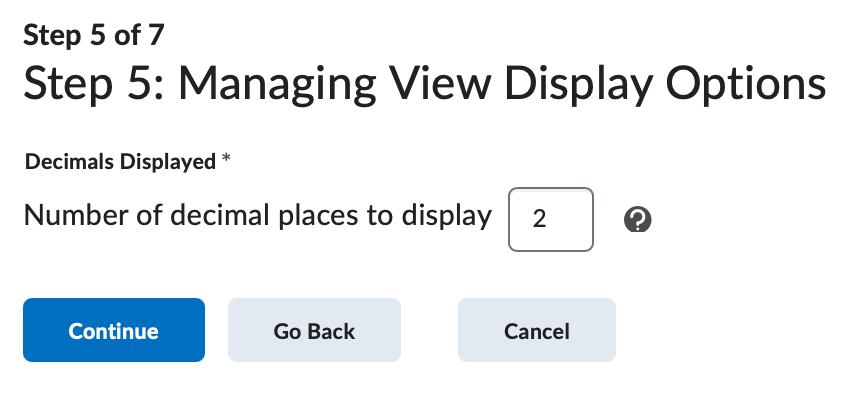
Make your selection and then click Continue.
-
Step 6
Step 6
The sixth step of the setup wizard controls the setup the Submission View for your Gradebook. These settings affect how your students see in the Grade View.
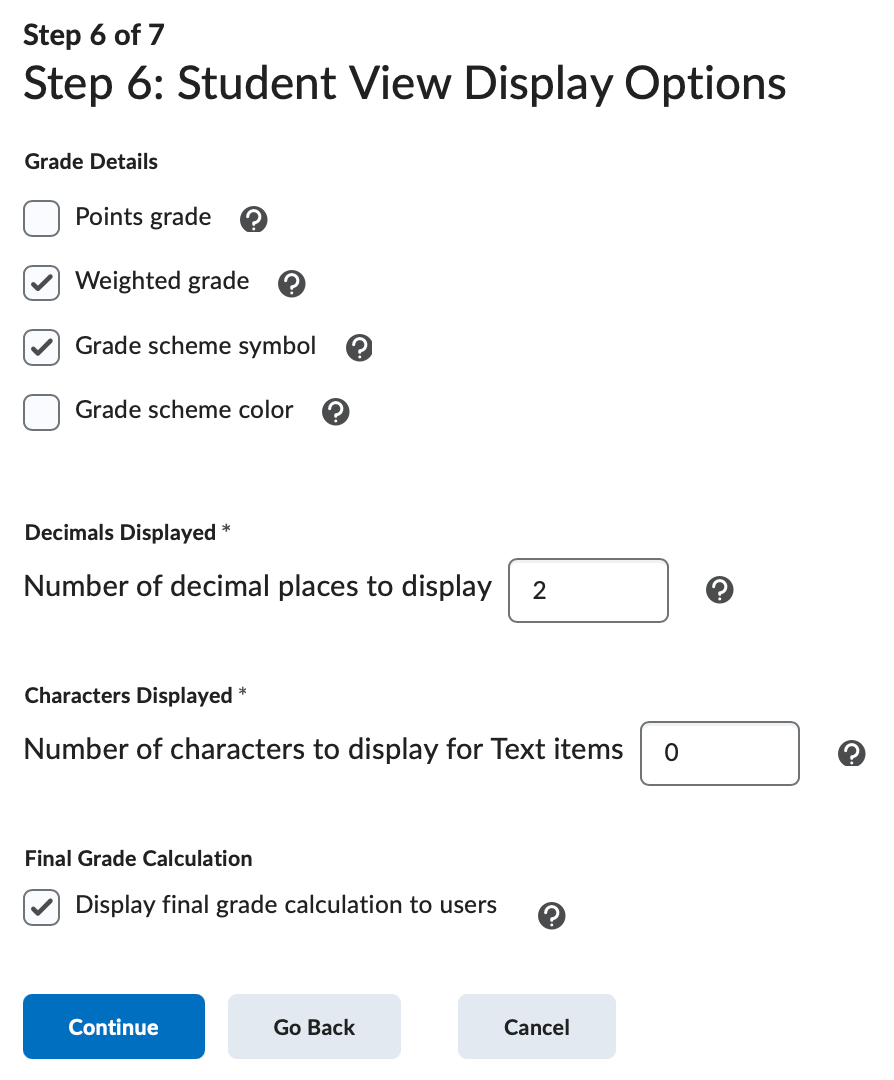
- Points Grade - This setting determines whether or not the Points grade value associated with a grade item is displayed in the student view of grades.
- Weighted Grade - This setting determines whether or not the Weighted grade value associated with a grade item is displayed in the student view of grades.
- Grade Scheme Symbol - This setting determines whether or not the Grade scheme symbol associated with a grade item is displayed in the student view of grades.
- Grade Scheme Color - This setting determines whether or not the grade scheme color associated with a
grade item is displayed in the student view of grades.
- Note: The grade scheme color can only be displayed if the grade scheme symbol is also displayed.
- Number of decimal places to display - This setting controls how many decimals will be displayed in the student view of Grades. The value must be an integer between 0 and 5.
- Number of characters to display for text items - This setting determines how many characters of a Text grade item display on the user list. The value must be an integer between 0 and 50. If the Text item is longer than the value specified, the text will be truncated.
- Display final grade calculation to users - This setting allows you to decide whether or not to display how the student's final grade was calculated.
Make your selection and then click Continue.
-
Step 7
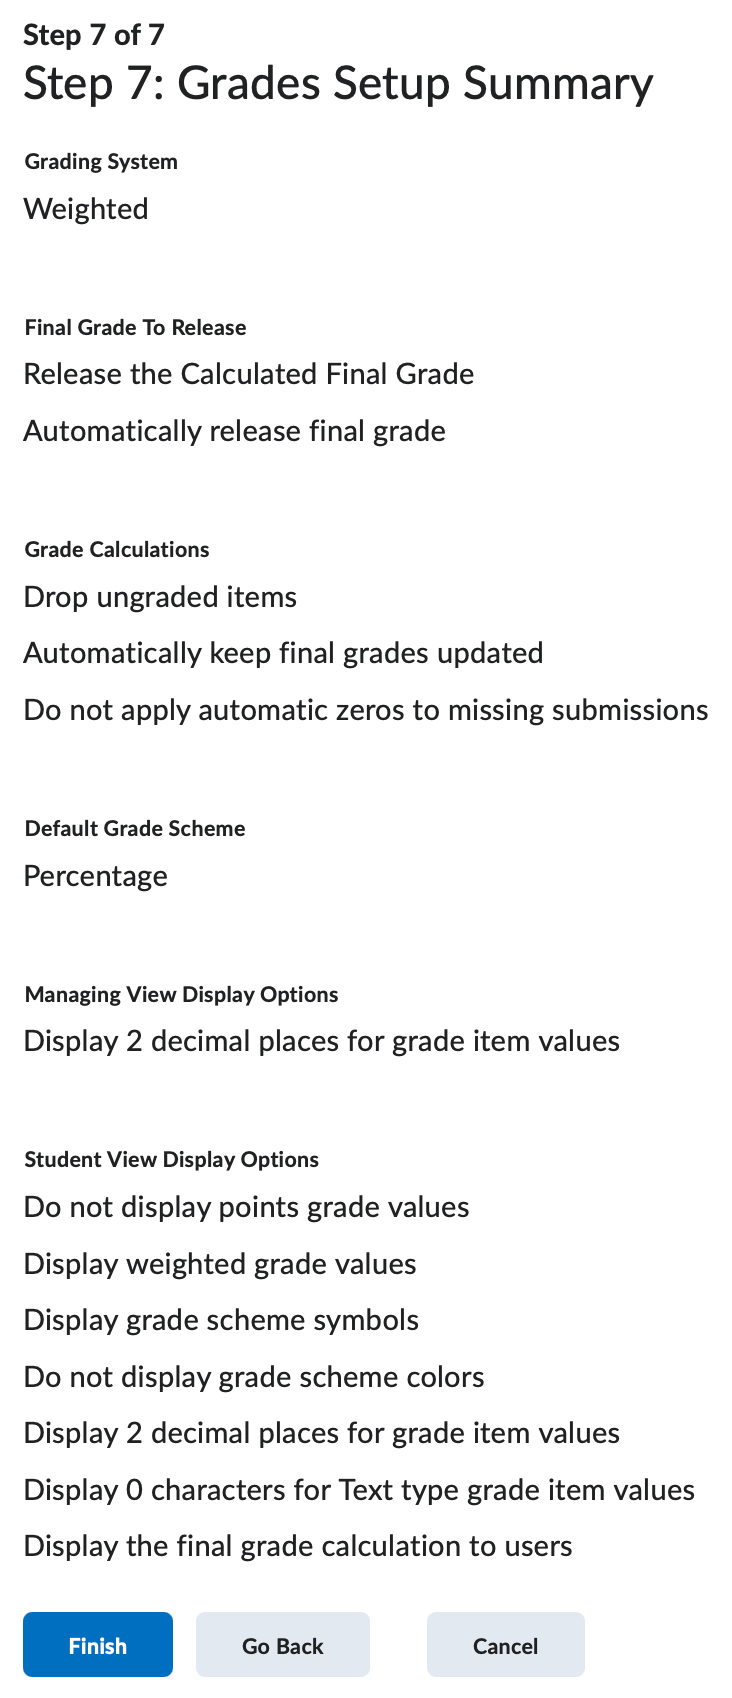
Step 7
The final step will give you a summary of setting configured throughout Grades Setup Wizard. You can select back to return to previous steps to change a setting or select Finish. You can return to the Grade Setup Wizard at any time to make changes.
Settings
Gradebook Settings
Visit Gradebook Settings to configure any aspect of your gradebook's function and/or appearance. To open gradebook settings, click the Settings hyperlink to the far right of any gradebook page.

-
Personal Display Options
Personal Display Options
Personal Display Options control how your gradebook displays to you in the Instructor Role. These settings specifically affect the Enter Grades area.
Note: Gradebook settings are course specific.
Managing View Display Options
User Details
Determine the student information visible in your instructor gradebook.
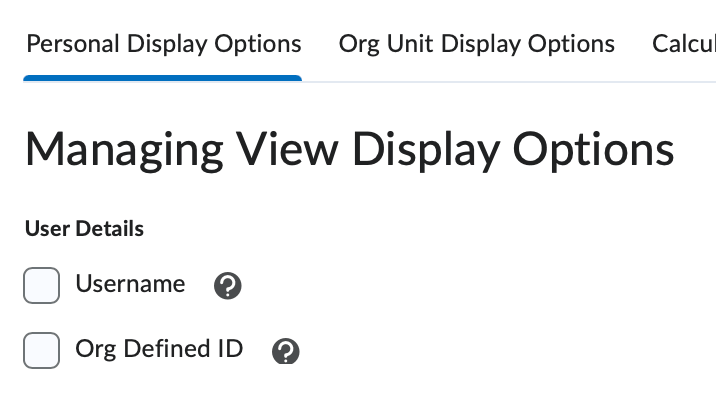
- Username - Click this checkbox to display a student's ETSU username within the gradebook spreadsheet.
- Org Defined ID - Click this checkbox to display a student's ETSU E# within the gradebook spreadsheet.
Grade Details
Determine the grade information visible in your instructor gradebook.
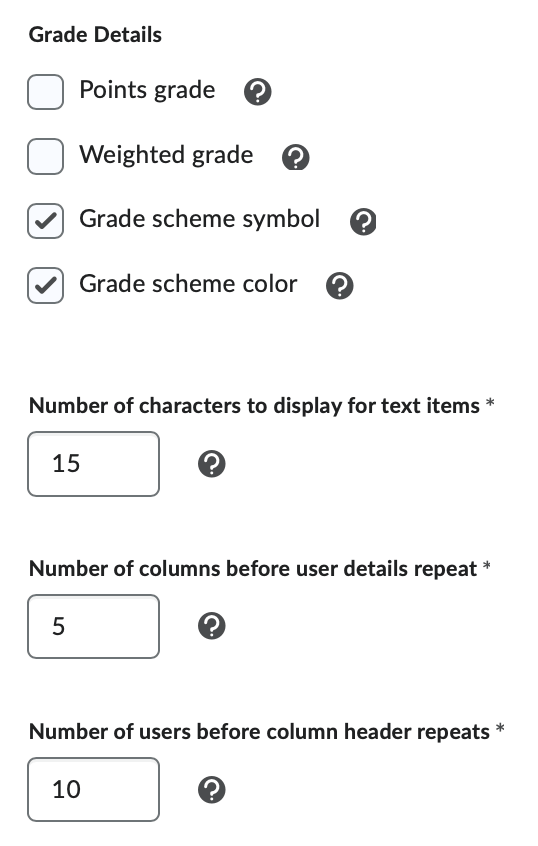
- Points grade - Mark the checkbox to display the points value of a grade item/category.
- Weighted grade - Mark the checkbox to display the weighted value of a grade item/category.
- Grade scheme symbol - Mark the checkbox to display the grade scheme symbol.
- Grade scheme color - Mark the checkbox to display the colors set in the thresholds of the grade scheme.
- Number of characters to display for text items - This setting determines how many characters of a grade item or category display on the Enter Grades Screen views.
- Number of columns before user details repeat - This setting determines how often user details are repeated on Enter Grades Screen views.
- Number of users before column header repeats - This setting determines how often the column header is repeated on the Enter Grades screen.
Repeat Final Grades

- Repeat calculated final grade at the start of the user list - Mark this setting if you want the calculated final grade to appear at the beginning of the gradebook spreadsheet.
- Repeat adjusted final grade at the start of the user list - Mark this setting if you want the adjusted final grade to appear at the beginning of the gradebook spreadsheet.
Start Page
Configure the the default Start Page. The Start Page is the first page D2L will open when clicking the Grades tool from the Default Course Nav Bar.
-
Org Unit Display Options
Org Unit Display Options
Org Unit Display Options control how the student views the course gradebook and what information is displayed to them.
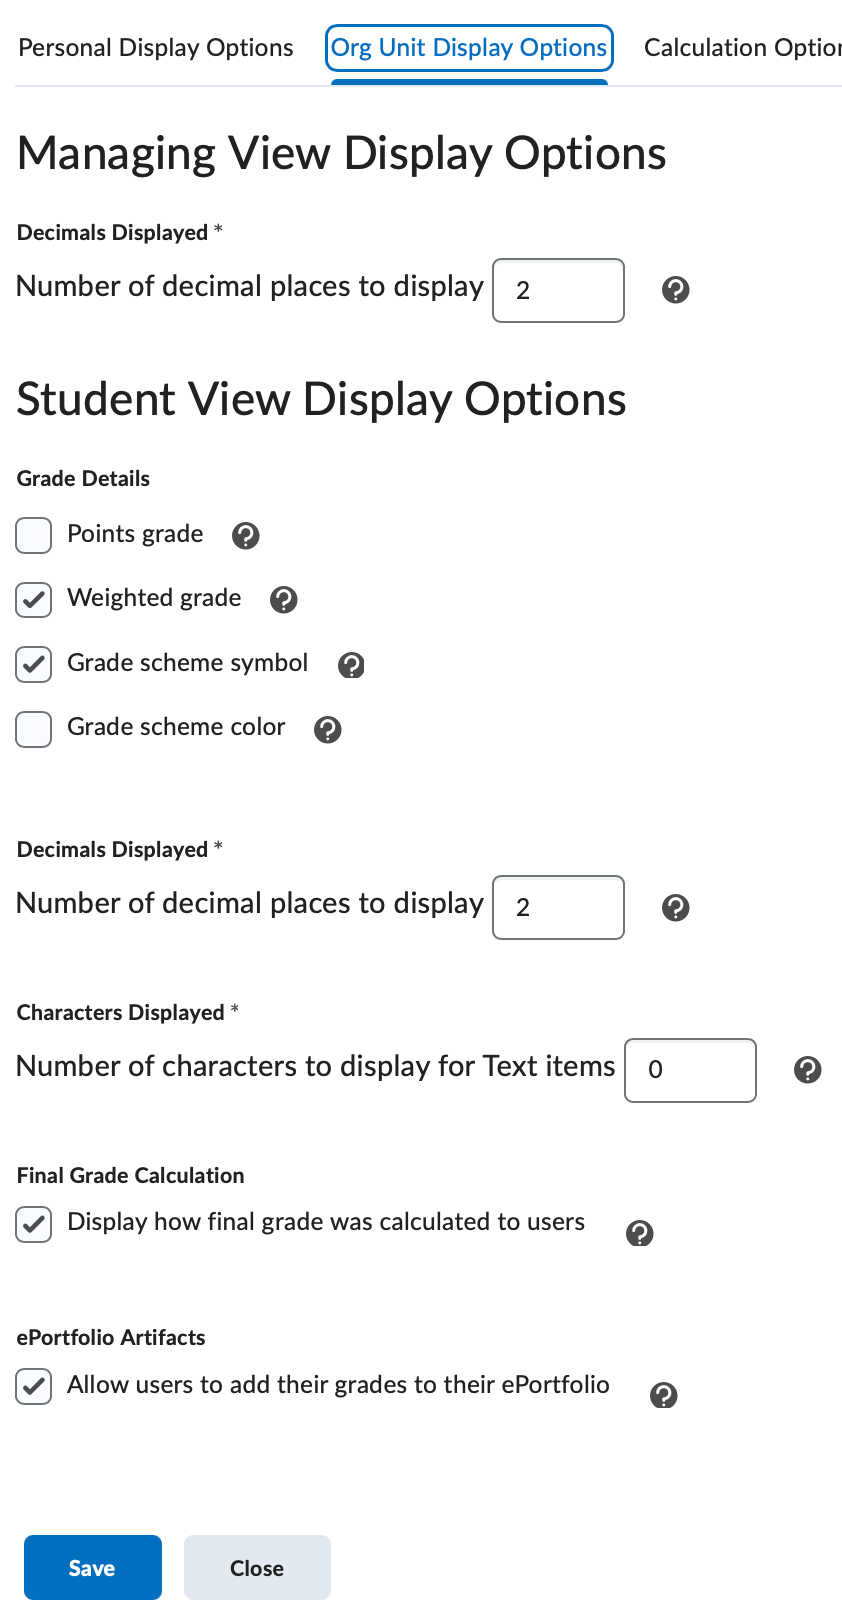
Managing View Display Options
- Number of decimal places to display - change the default number of decimal places displayed to fewer or more. The default is 2. This setting controls how many decimals will be displayed to users grading a course. The value must be an integer between 0 and 5.
Student View Display Options
- Grade Details: Determine the grade information visible in your instructor gradebook.
- Points grade - Mark the checkbox to display the points value of a grade item/category.
- Weighted grade - Mark the checkbox to display the weighted value of a grade item/category.
- Grade scheme symbol - Mark the checkbox to display the grade scheme symbol.
- Grade scheme color - Mark the checkbox to display the colors set in the thresholds of the grade scheme.
- Decimals Displayed: Number of decimal places to display - This setting controls how many decimals will be displayed in the student view of Grades. The value must be an integer between 0 and 5.
- Characters Displayed - Number of characters to display for text items - This setting determines how many characters of a Text grade item display on the user list. The value must be an integer between 0 and 50. If the Text item is longer than the value specified, the text will be truncated.
- Final Grade Calculation - Display final grade calculation to users - This setting determines how many characters of a Text grade item display on the user list. The value must be an integer between 0 and 50. If the Text item is longer than the value specified, the text will be truncated.
-
Calculation Options
Calculation Options
Change the way your gradebook calculates using the calculation options. These settings are also covered in the Setup Wizard directions.
Grading System
You can choose from a Weighted, Points, or Formula grading system.

- Weighted - Use the weighted system if you want grade items calculated as a percentage of the final grade worth 100%.
- Points - Calculate the final grade by totaling the points users received on grade items.
- Formula - Calculate final grade using a custom formula that lets you set conditions on grade items.
Final Grade Released
You can choose the final grade released to students.
- Calculated Final Grade - Displays the grade that is achieved by users based on the grading formula set up in the grade book. It cannot be adjusted without editing grade item scores.
- Adjusted Final Grade - Allows you to modify or adjust users' grades before releasing them.
Grade Calculations
The last section allows you to adjust the Grade Calculations.
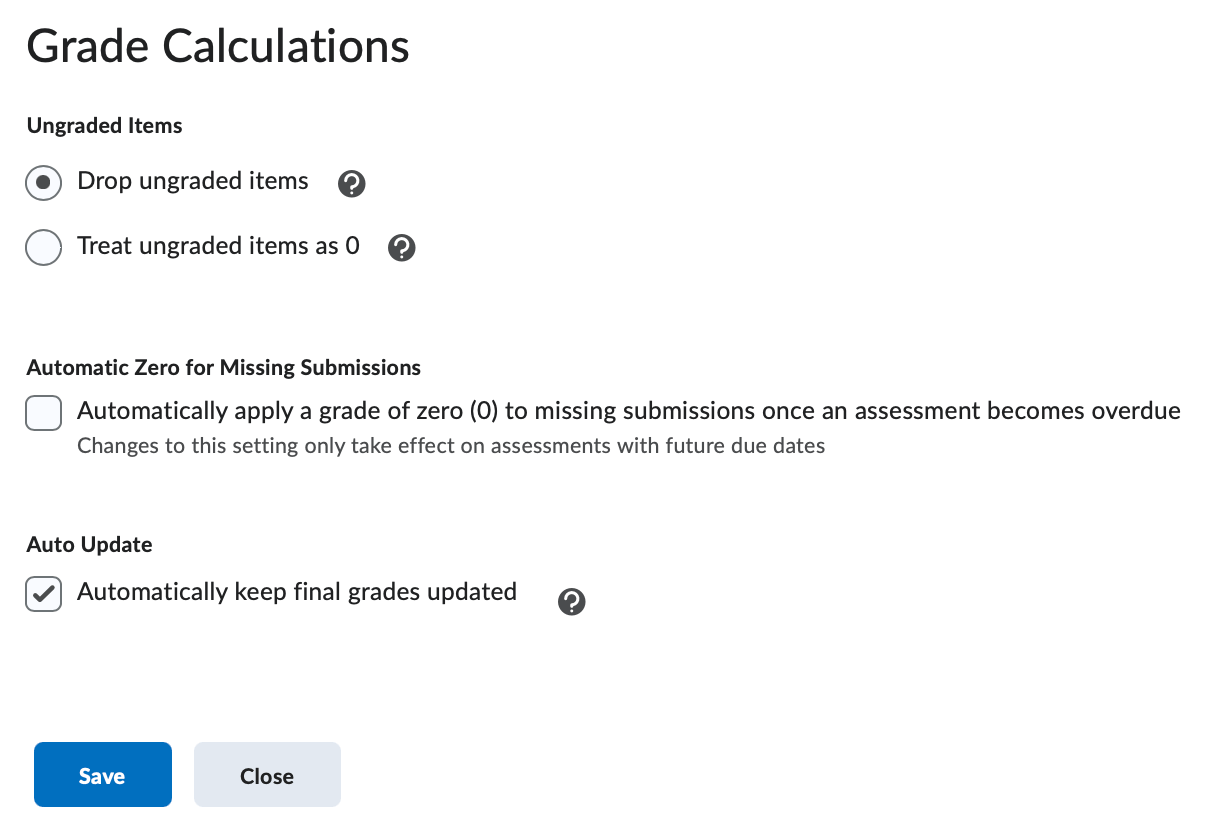
- Drop Ungraded Items - Items that do not have a grade inputted are not counted in the final grade.
- Treat Ungraded Items as 0 - Items that do not have a grade inputted are counted as 0 in the final grade.
- If you choose to Auto Update, the final grade will be updated any time you make changes to any grade items. If this option is not selected you must manually re-calculate final grades after updating any grade item.