Accessing Content
To access the Content tool, click on the Content hyperlink in the default course navigation bar.

The Content tool is the central location which houses all of your course files. Content structure is organized by modules. A module is a folder to which you can upload files, create HTML pages, and add external links. The Content tool includes completion tracking, which allows students to monitor their course progress.
-
The Overview
The Overview
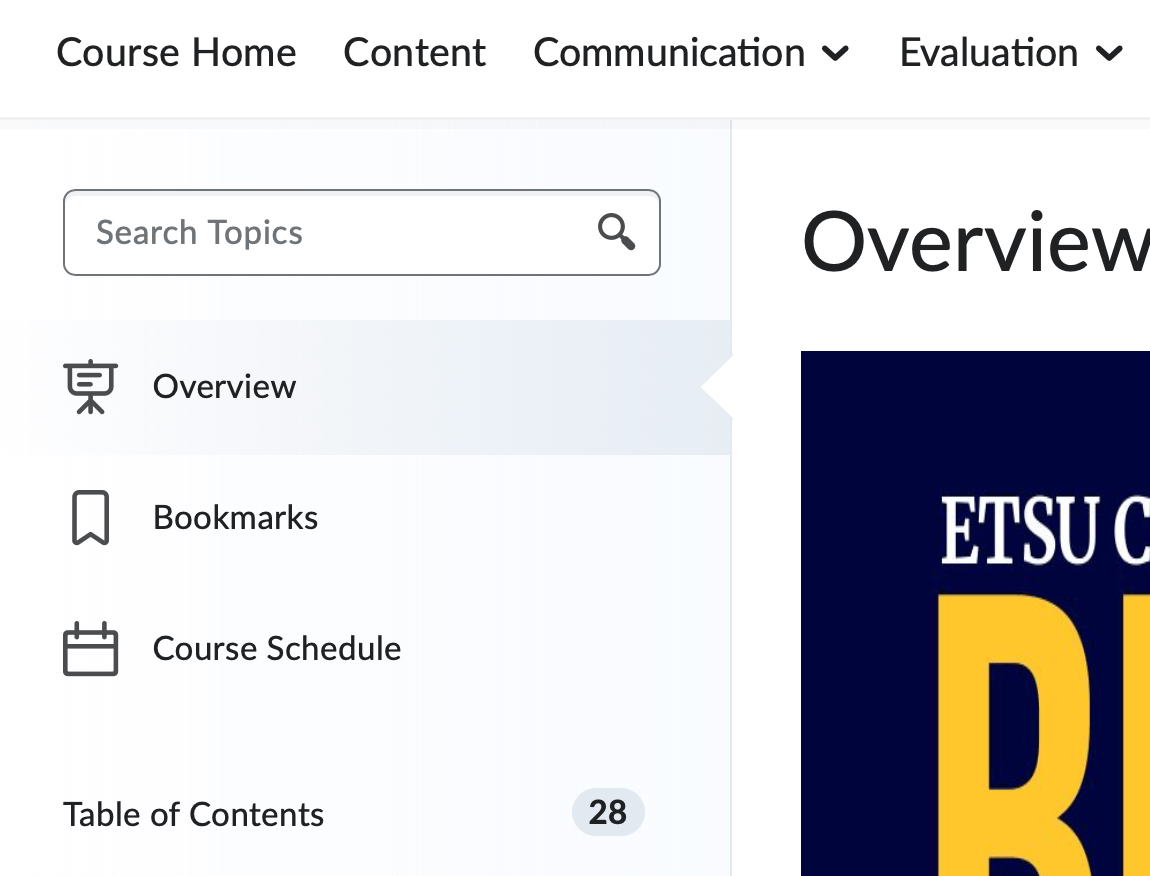
The Overview is a space that allows instructors to add a welcome message, course description, contact information, or a file to the area. The section will be the first thing students see when they click Content. Attaching the syllabus or other document is not suggested for this area. You can, however, add a small, web-friendly graphic.
Note: You do not have to populate this section. If you do not add anything to the Overview, the Overview block will be hidden on the student view.
Add a Course Welcome Message to Course Overview
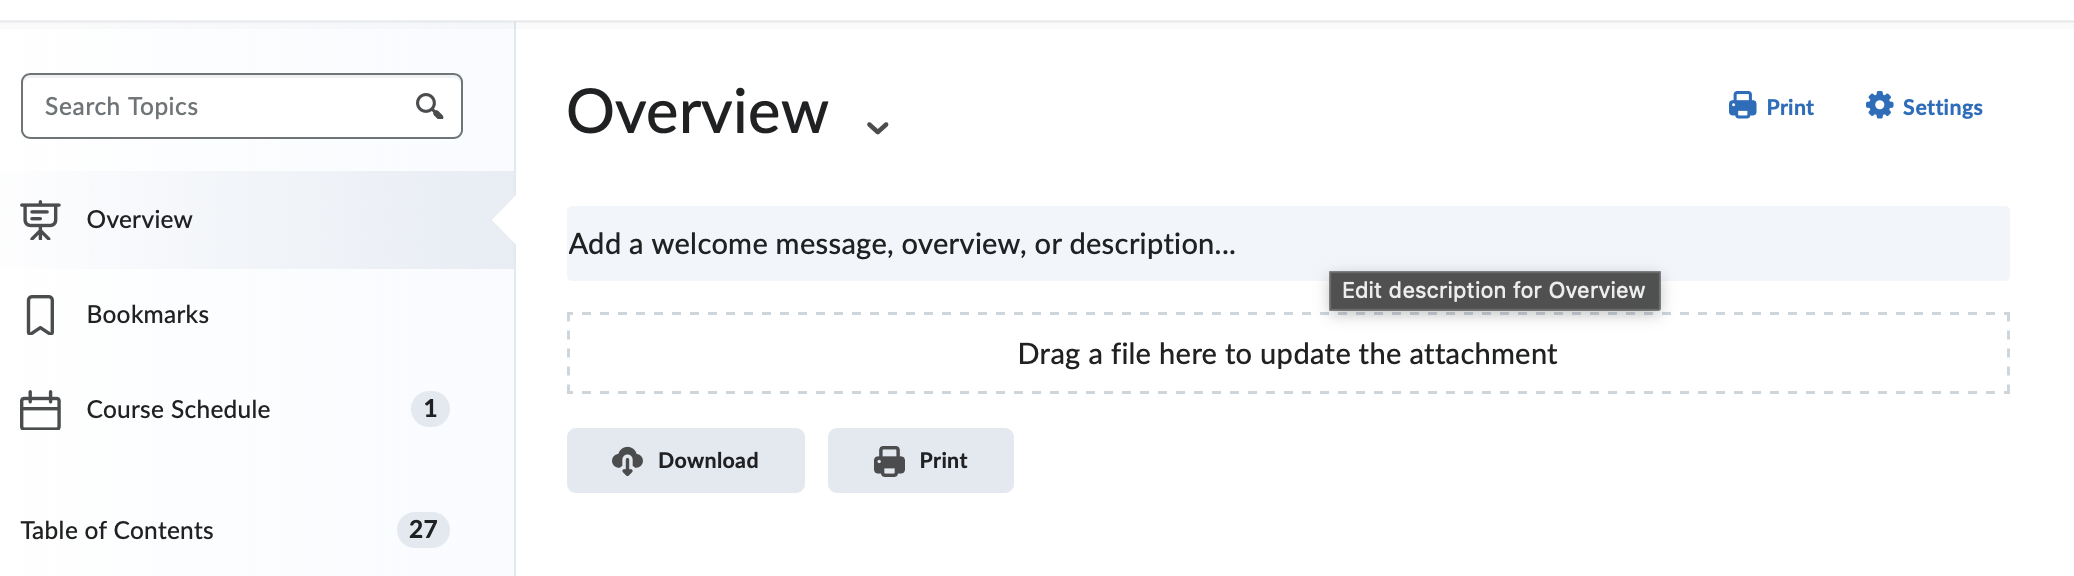
- Click Overview from the content map on the left-hand side of the page.
- Click Add a welcome message, overview, or description... A text editor will appear.
- After you have typed your content, click Update.
Upload a File to Course Overview
- Click Overview from the content map on the left-hand side of the page.
- There are two ways to upload your file:
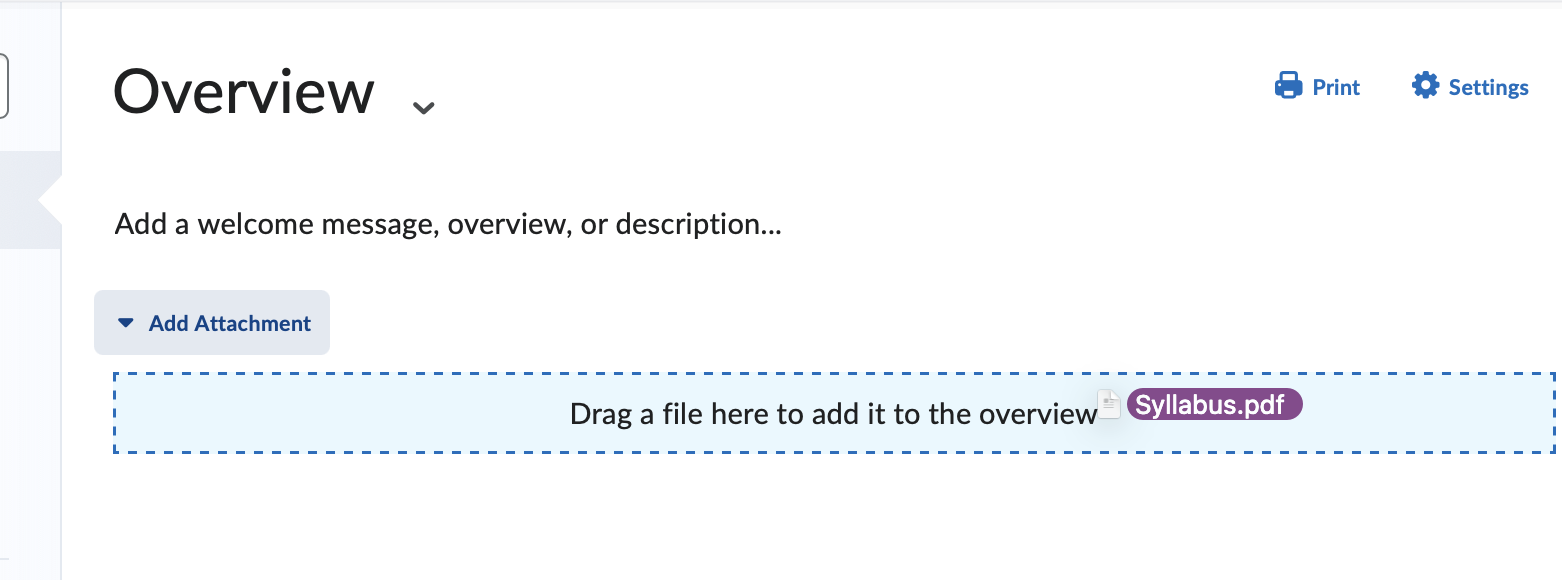
- Click the Add Attachment hyperlink. A field labeled Drag a file here to add it to the overview will display. Drag and drop the file from your computer (or the desired location) into this box.
The box will turn green, signifying that you can now insert the file into the Overview.
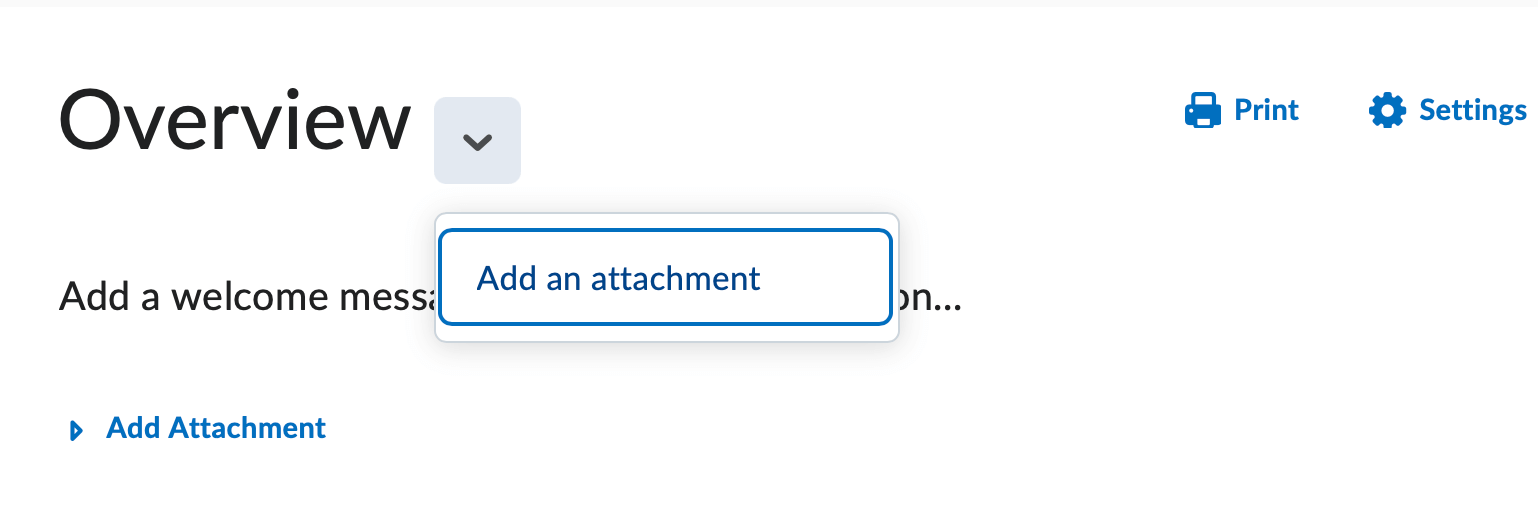
- Click the dropdown arrow to the right of the Overview title and select Add an Attachment.
Remove an Attachment from the Overview
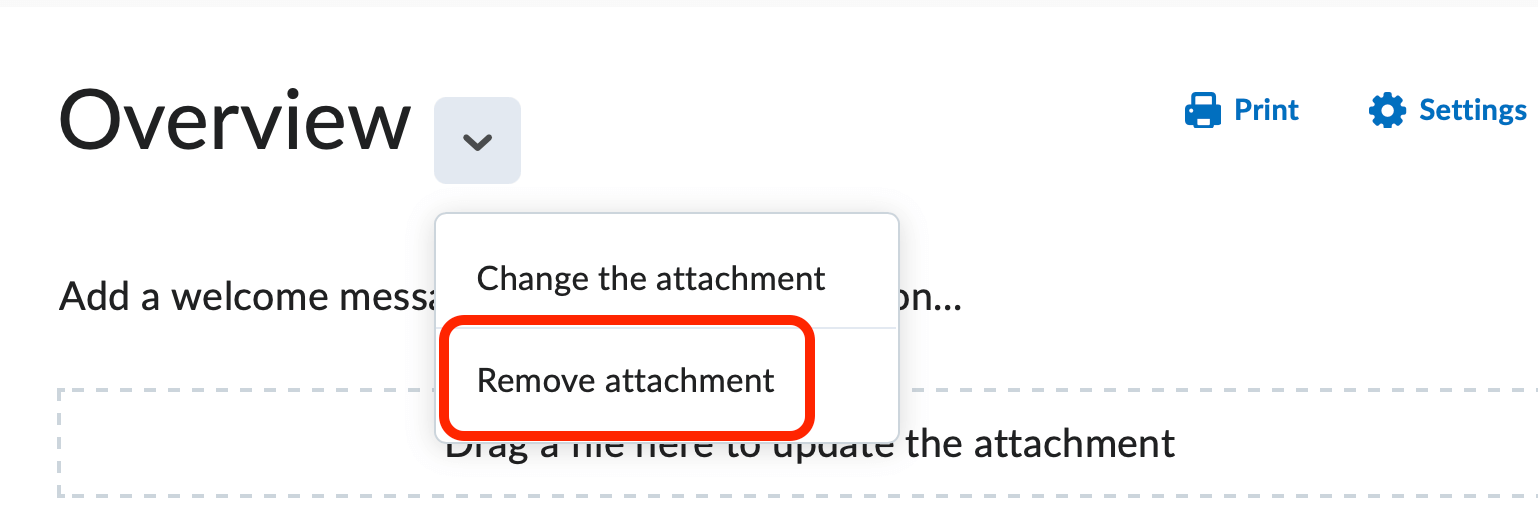
- Click Overview from the content map on the left-hand side of the page.
- Click the dropdown arrow to the right of the Overview title and select Remove Attachment.
-
Adding Content
Create a Module
Modules are like folders; they are used to organize your course's contents. You can organize your modules by week, topic, type, etc. All content items must live inside of modules.
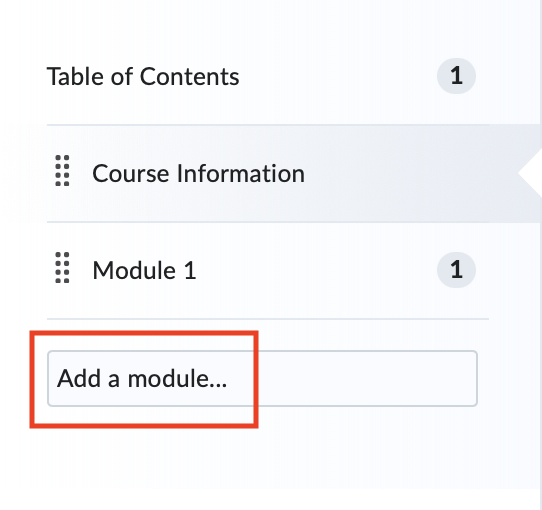
- Click Add a module... at the bottom of the content map. A text box will appear.
- Type the module's name in the text box.
- Press the <Enter> or <Return> key on your keyboard. Your new module will open to the right, ready for you to begin adding your content items.
Create a Submodule
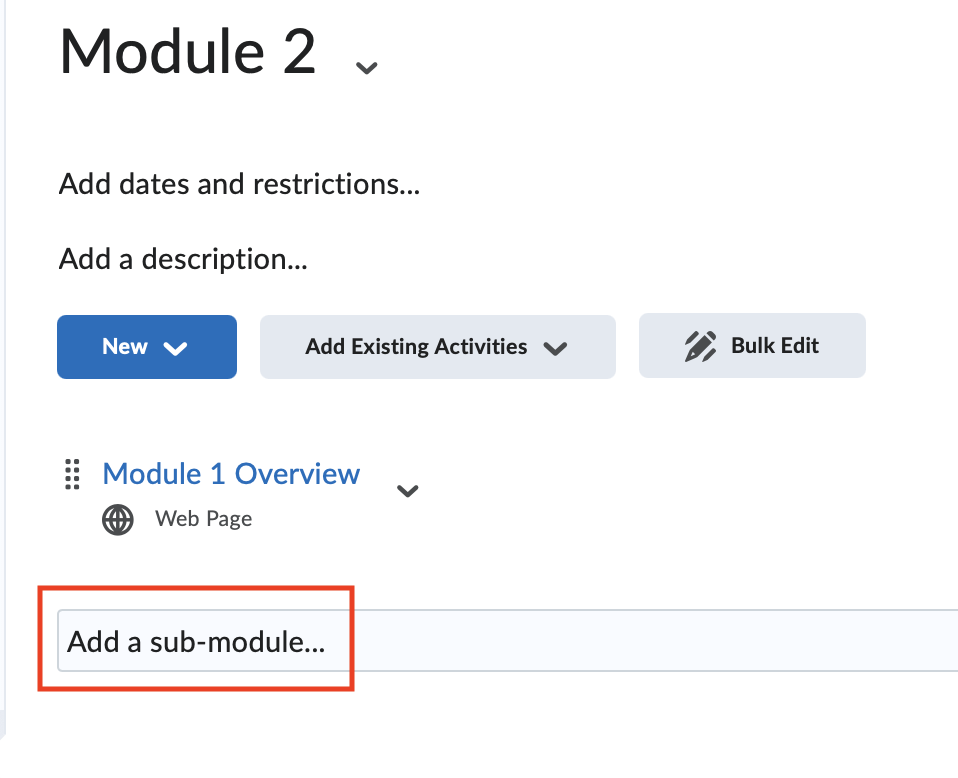
- Open the module in which you would like to create a submodule.
- Click Add a submodule.... A text box will appear.
- Type the submodule's name in the text box
- Press the <Enter> or <Return> key on your keyboard. Your new module will appear within its parent module.
Upload a File
- From the Table of Contents or from within a module, click the New button.
- Click Upload Files.
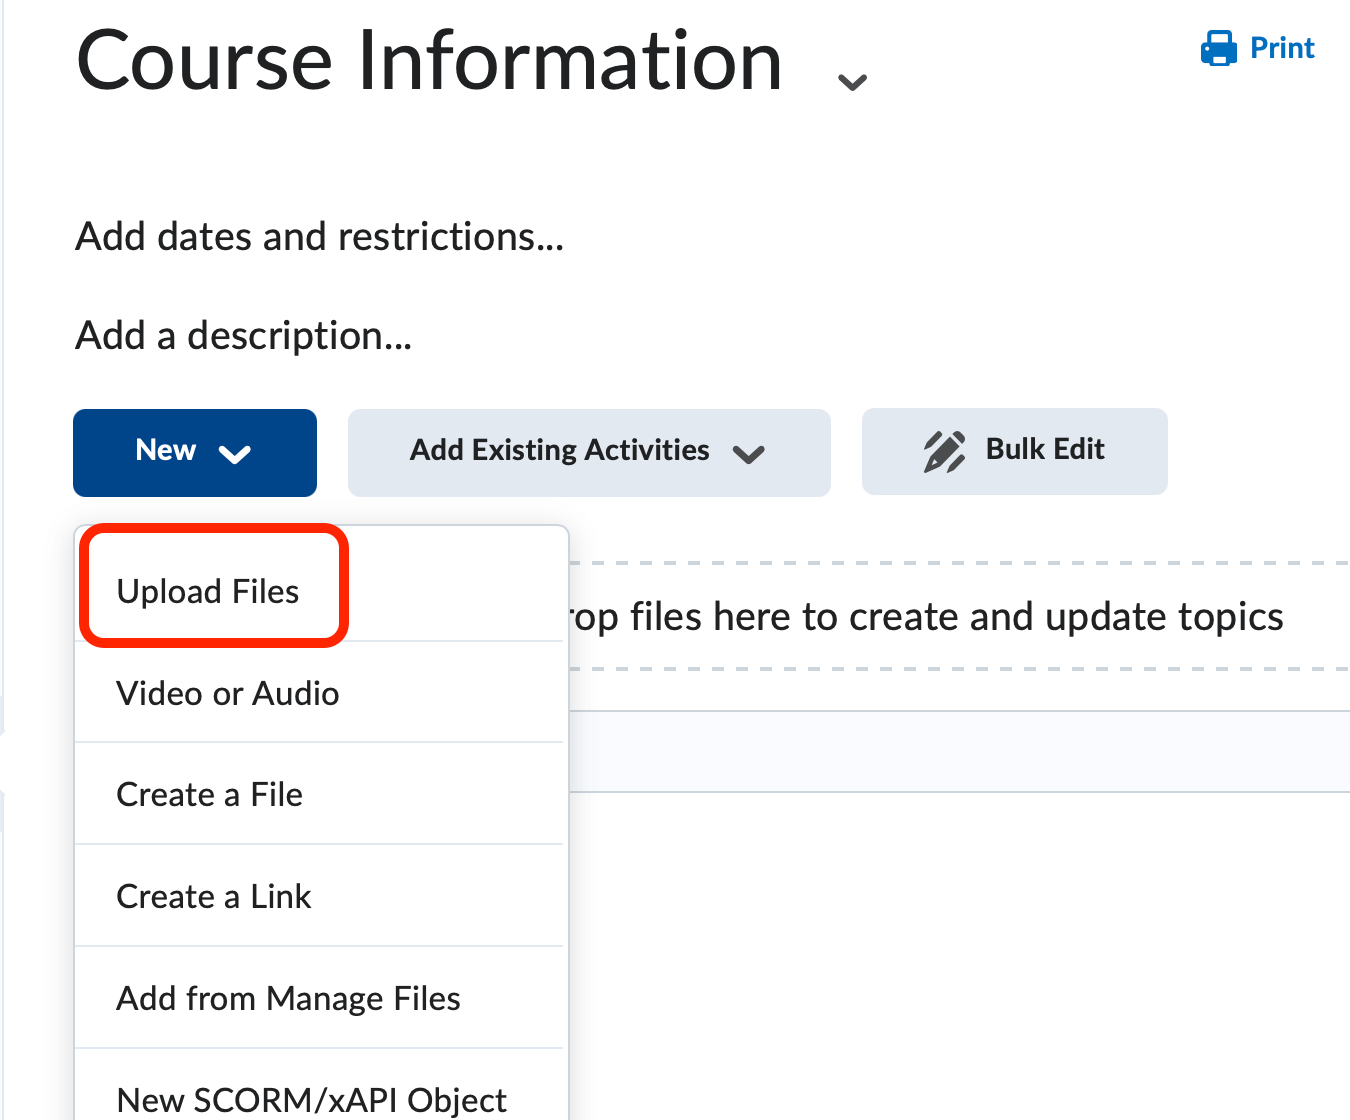
- Select the appropriate area to retrieve the file. You can choose from your computer
files, course offering files already uploaded to the course, or Google Drive.
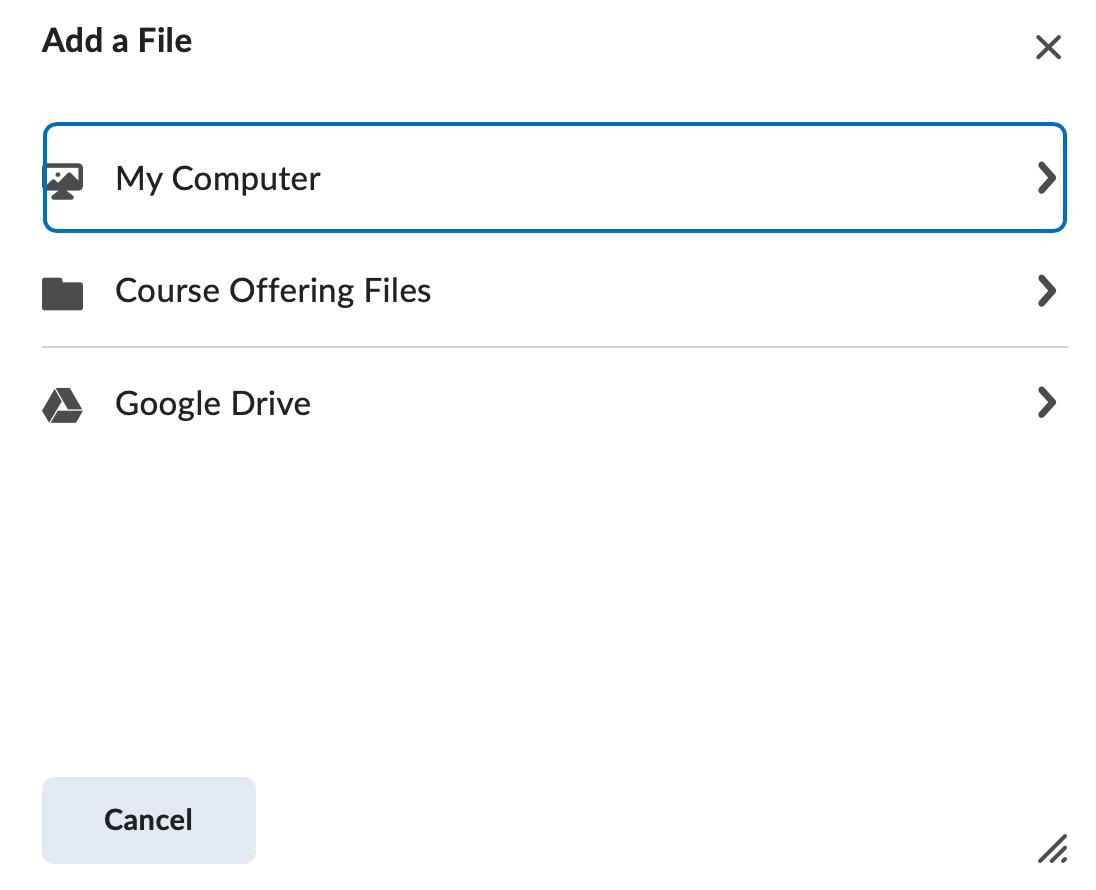
- Click Upload. Browse to find the file(s) on your computer. Double-click the file's name to select it.
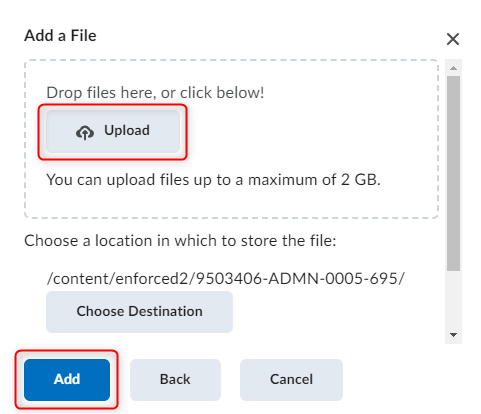
- Click Add. The file will now appear as a link within your module.
Note: You can select multiple files at one time.
Adding Multimedia Content
While you should never upload a large multimedia file (video, audio, animation, etc) directly into your D2L course, you can embed this content. Embedding multimedia content is a method that allows users to view content that resides elsewhere. For example, embedding a YouTube video within your D2L course will allow students to view the video without needing to visit the YouTube website.
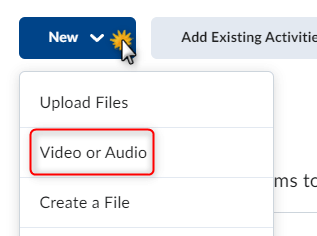
- From within a module, click the New button.
- Click Video or Audio.
- Paste in a video's URL or Embed code into the space provided.
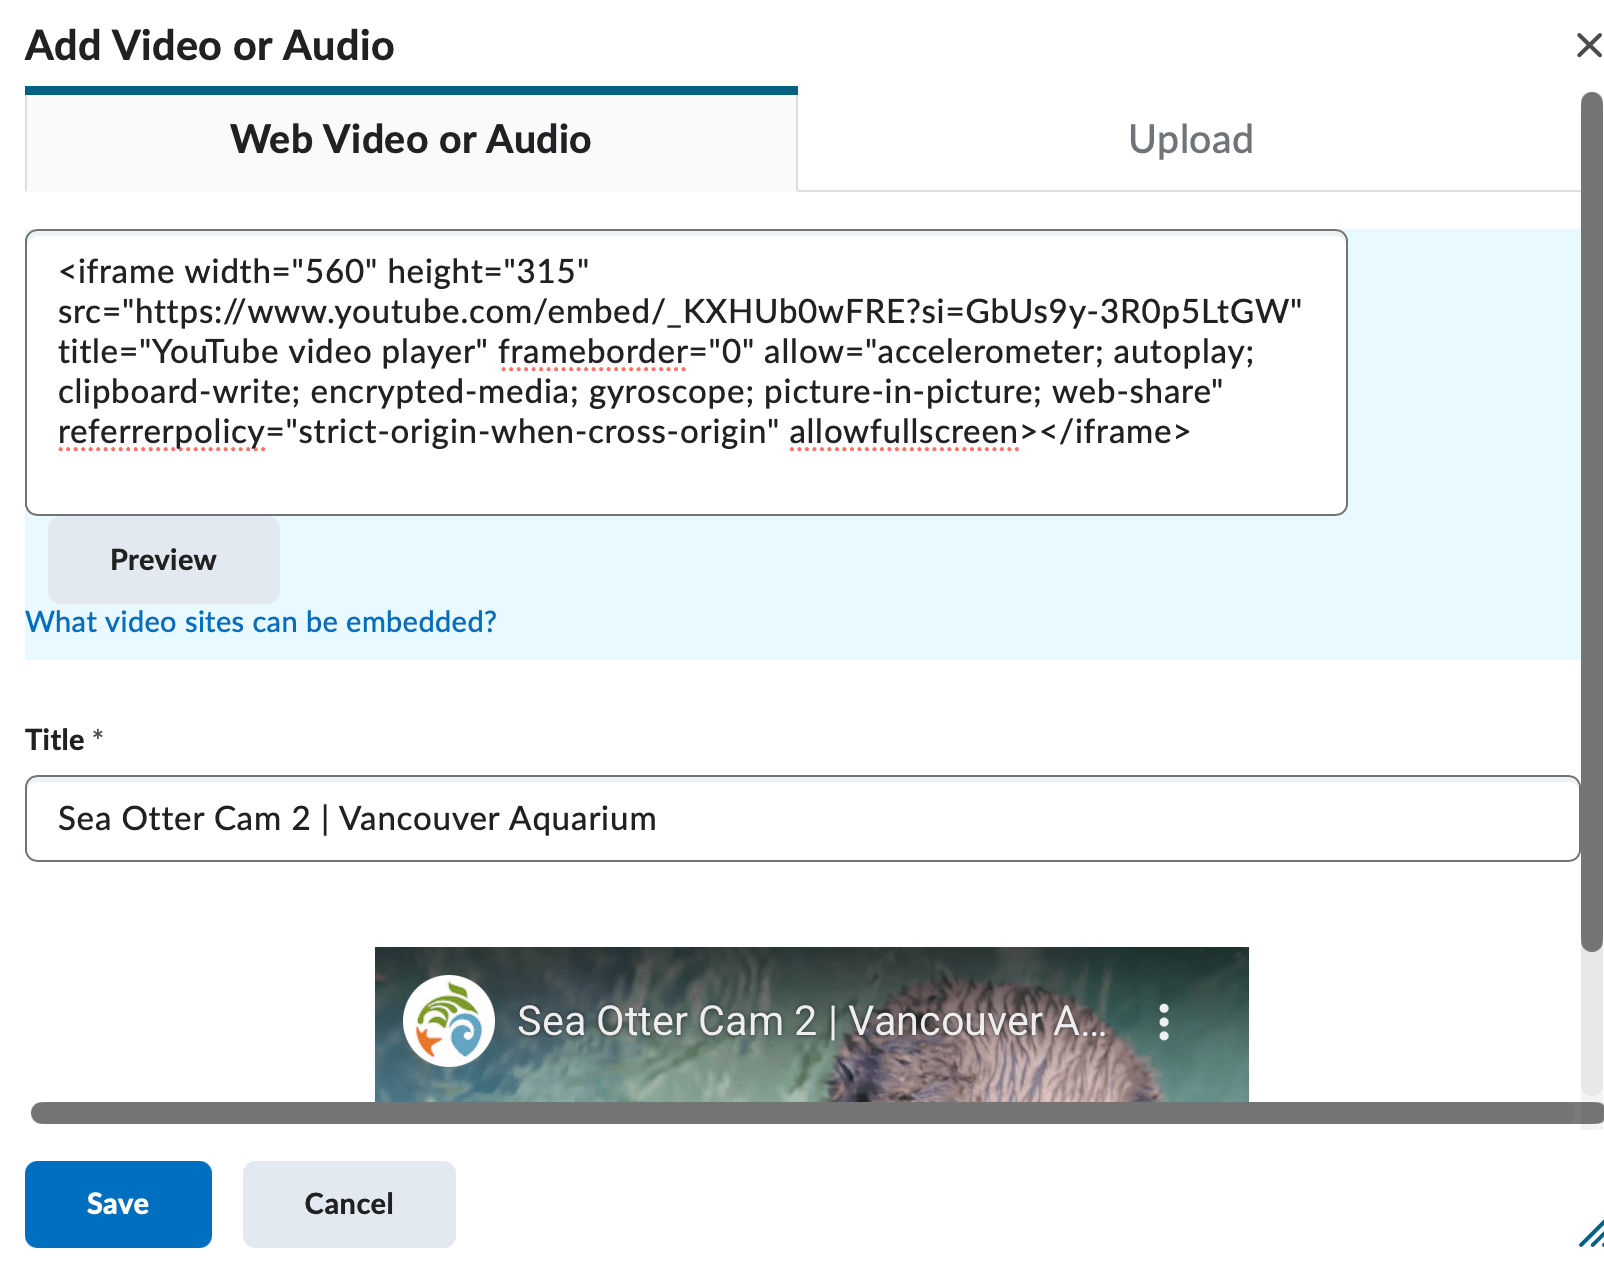
- Enter a Title for the video. Note that will show as the title in the module.
- Click Save to add the video to your module.
Create a New File (HTML)
You can use D2L's HTML editor to create new documents from within the learning environment. This HTML file can contain text, images, and video. You can customize this document using HTML code.
- From within a module, click the New button.
- Click Create a File.
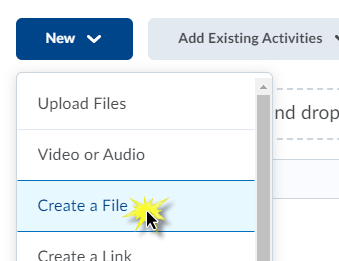
- The HTML editor will open to allow you to create a new file. Enter a Title in the Enter a Title text box.
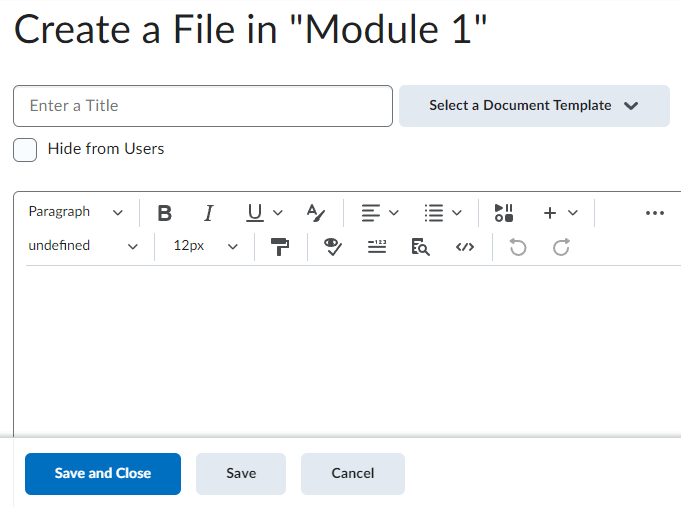
- Enter your Content to display in the larger text box.
- Click Save and Close when finished to publish.
Create a Link to an External Website
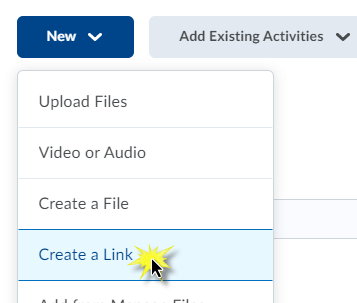
- From within a module, click the New button.
- Click Create a Link.
- Enter a link Title.
- Enter or paste the URL (web address).

- Mark the checkbox label Open as External Resource.
- Click Create to add the external link to the module.
Add a Link to another D2L Activity
You can add links to your discussion topics, dropbox folders, quizzes, and other D2L tools in Content. Linking these tools within Content allows your students easy access and navigation within the course.
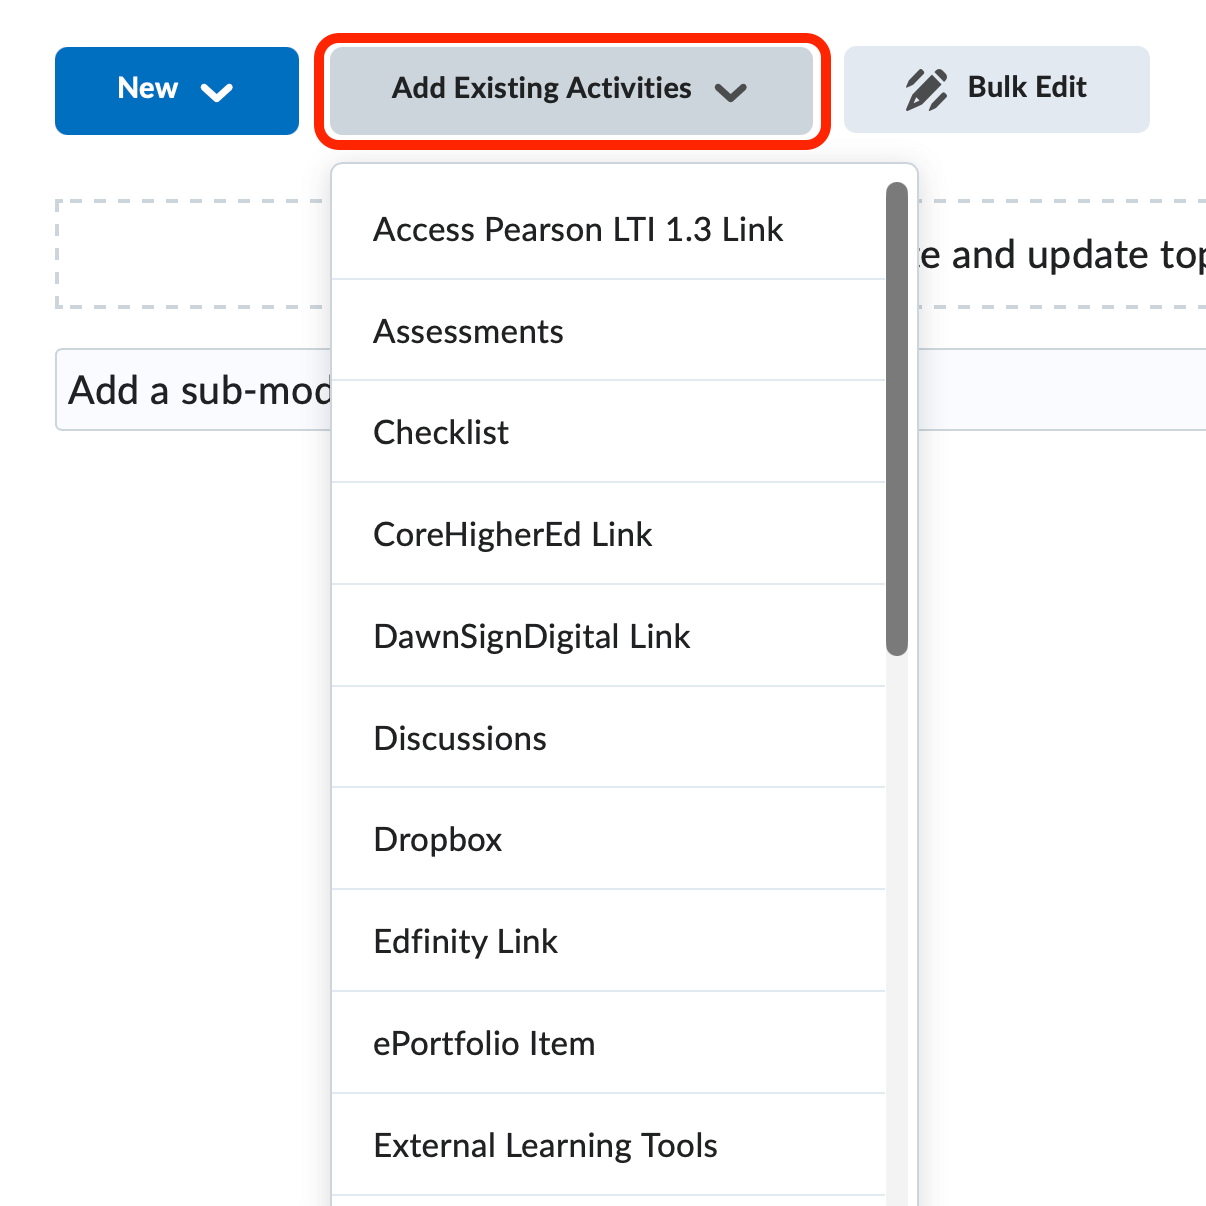
- From within a module, click the Add Existing Activities button.
- Select the type of activity from the drop-down menu. The Add Activity window will appear.
- Click on the item you would like to add.
- The link will now appear within your module.
-
Managing Content
Reorder Content
To reorder modules and topics, use the drag and drop feature in either the content map or the main content area. Refer to the image below for an illustration of this feature.
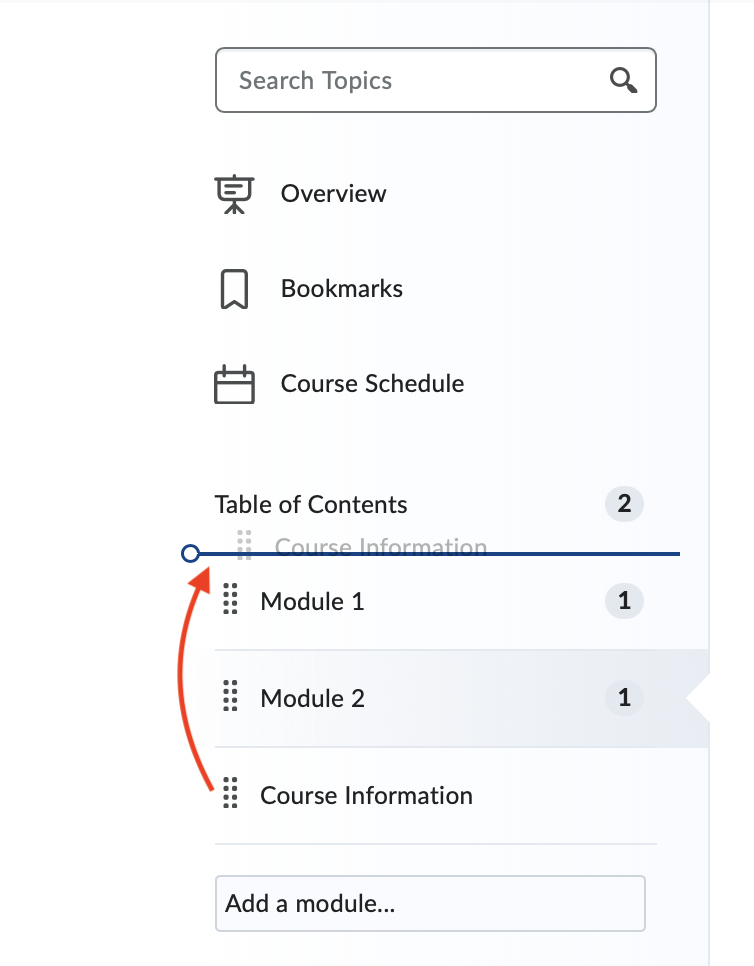
- Hover your cursor to the left of an item's name. The Crosshairs cursor is your signal that you can move this item to a new location.
- Hold down your left mouse button, and move your mouse up or down to drag the item to its new location. Note that a blue bar will appear, indicating the item's new location.
- Release your mouse button to drop the item into its new location.
Note: When dragging and dropping modules via the content map, a module turning blue indicates that you are placing the selected module inside of the blue module, creating a submodule.
Edit a Module Name
- Click on the module to open it.
- Click on the module's title at the top of the page. The title will become a text box.
- Enter the new name.
- Press the <Enter> key on your keyboard.
Edit an HTML File
- Click on the HTML file's name to open it.
- Click the Edit HTML button located below the current text.

- Make your changes in the text editor.
- Click the Save and Close button to save the changes.
Delete a Module
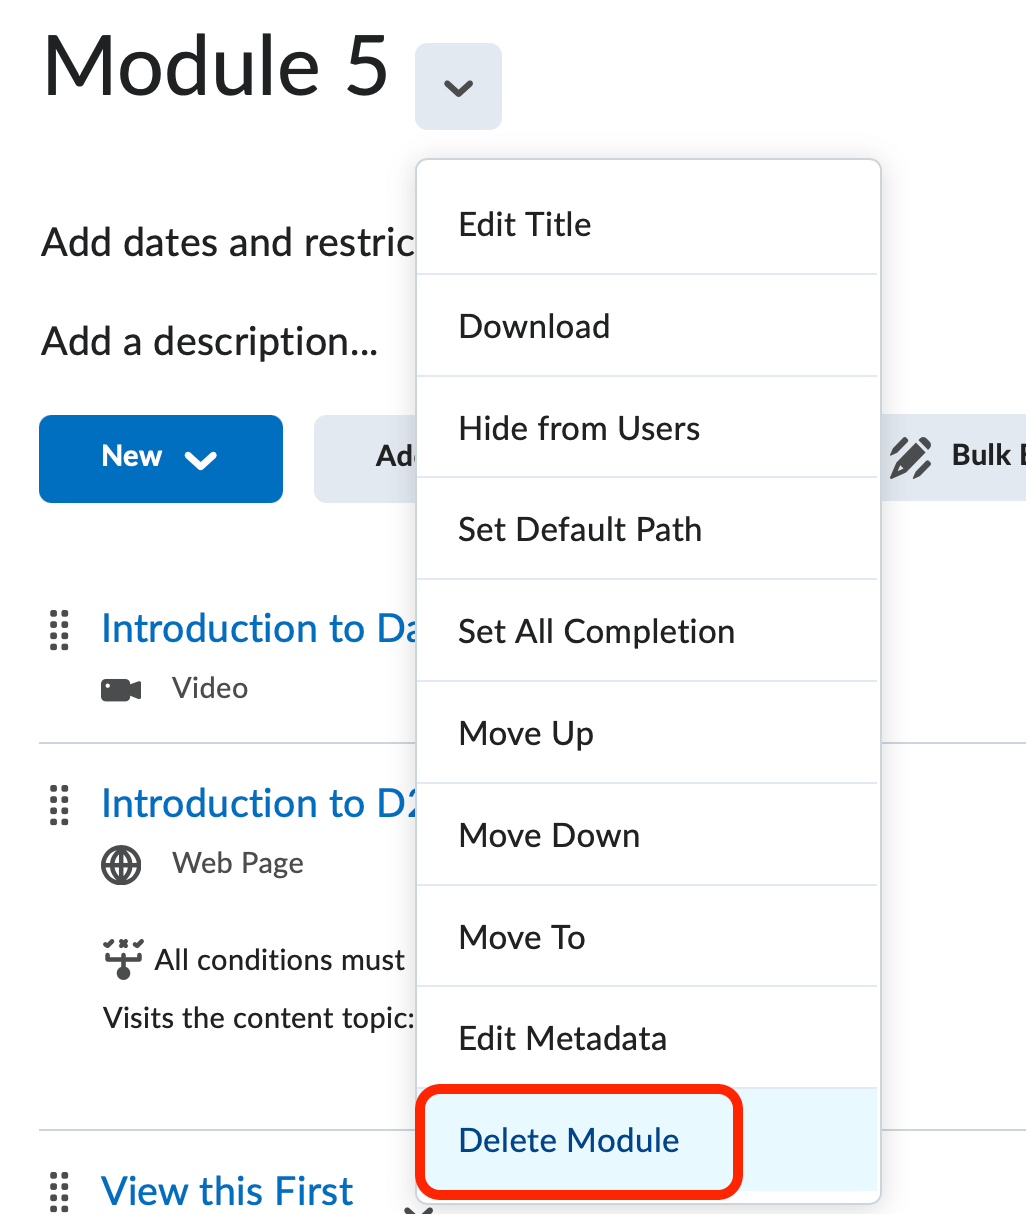
- Click on the module name to open it.
- Click the downward-facing arrow to expand the context menu.
- Click Delete Module.
Delete a Topic
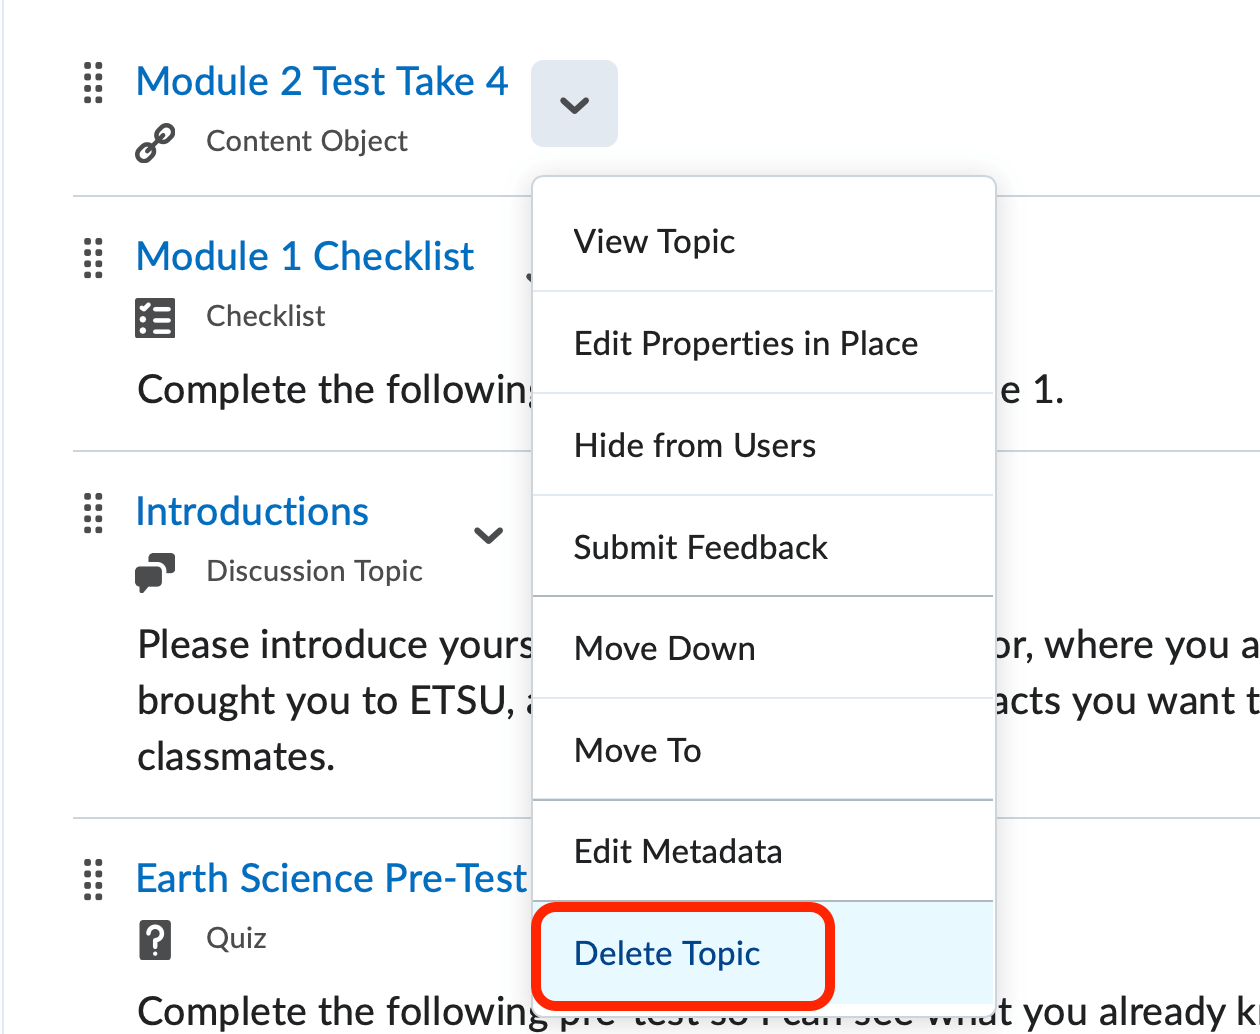
- Click the downward-facing arrow to expand the context menu of the topic (item) you want to delete.
- Click Delete Topic.
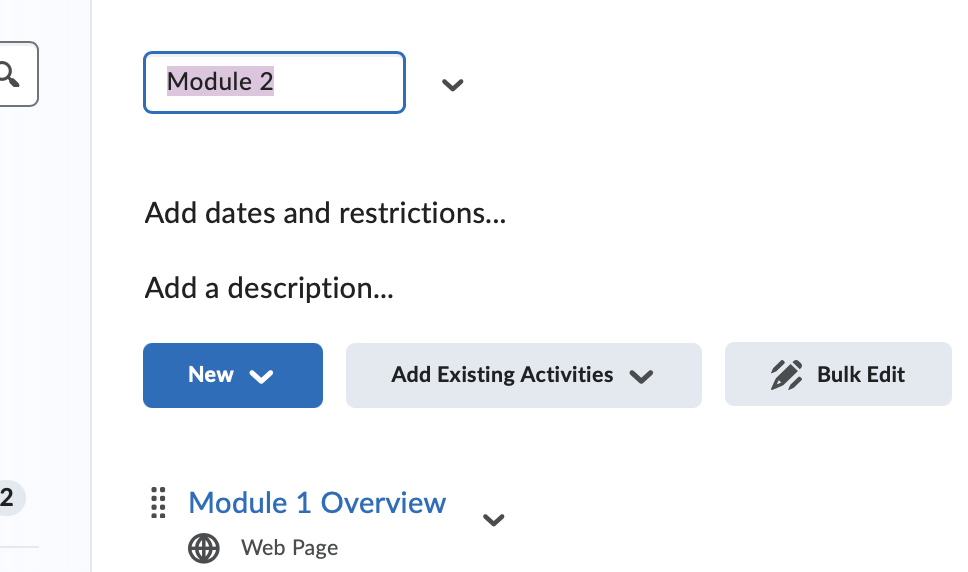
Add Descriptions to Modules or Topics
Descriptions can now be added to modules or individual topics. A description can provide additional information, context, and guidance to your students. These descriptions are visible to students from the Table of Contents as well as when they click on the module or topic.
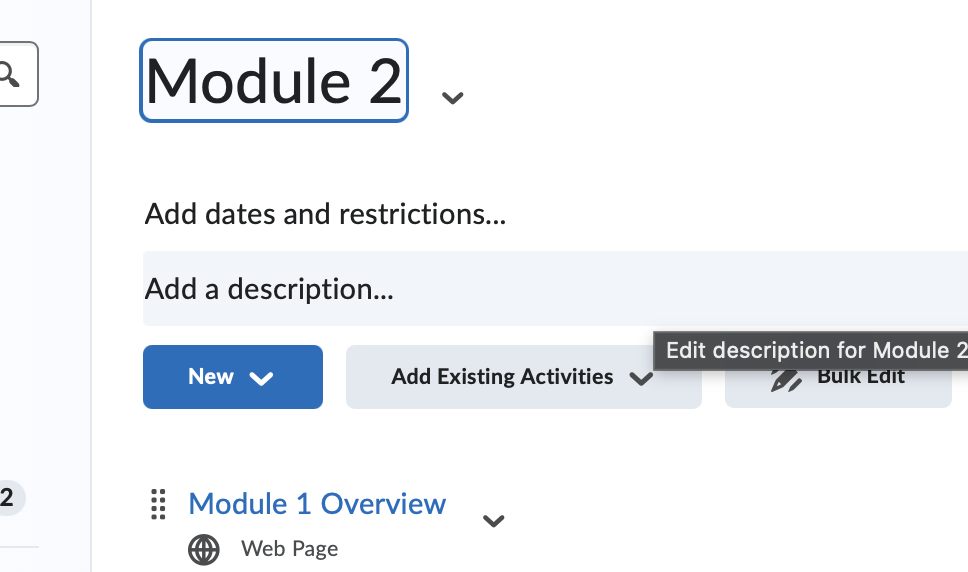
- Click to open the module.
- Click Add a description... A text box will open.
- Enter your description.
- Click Update.
-
Content Visibility and Accessibility
Content Visibility and Accessibility
There are two options for what students can see and access within the Content tool. D2L provides instructors with the ability to hide a module or topic from student view. Alternatively, instructor can set dates for students to access content topics.
Hide a Module
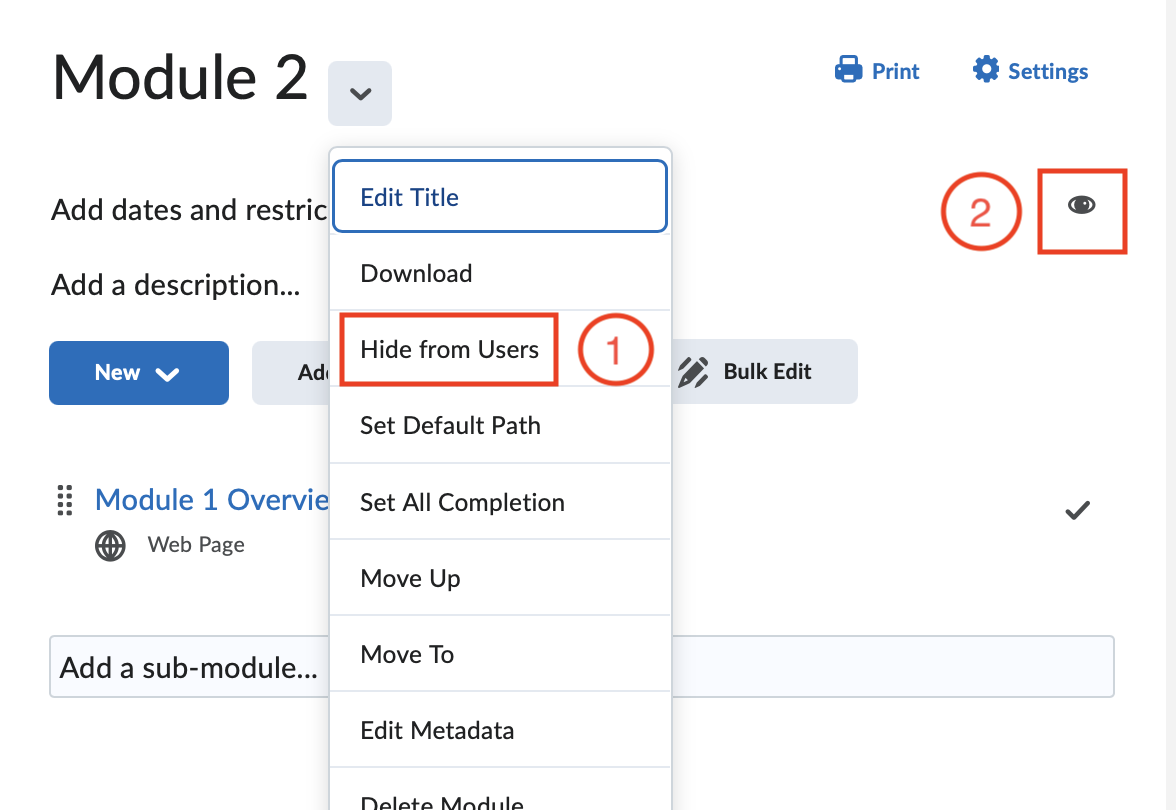
- Click on the dropdown menu next to the module title and choose Hide from Users. The same can be done for individual module items.
- You can also click on the eye icon to hide the module or individual items.
Availability and Due Dates
When setting availability dates, students will always be able to see the topic or module, but they will not be able to access it outside of the specified date range. To hide a topic or module, see the previous section.
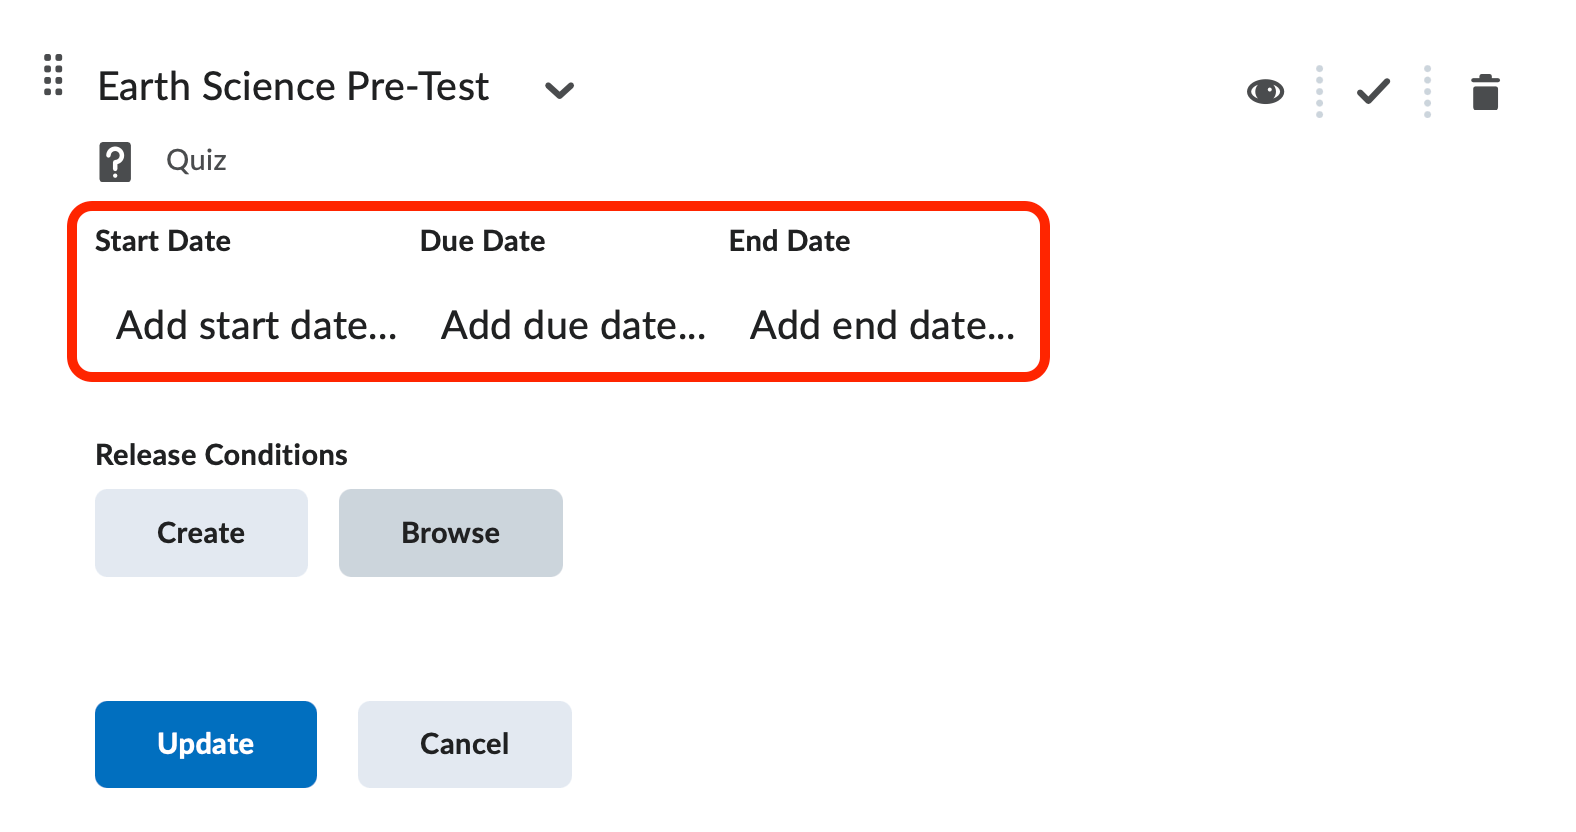
- Click on the module or topic you wish to restrict accessibility for by date.
- Click Add dates and restrictions...
- Set a start, end, or due date as desired, click on the text: Add a Start Date..., etc
- Start Date – the students will not be able to access the content until after the date and time specified.
- End Date – the students will not be able to access the content after the date and time specified.
- Due Date – If you set a due date, the content topic and the due date will appear in the course calendar, but it will not restrict access to the item.
- Click Update.
Release Conditions
Use a release condition to automate the visibility of a module or topic. Visit the Release Conditions page to learn more about creating and managing release conditions.